Disassembling, cleaning, and reassembling a Kel-Tec SU-16B rifle

In this document, I will show how to disassemble, clean, and reassemble this rifle. I will not show how to work on the trigger assembly, as there's not generally any reason to muck about with it. I assume that the reader has a basic knowledge of gun cleaning, a basic cleaning kit, and common sense. Additionally, it is assumed that the reader knows the basic manual of arms (i.e. how to remove the magazine, lock the bolt to the rear, and operate the basic mechanisms) for this rifle.

It's my understanding that the internals of all SU-16x rifles and the PLR-16 pistol are essentially identical. Thus, this site should be applicable to all the SU-16x and PLR-16 series firearms.

Unlike the AR-15, the SU-16B utilizes a gas-piston operating mechanism that keeps the dirty gasses generated during firing away from the bolt, bolt carrier, and other important parts. This results in making cleaning much easier than with AR-15s. The simple construction and ability to break down into only twelve parts (including the rifle itself) also aids in the ease of cleaning. The only tool needed to disassemble the rifle is a single cartridge, or a thin pointy object like a stick or punch.

Note: I no longer own a SU-16B, so I can't comment on how well this applies to currently-made rifles. I'm leaving this page up for archival purposes.

Equipment Needed:
* Cleaning solvent (I prefer Break-Free CLP, as it will clean, lubricate, and prevent rust all with a single product).
* Appropriately sized cleaning rod or boresnake. I very much like the boresnake.
* Appropriately sized (.22 caliber) cleaning patches.
* A stiff-bristled brush like a gun-cleaning "toothbrush", preferably with bronze bristles.
* Bore brush. I prefer bronze-bristled, but nylon bristles will work as well. Avoid stainless steel bristles.

Optional Equipment:
* Q-tips (extremely handy for cleaning little parts).
* A small bowl (to contain the small parts of the rifle).
* Good lighting (the rifle and all of its parts are black. If one drops a part, it's very difficult to locate it in a dark room. It's for this reason I put white paper as a background, to provide contrast for the photographs and to better show the individual parts.)

Parts Legend
I have labeled all the small parts of the rifle in this picture to prevent confusion when I describe certain parts.


Disasembly

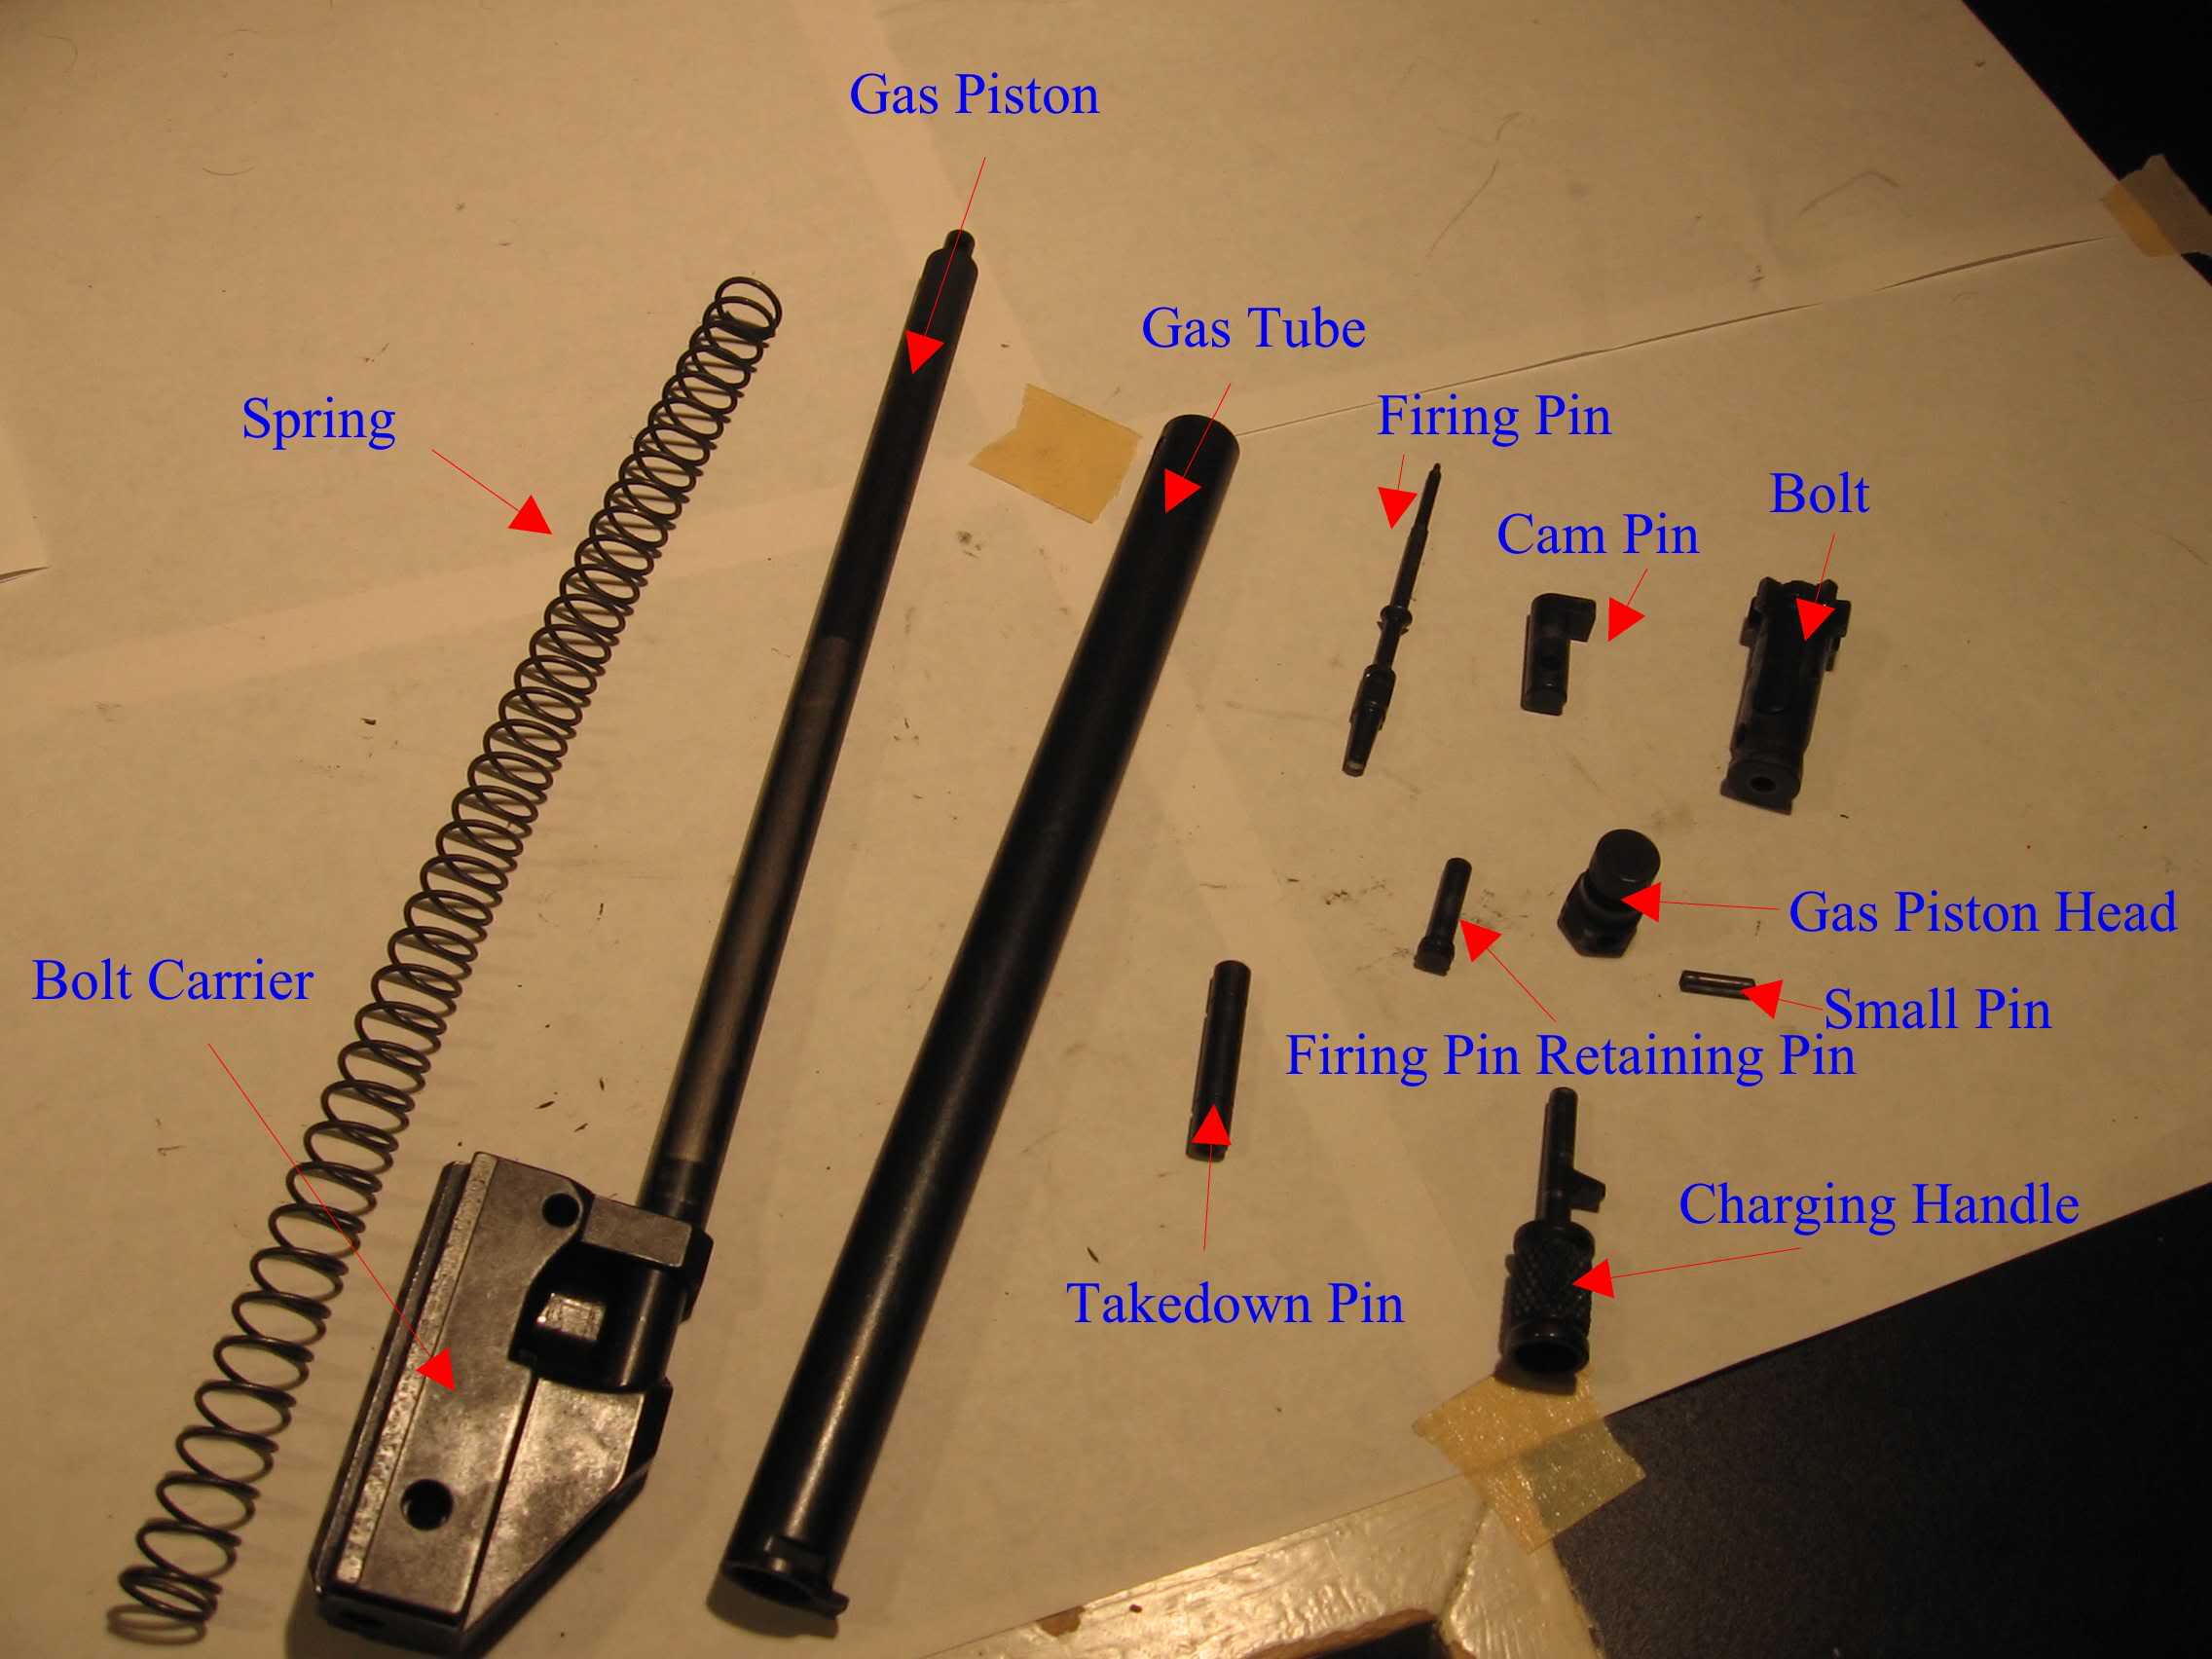
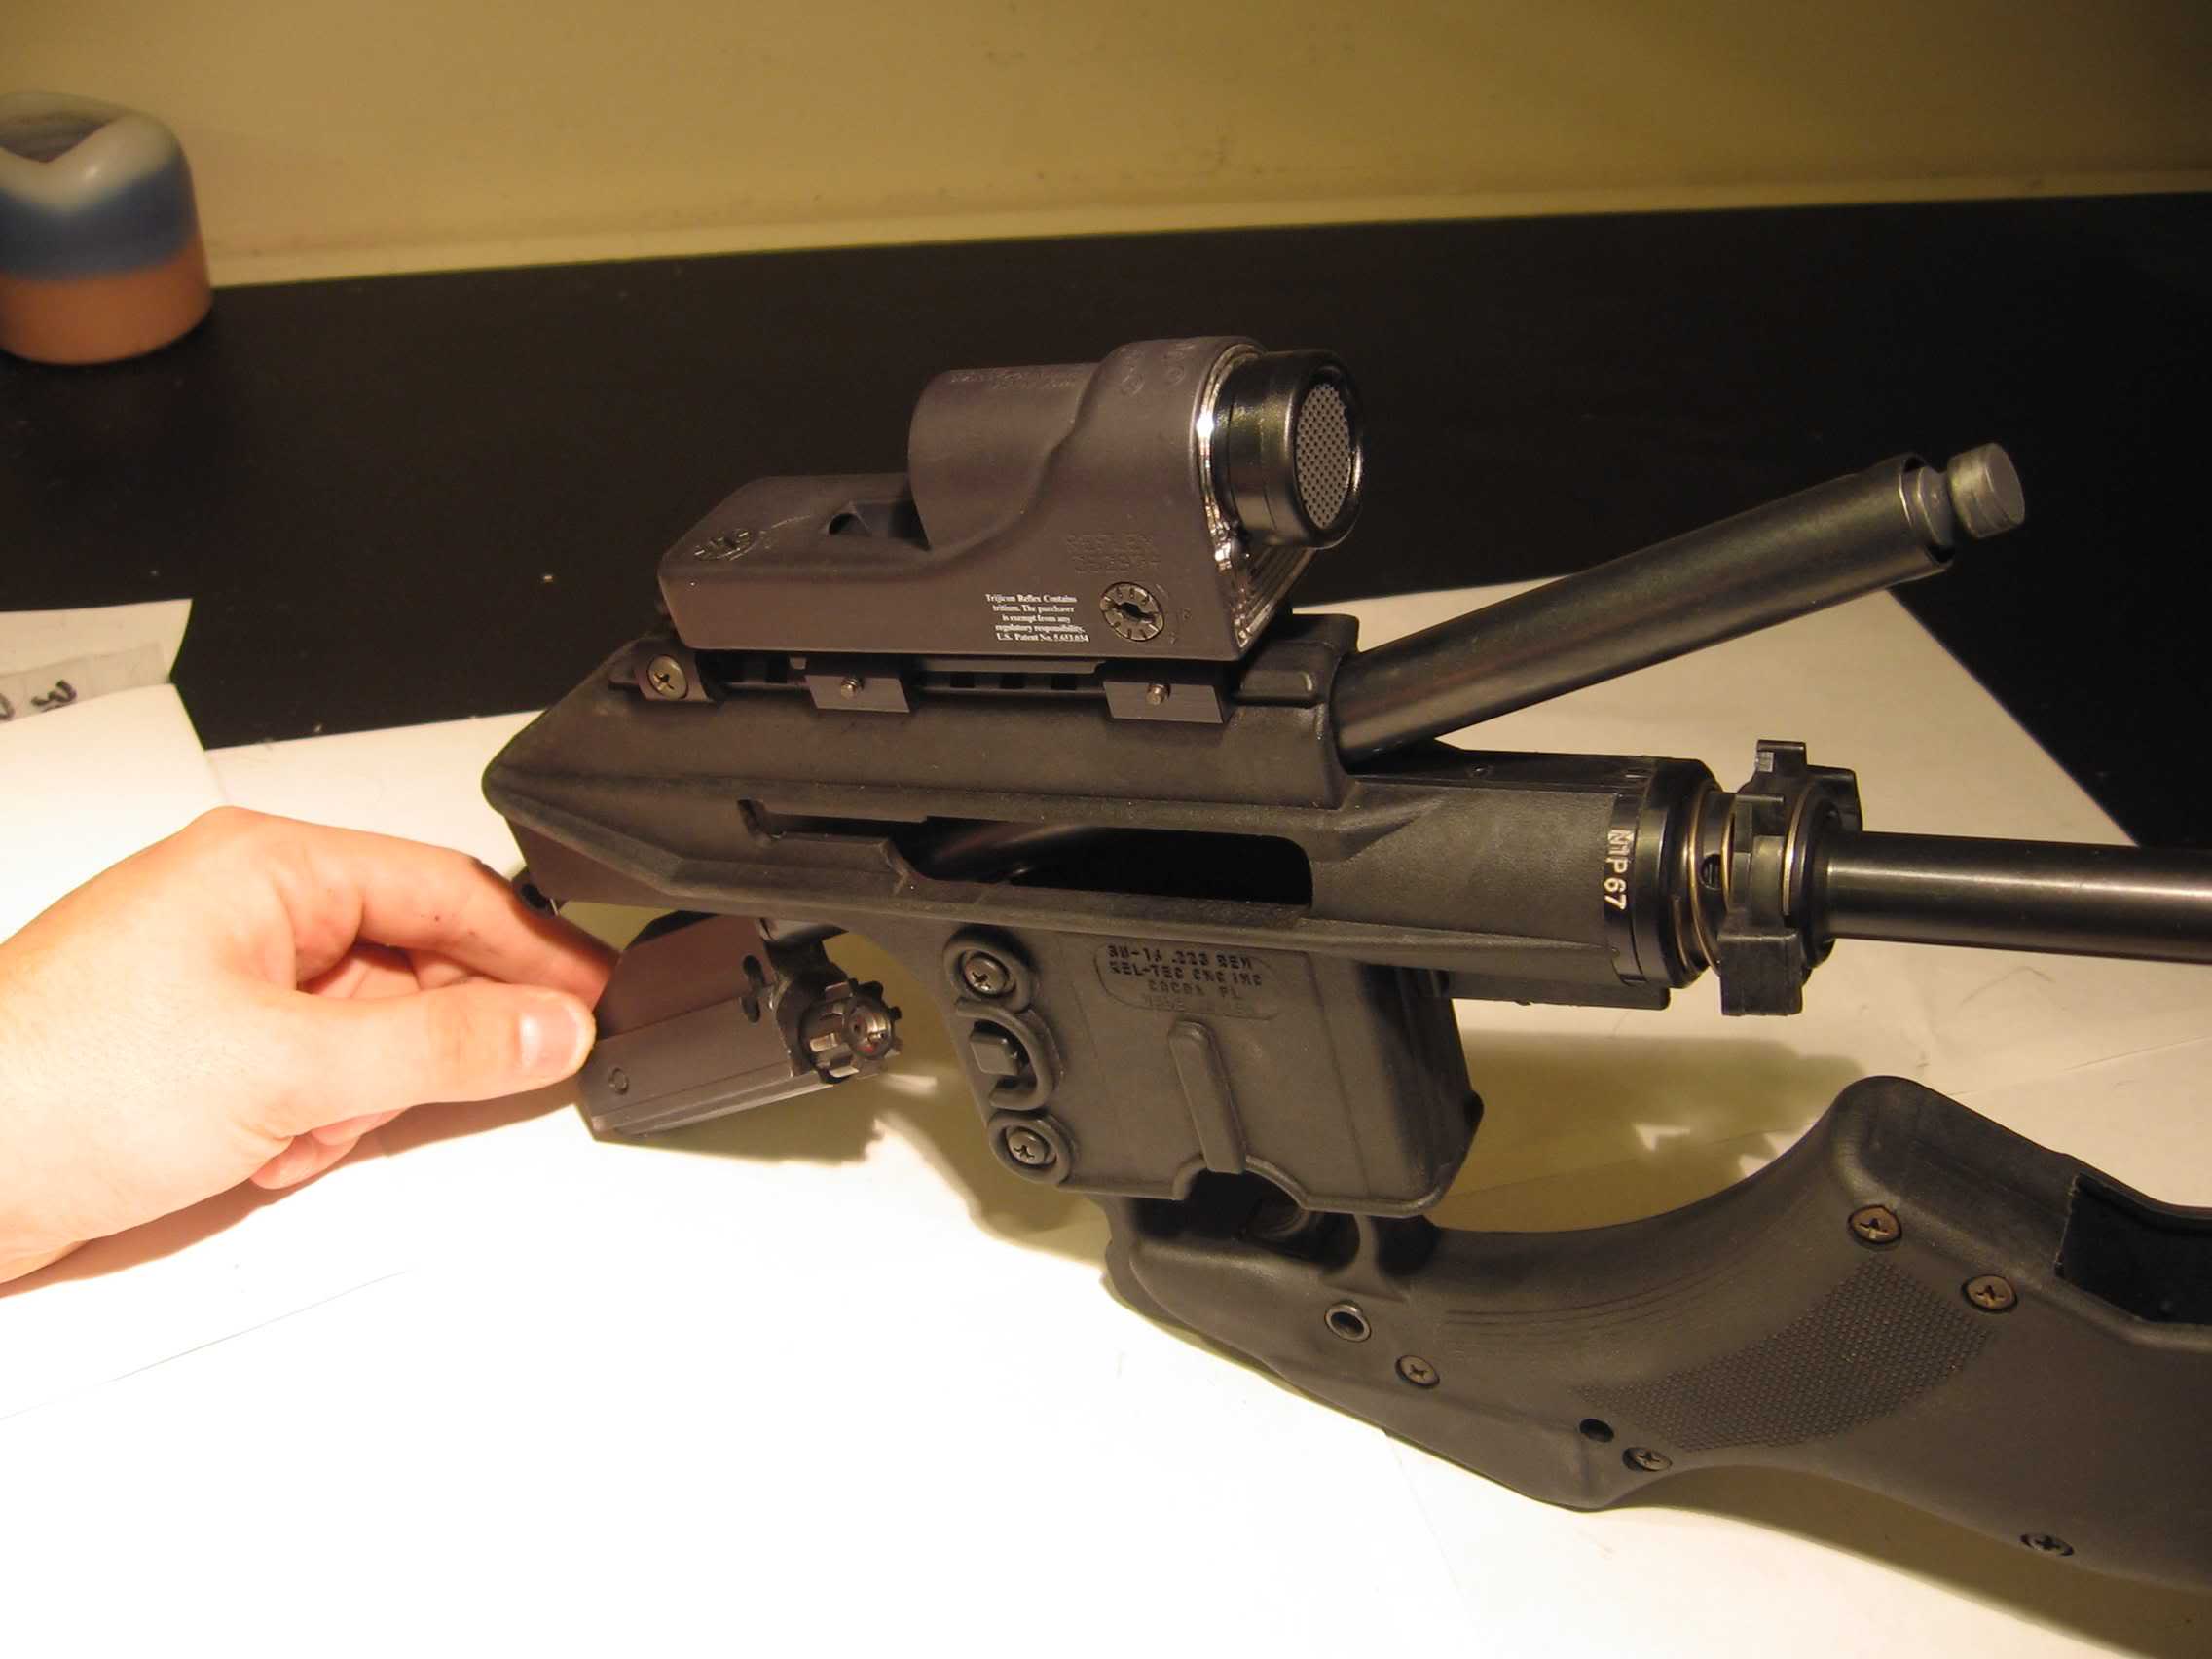
Step 1: Ensure rifle is unloaded. Remove magazine, lock bolt to the rear. Verify that chamber is empty.

Also note that I bite my fingernails. It's been a habit for years. Oh well.


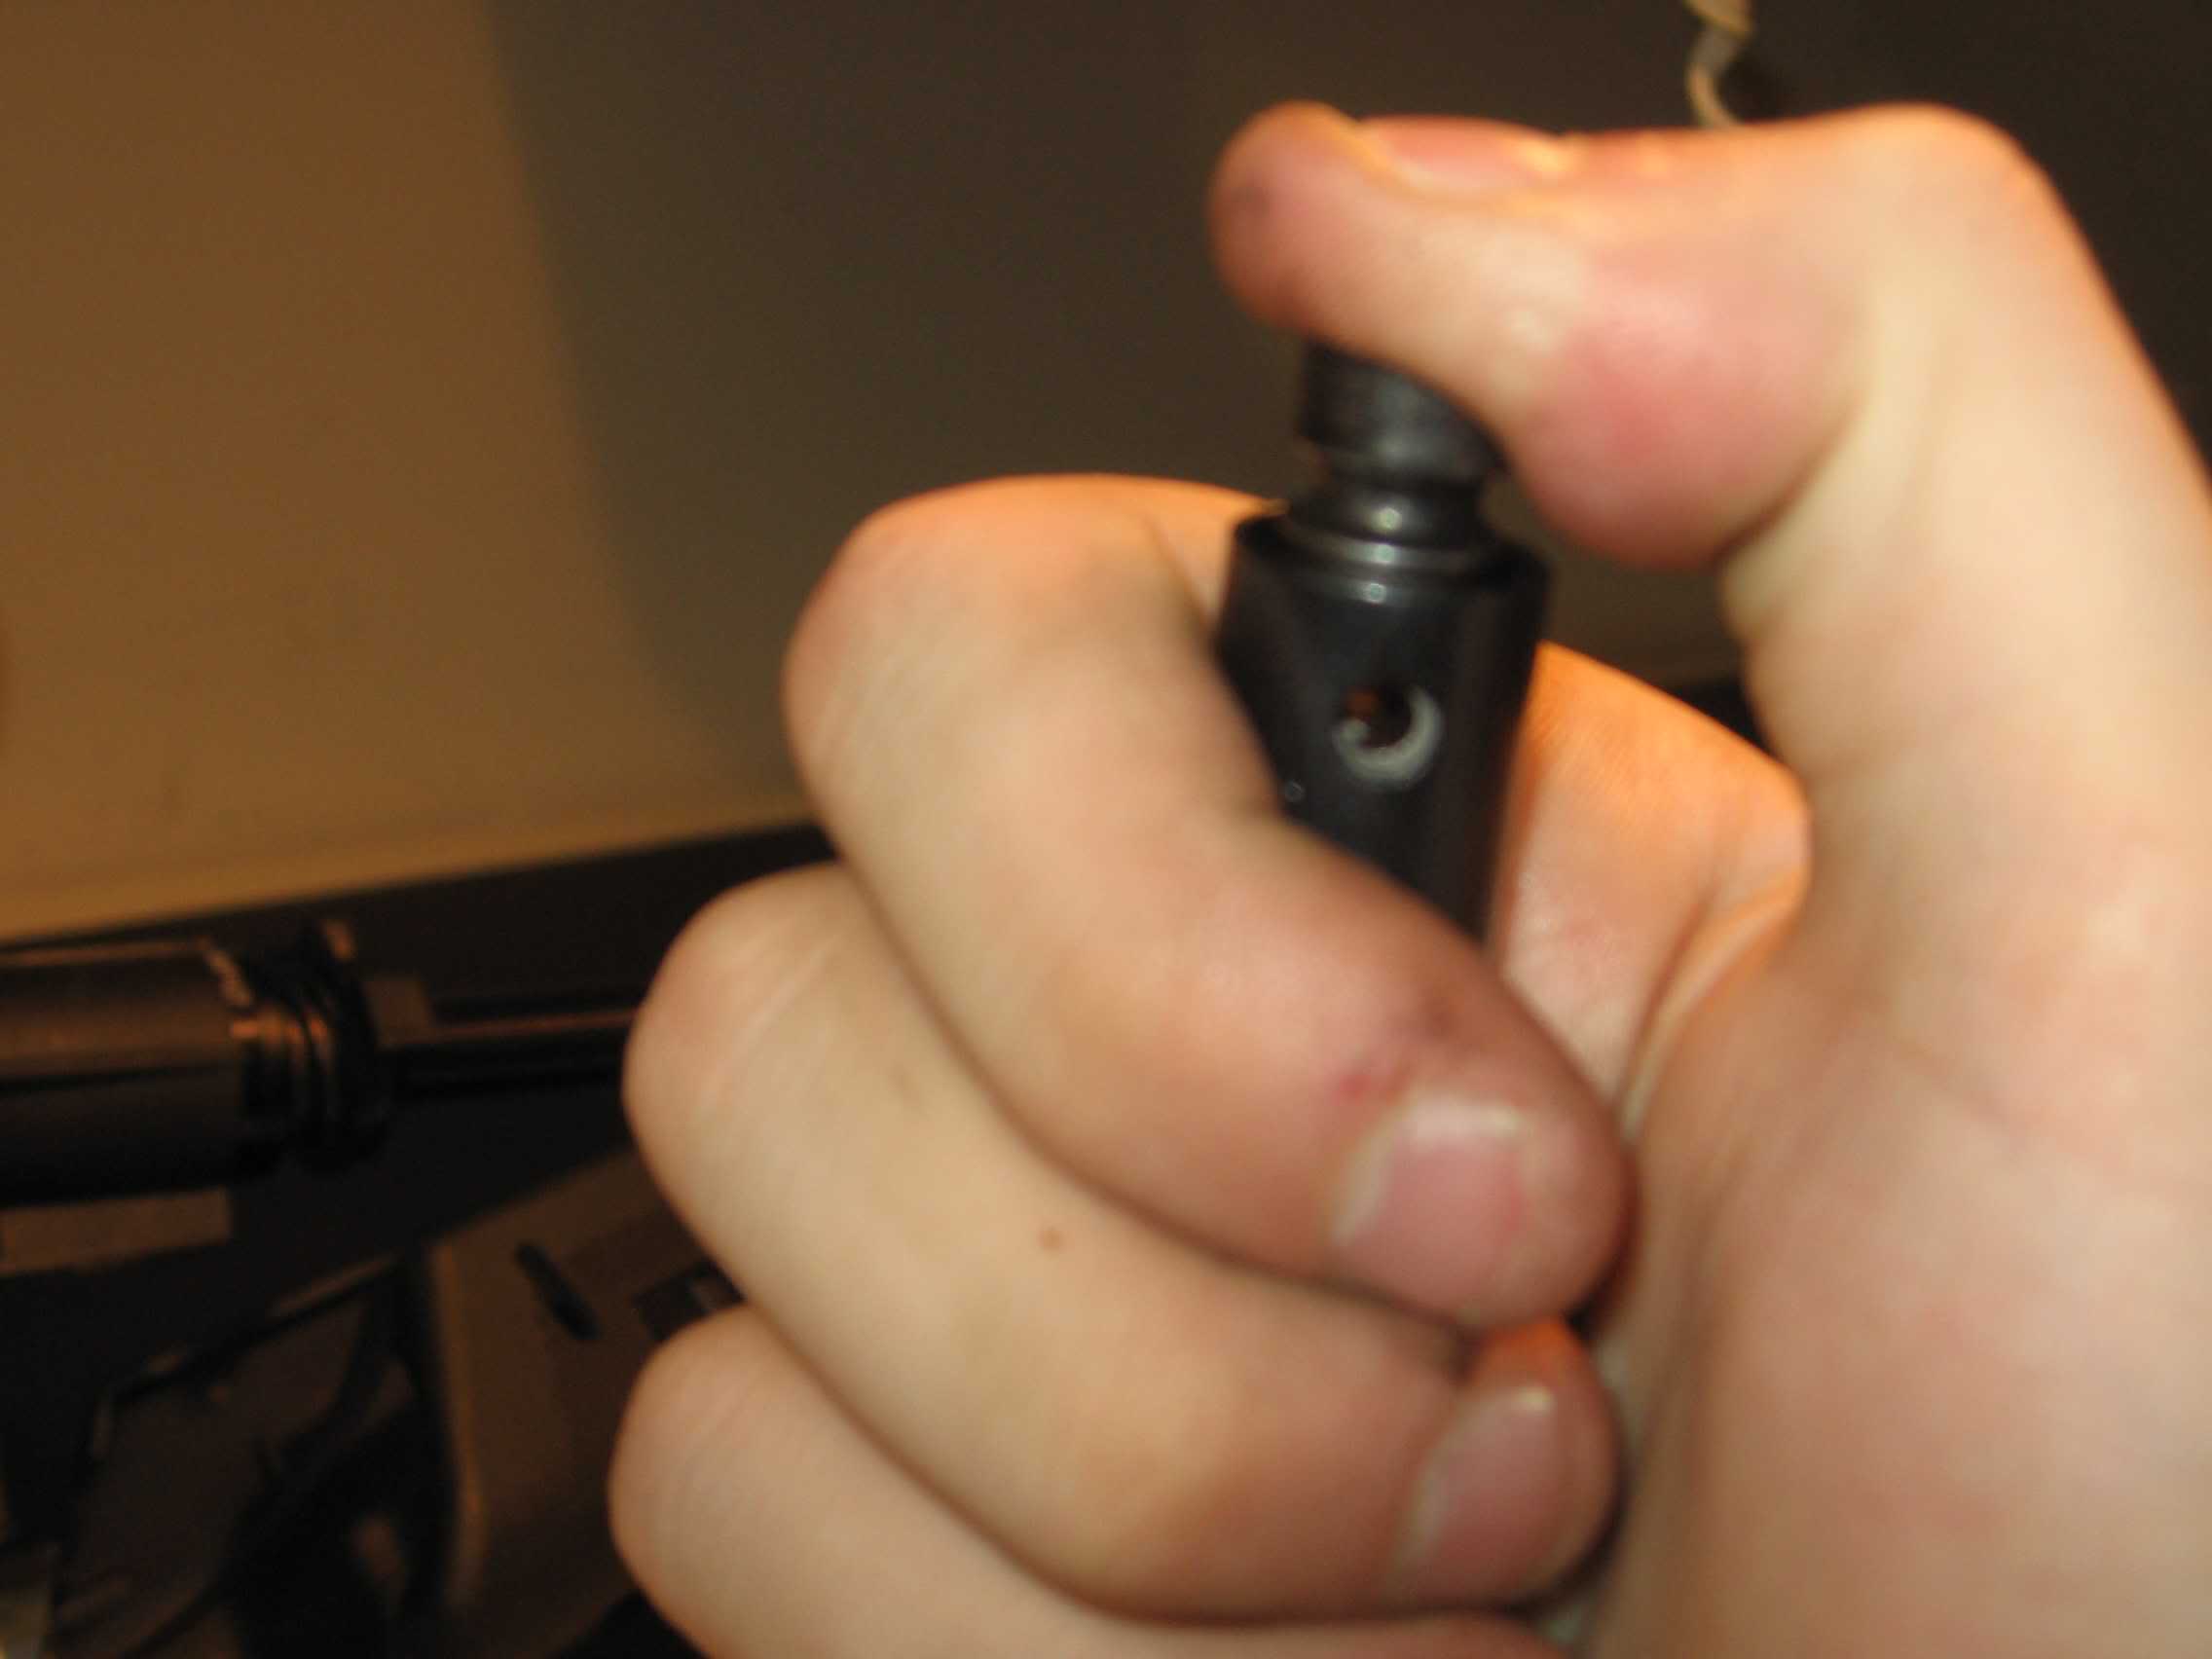
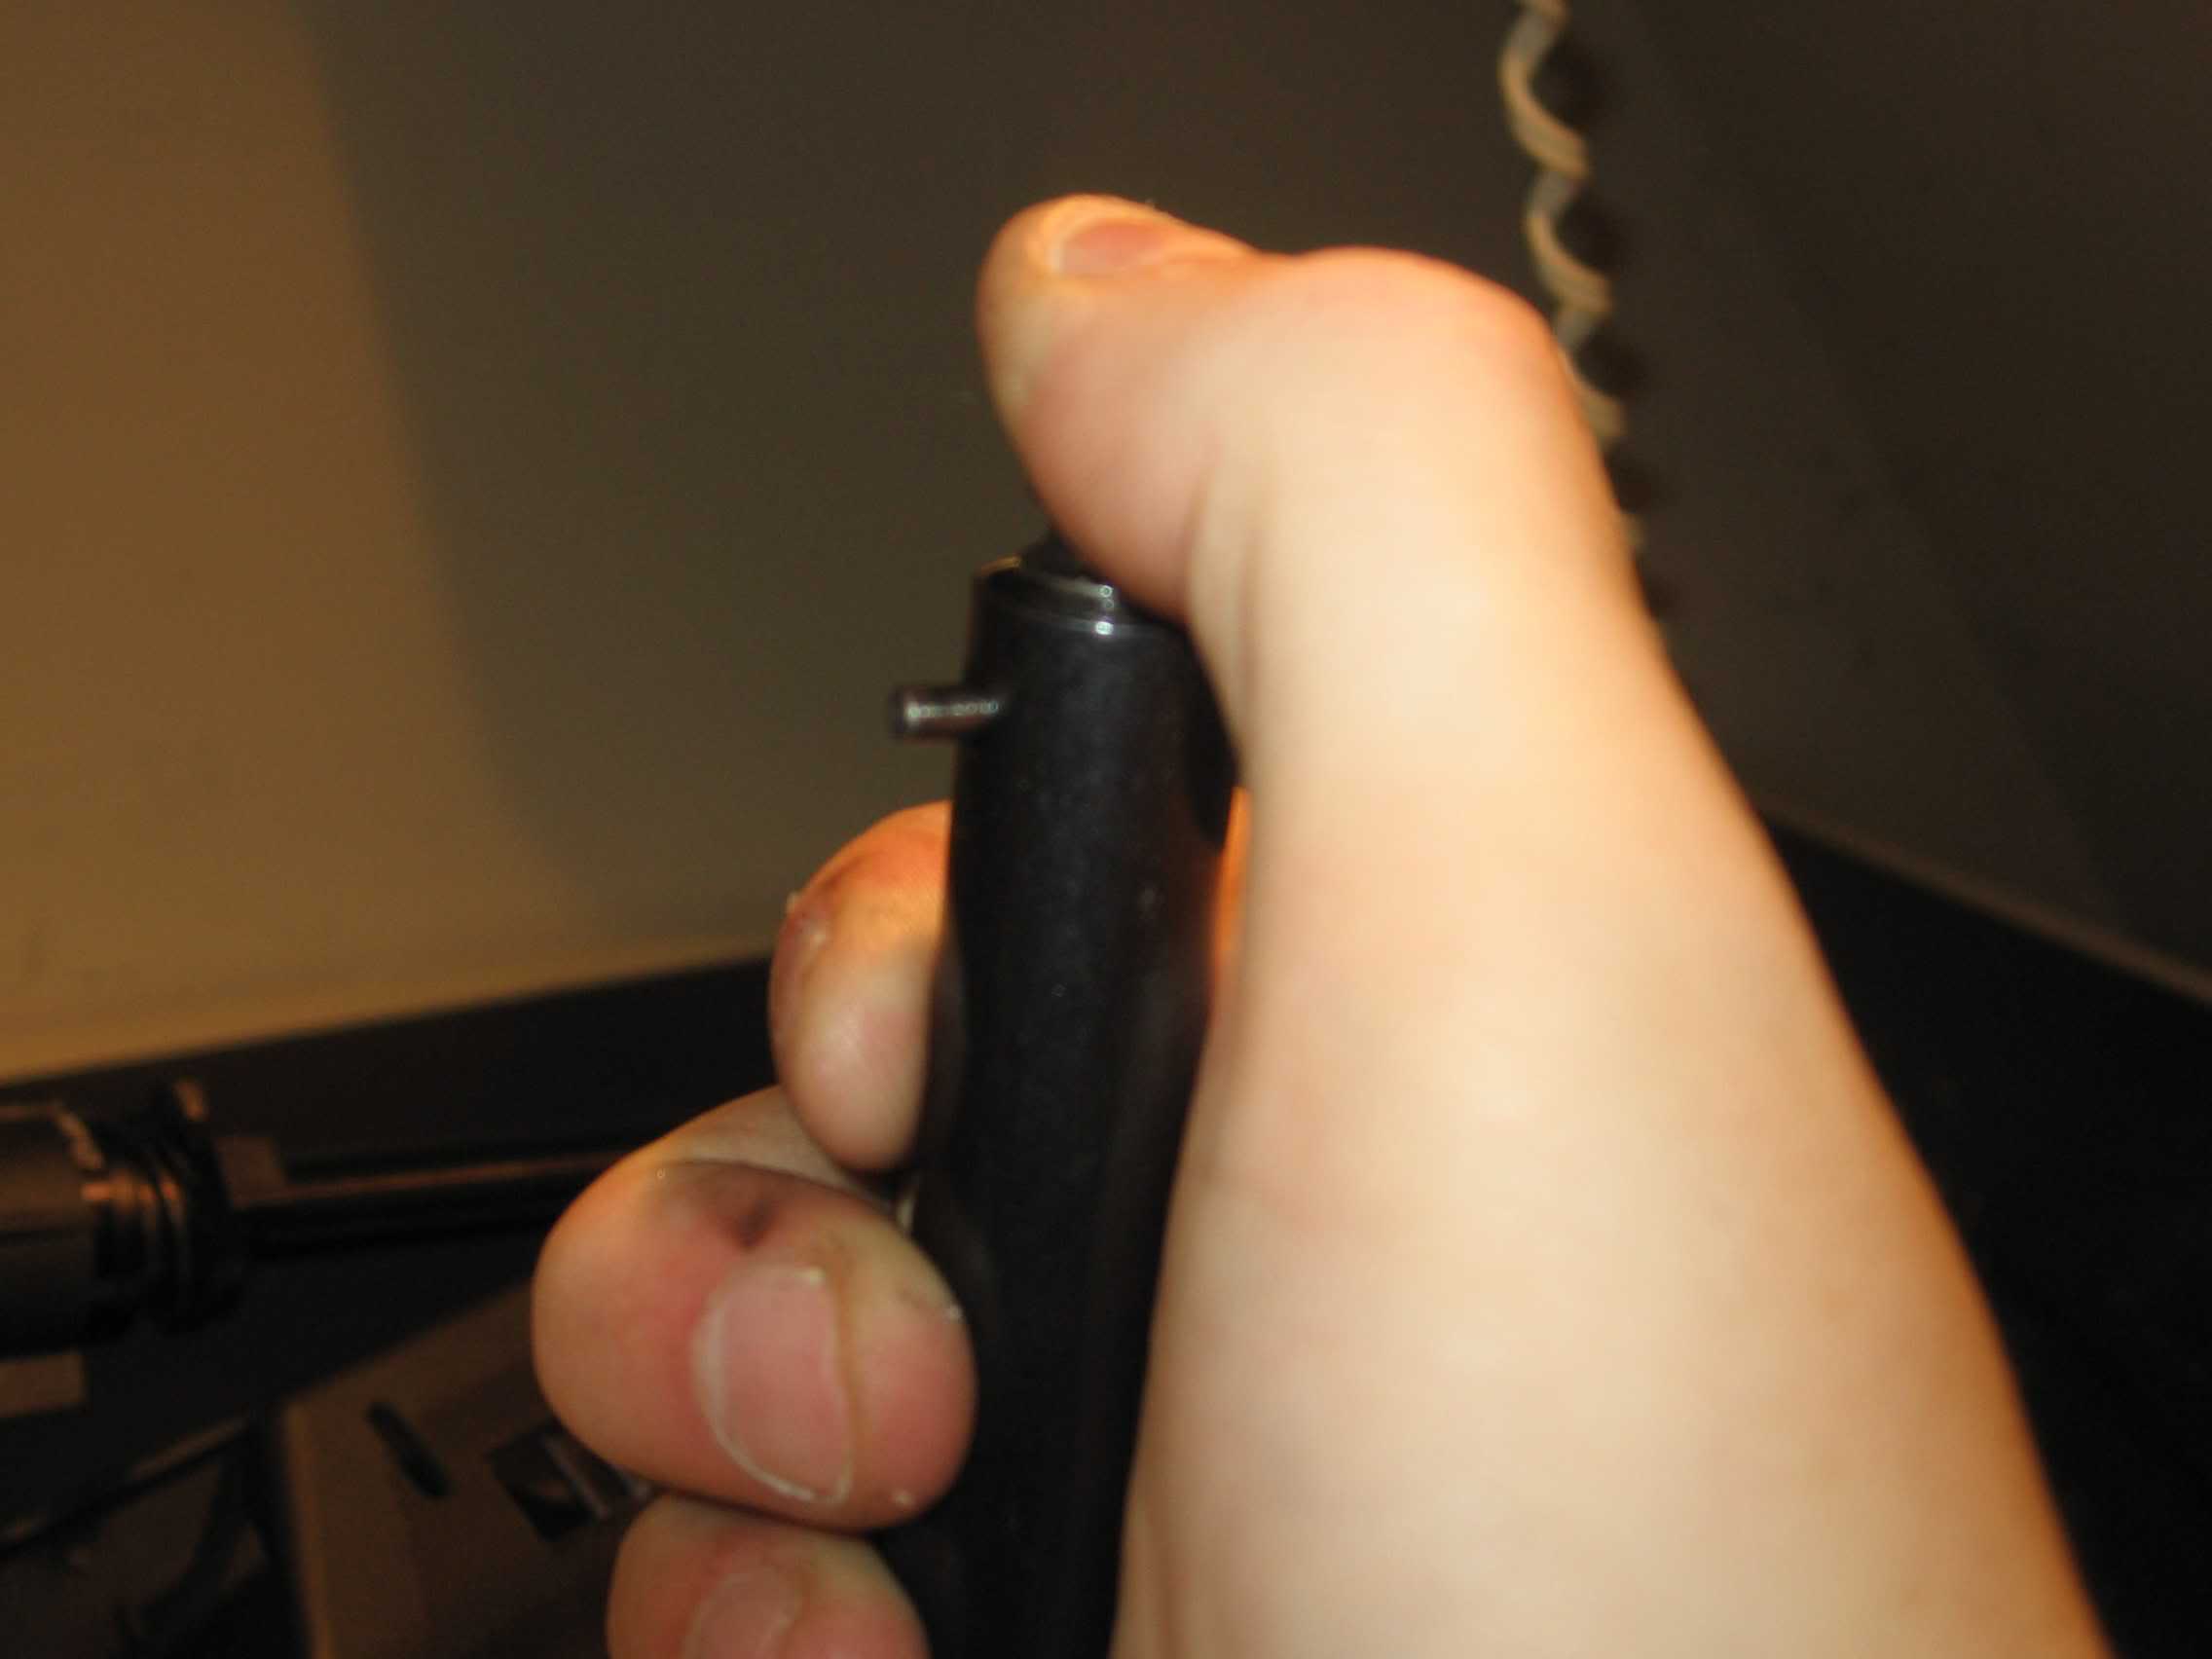
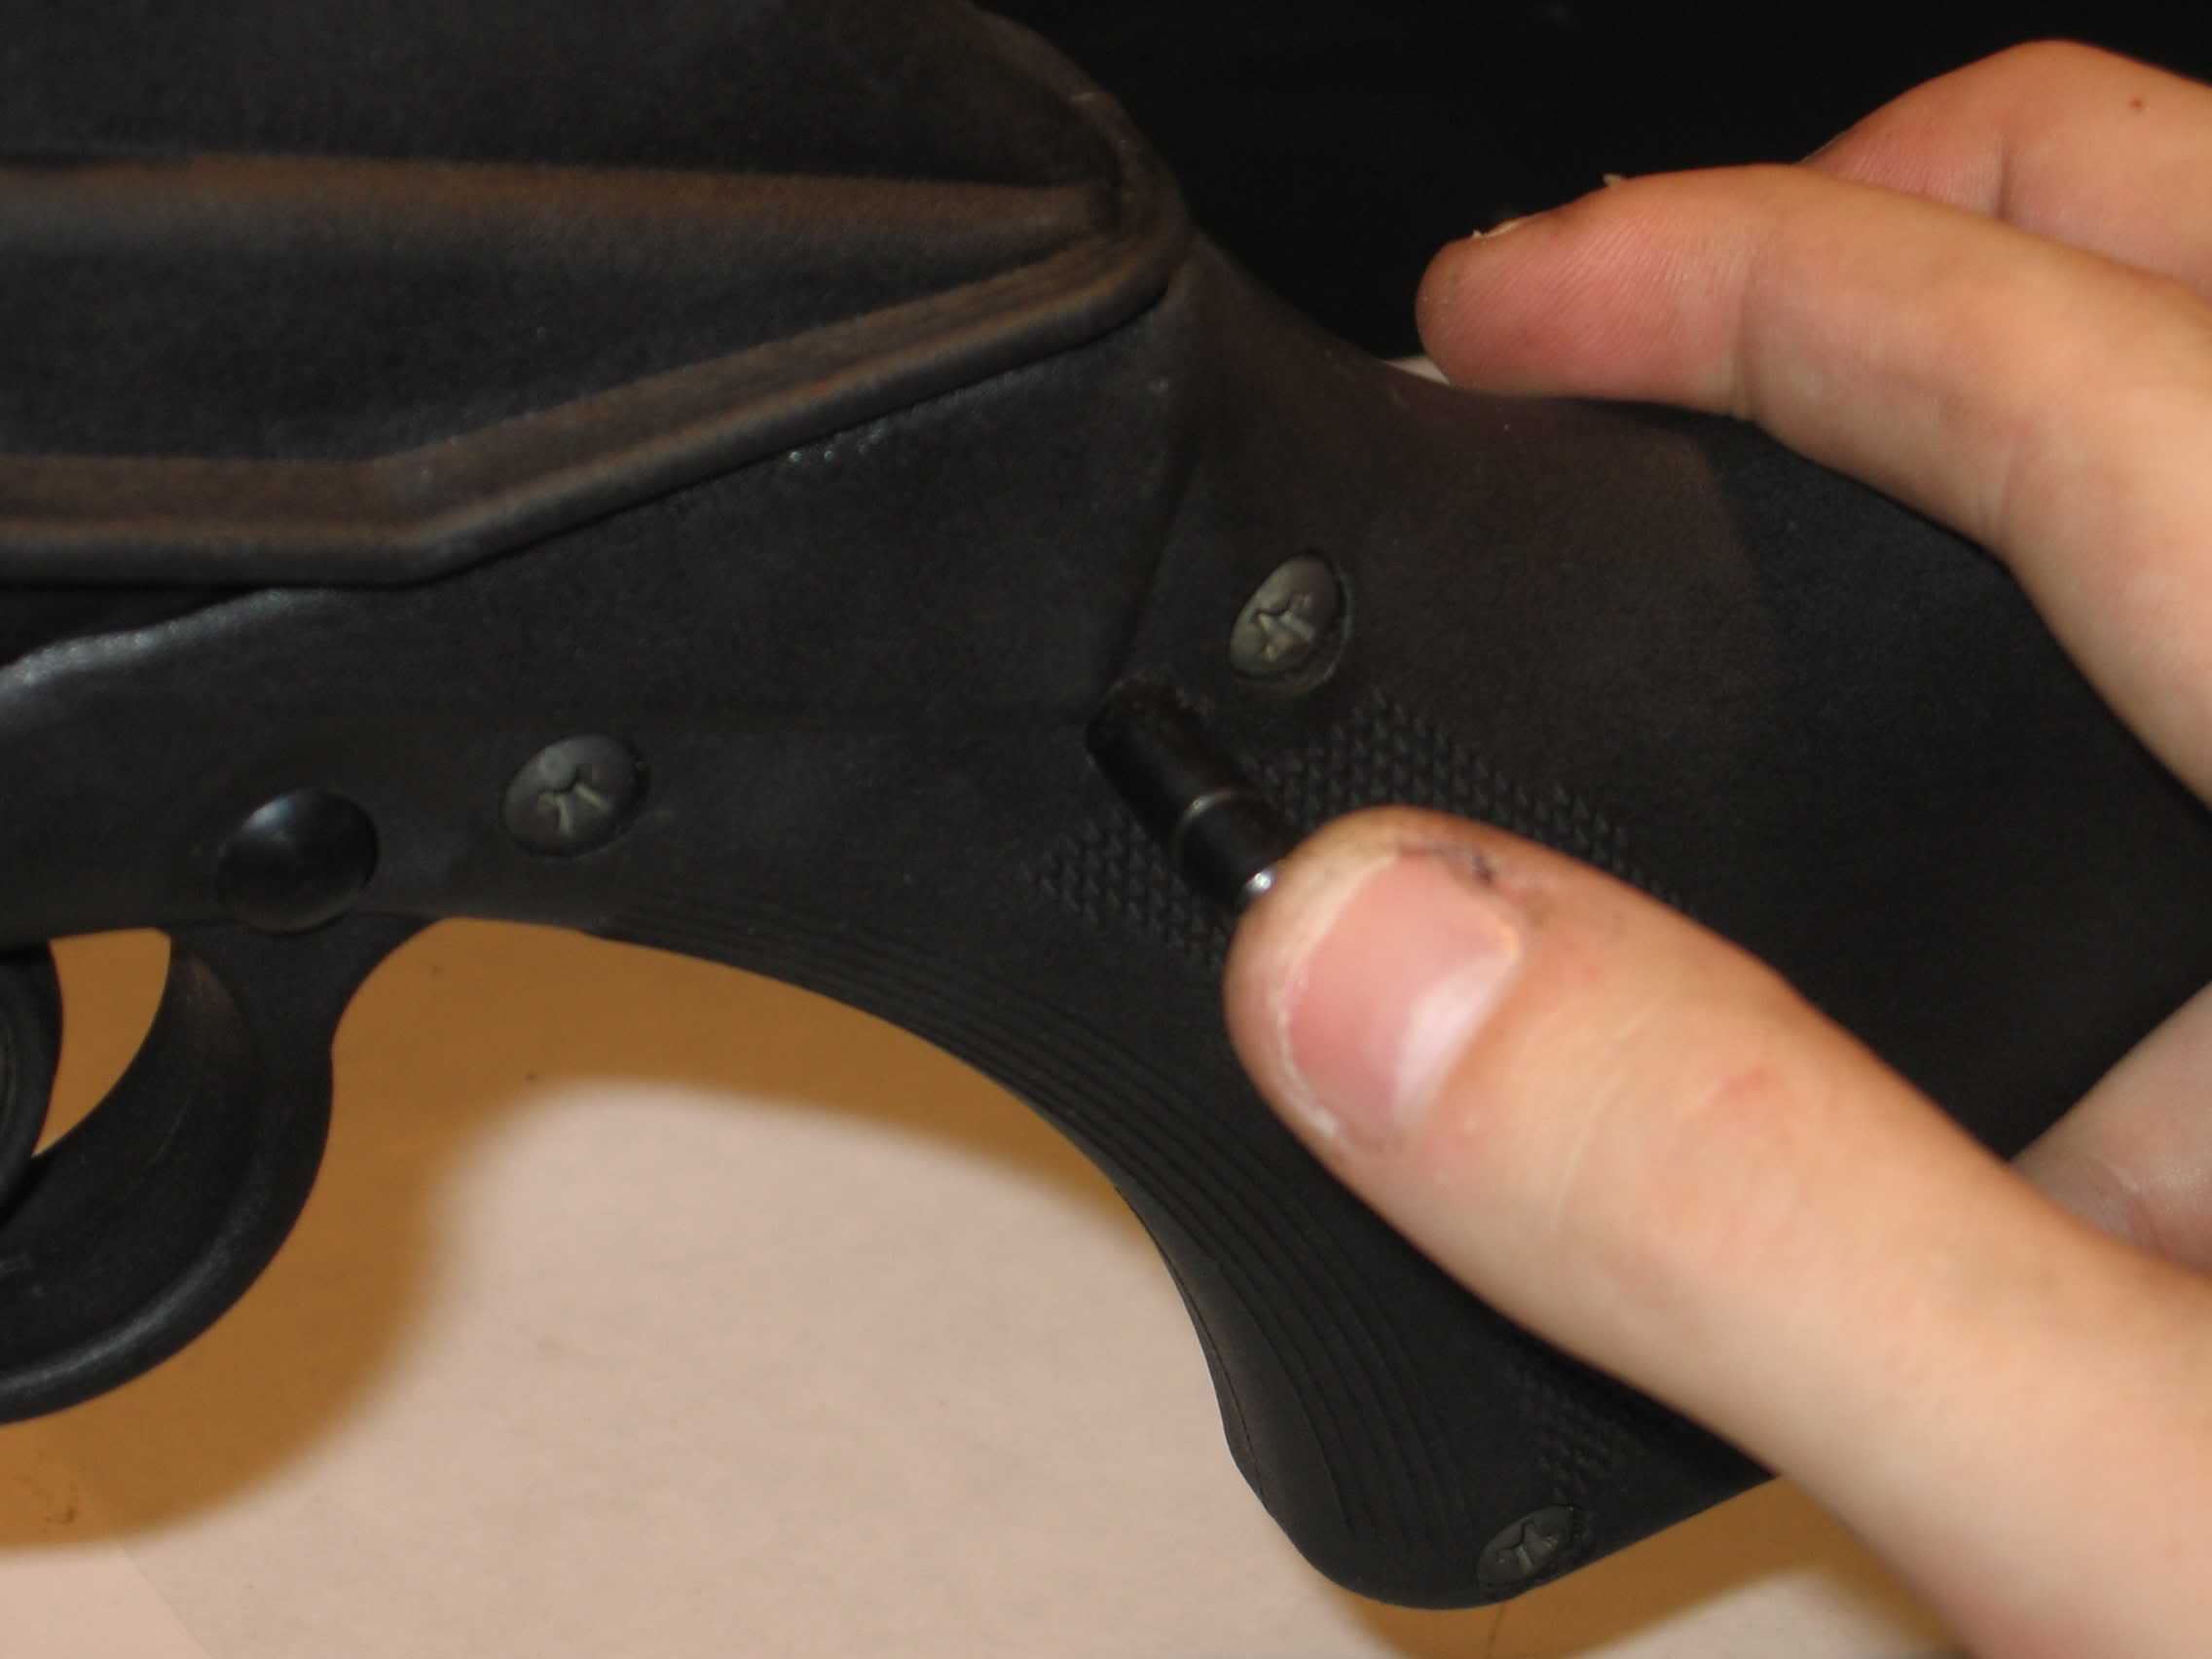
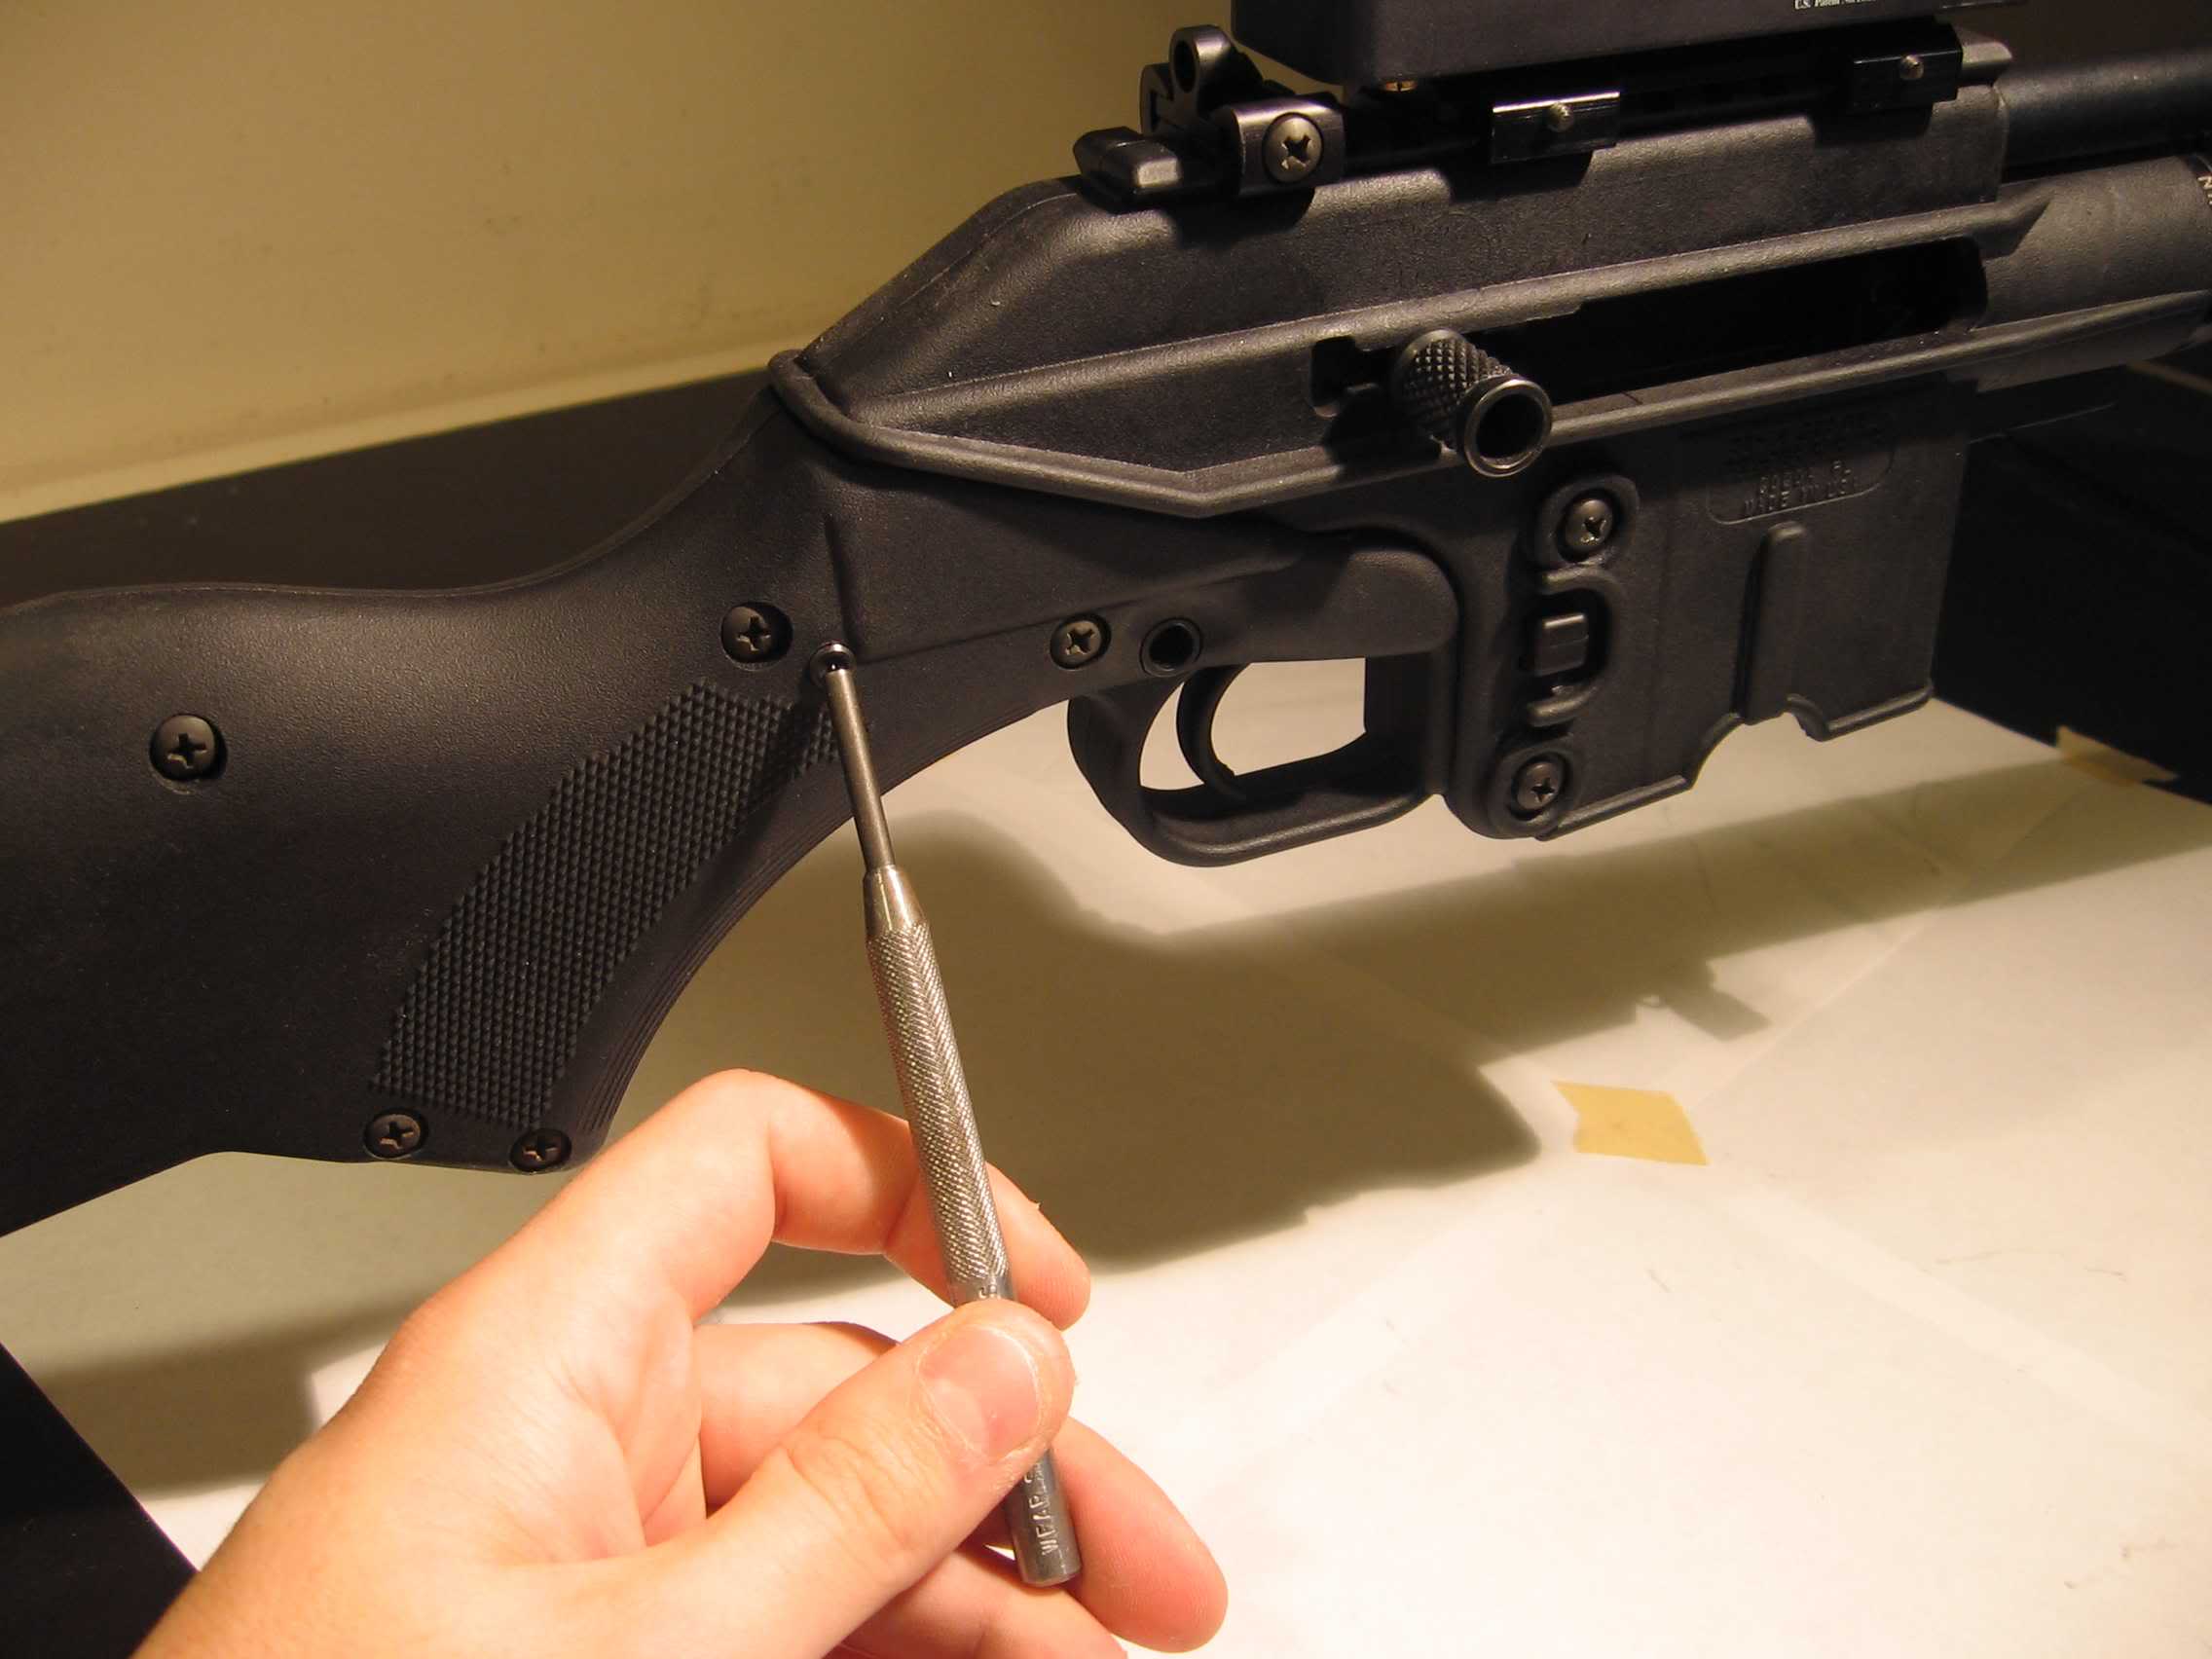
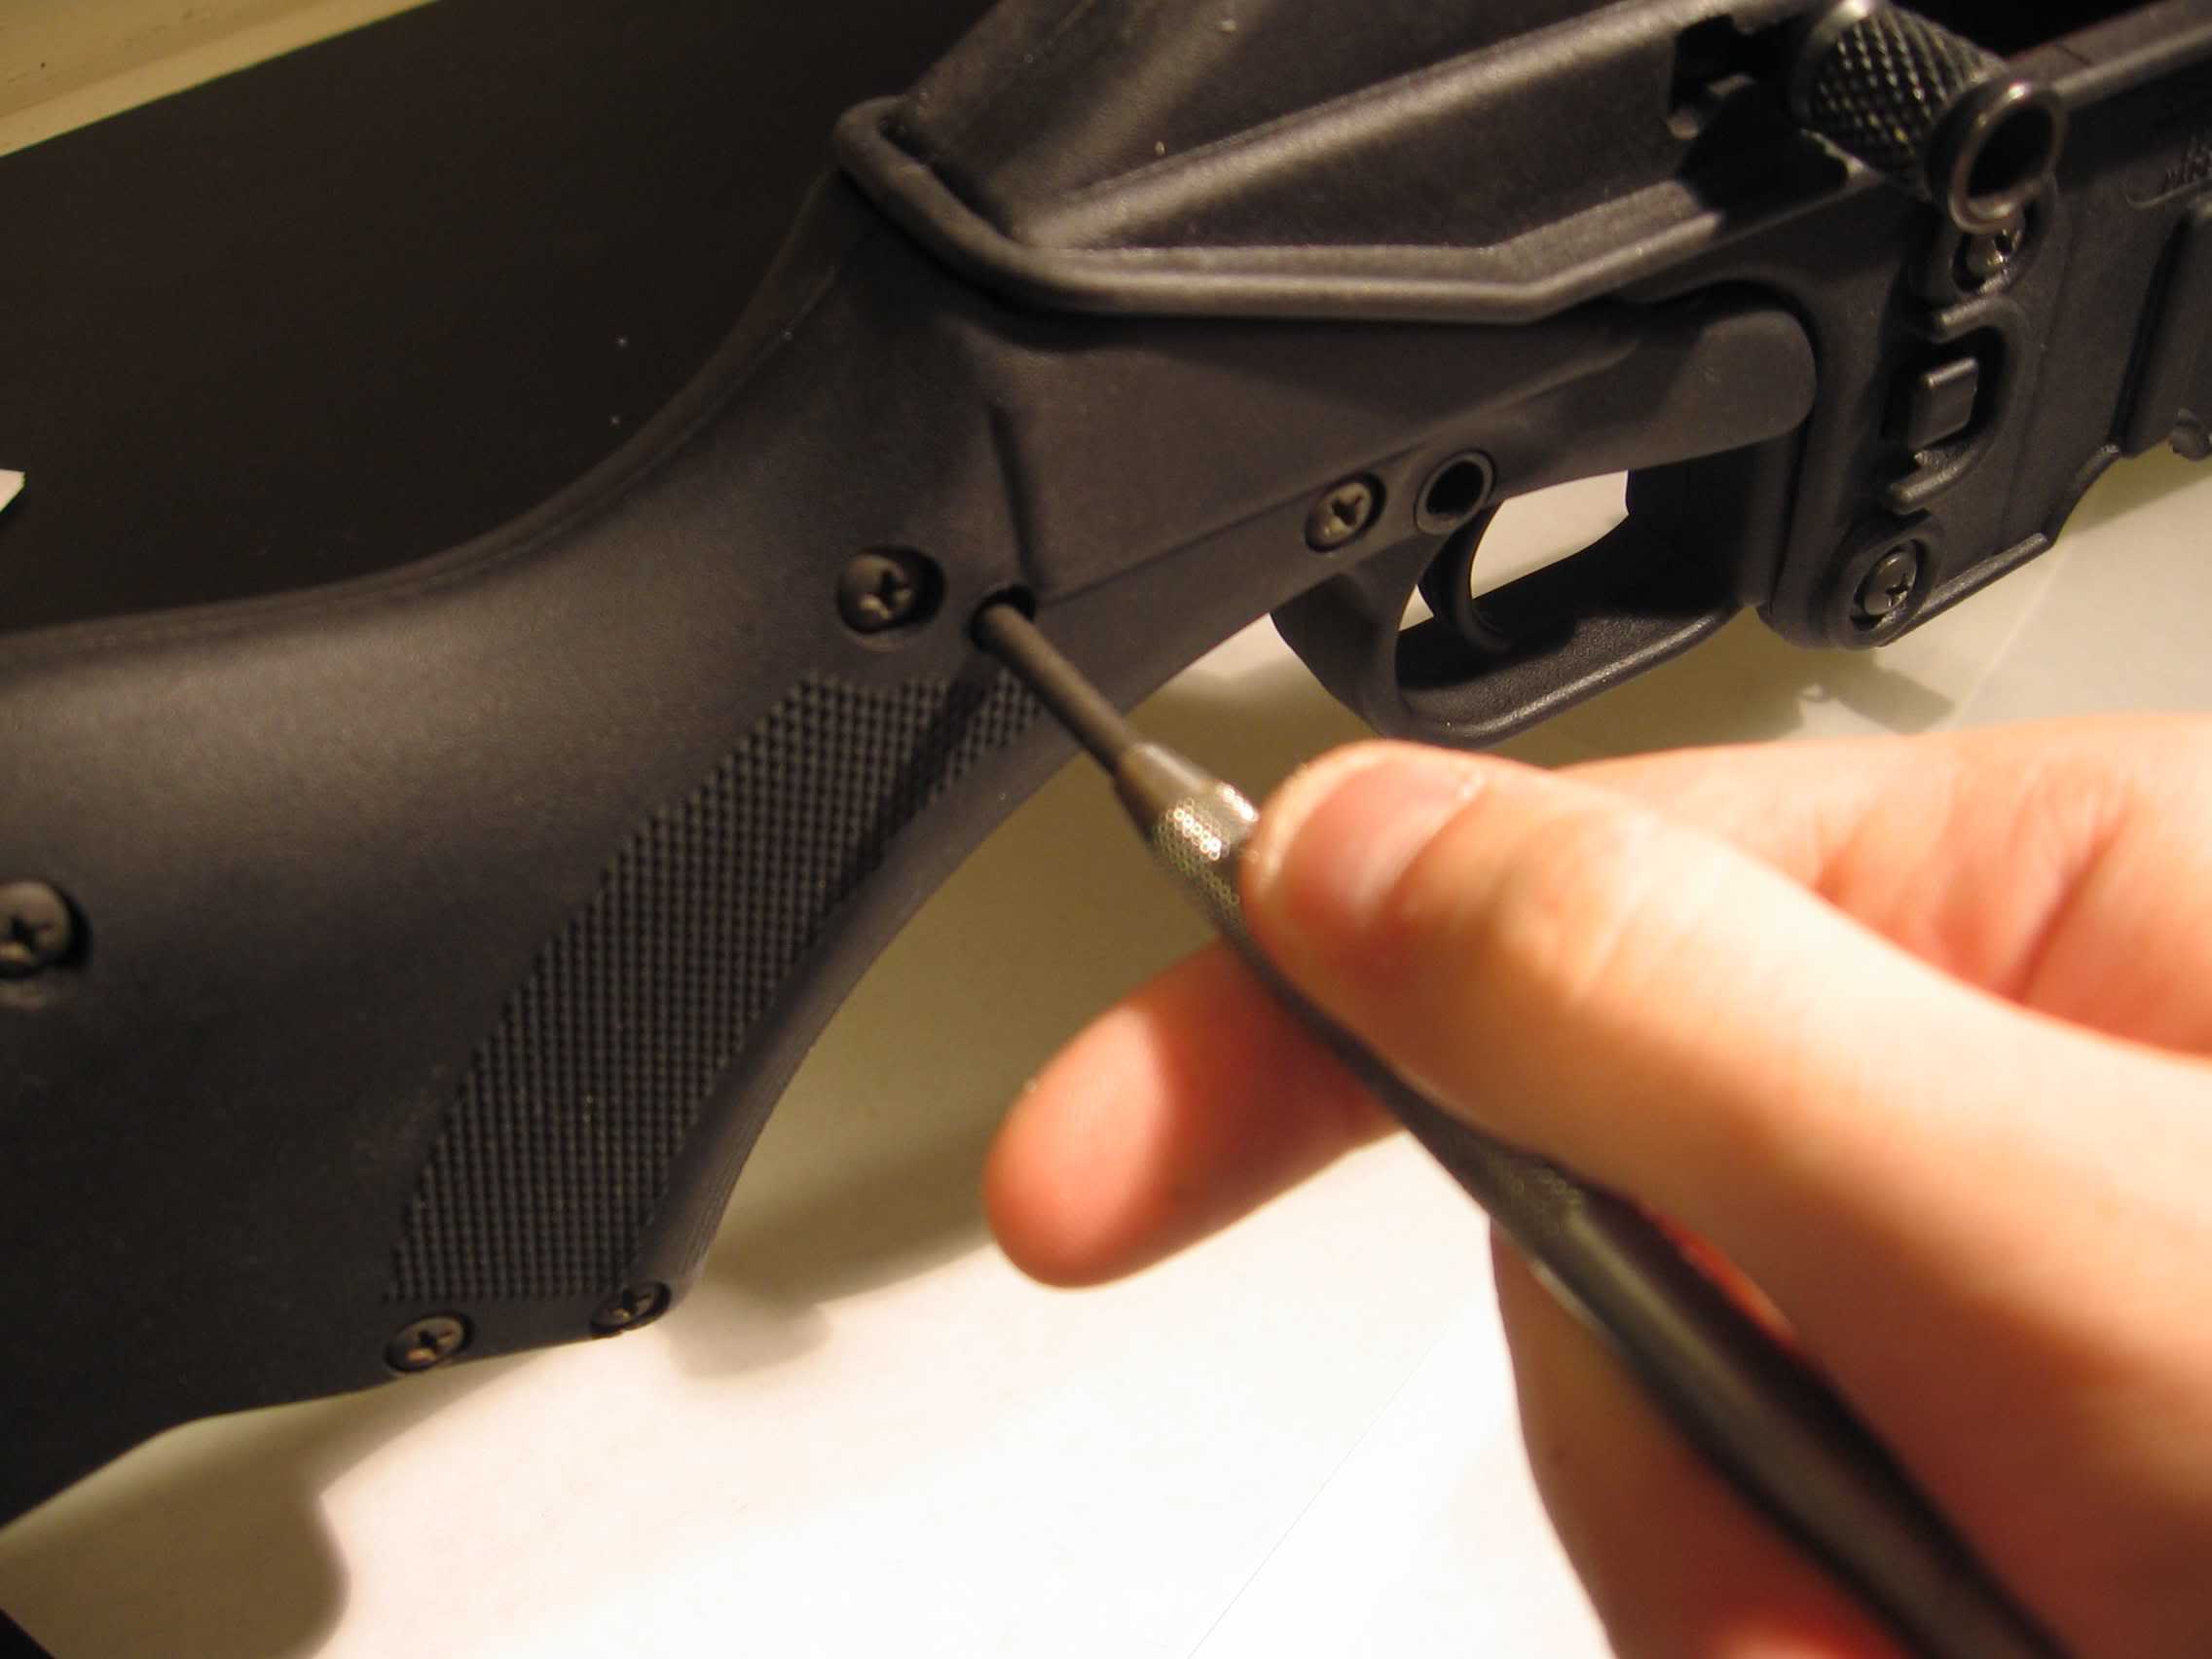
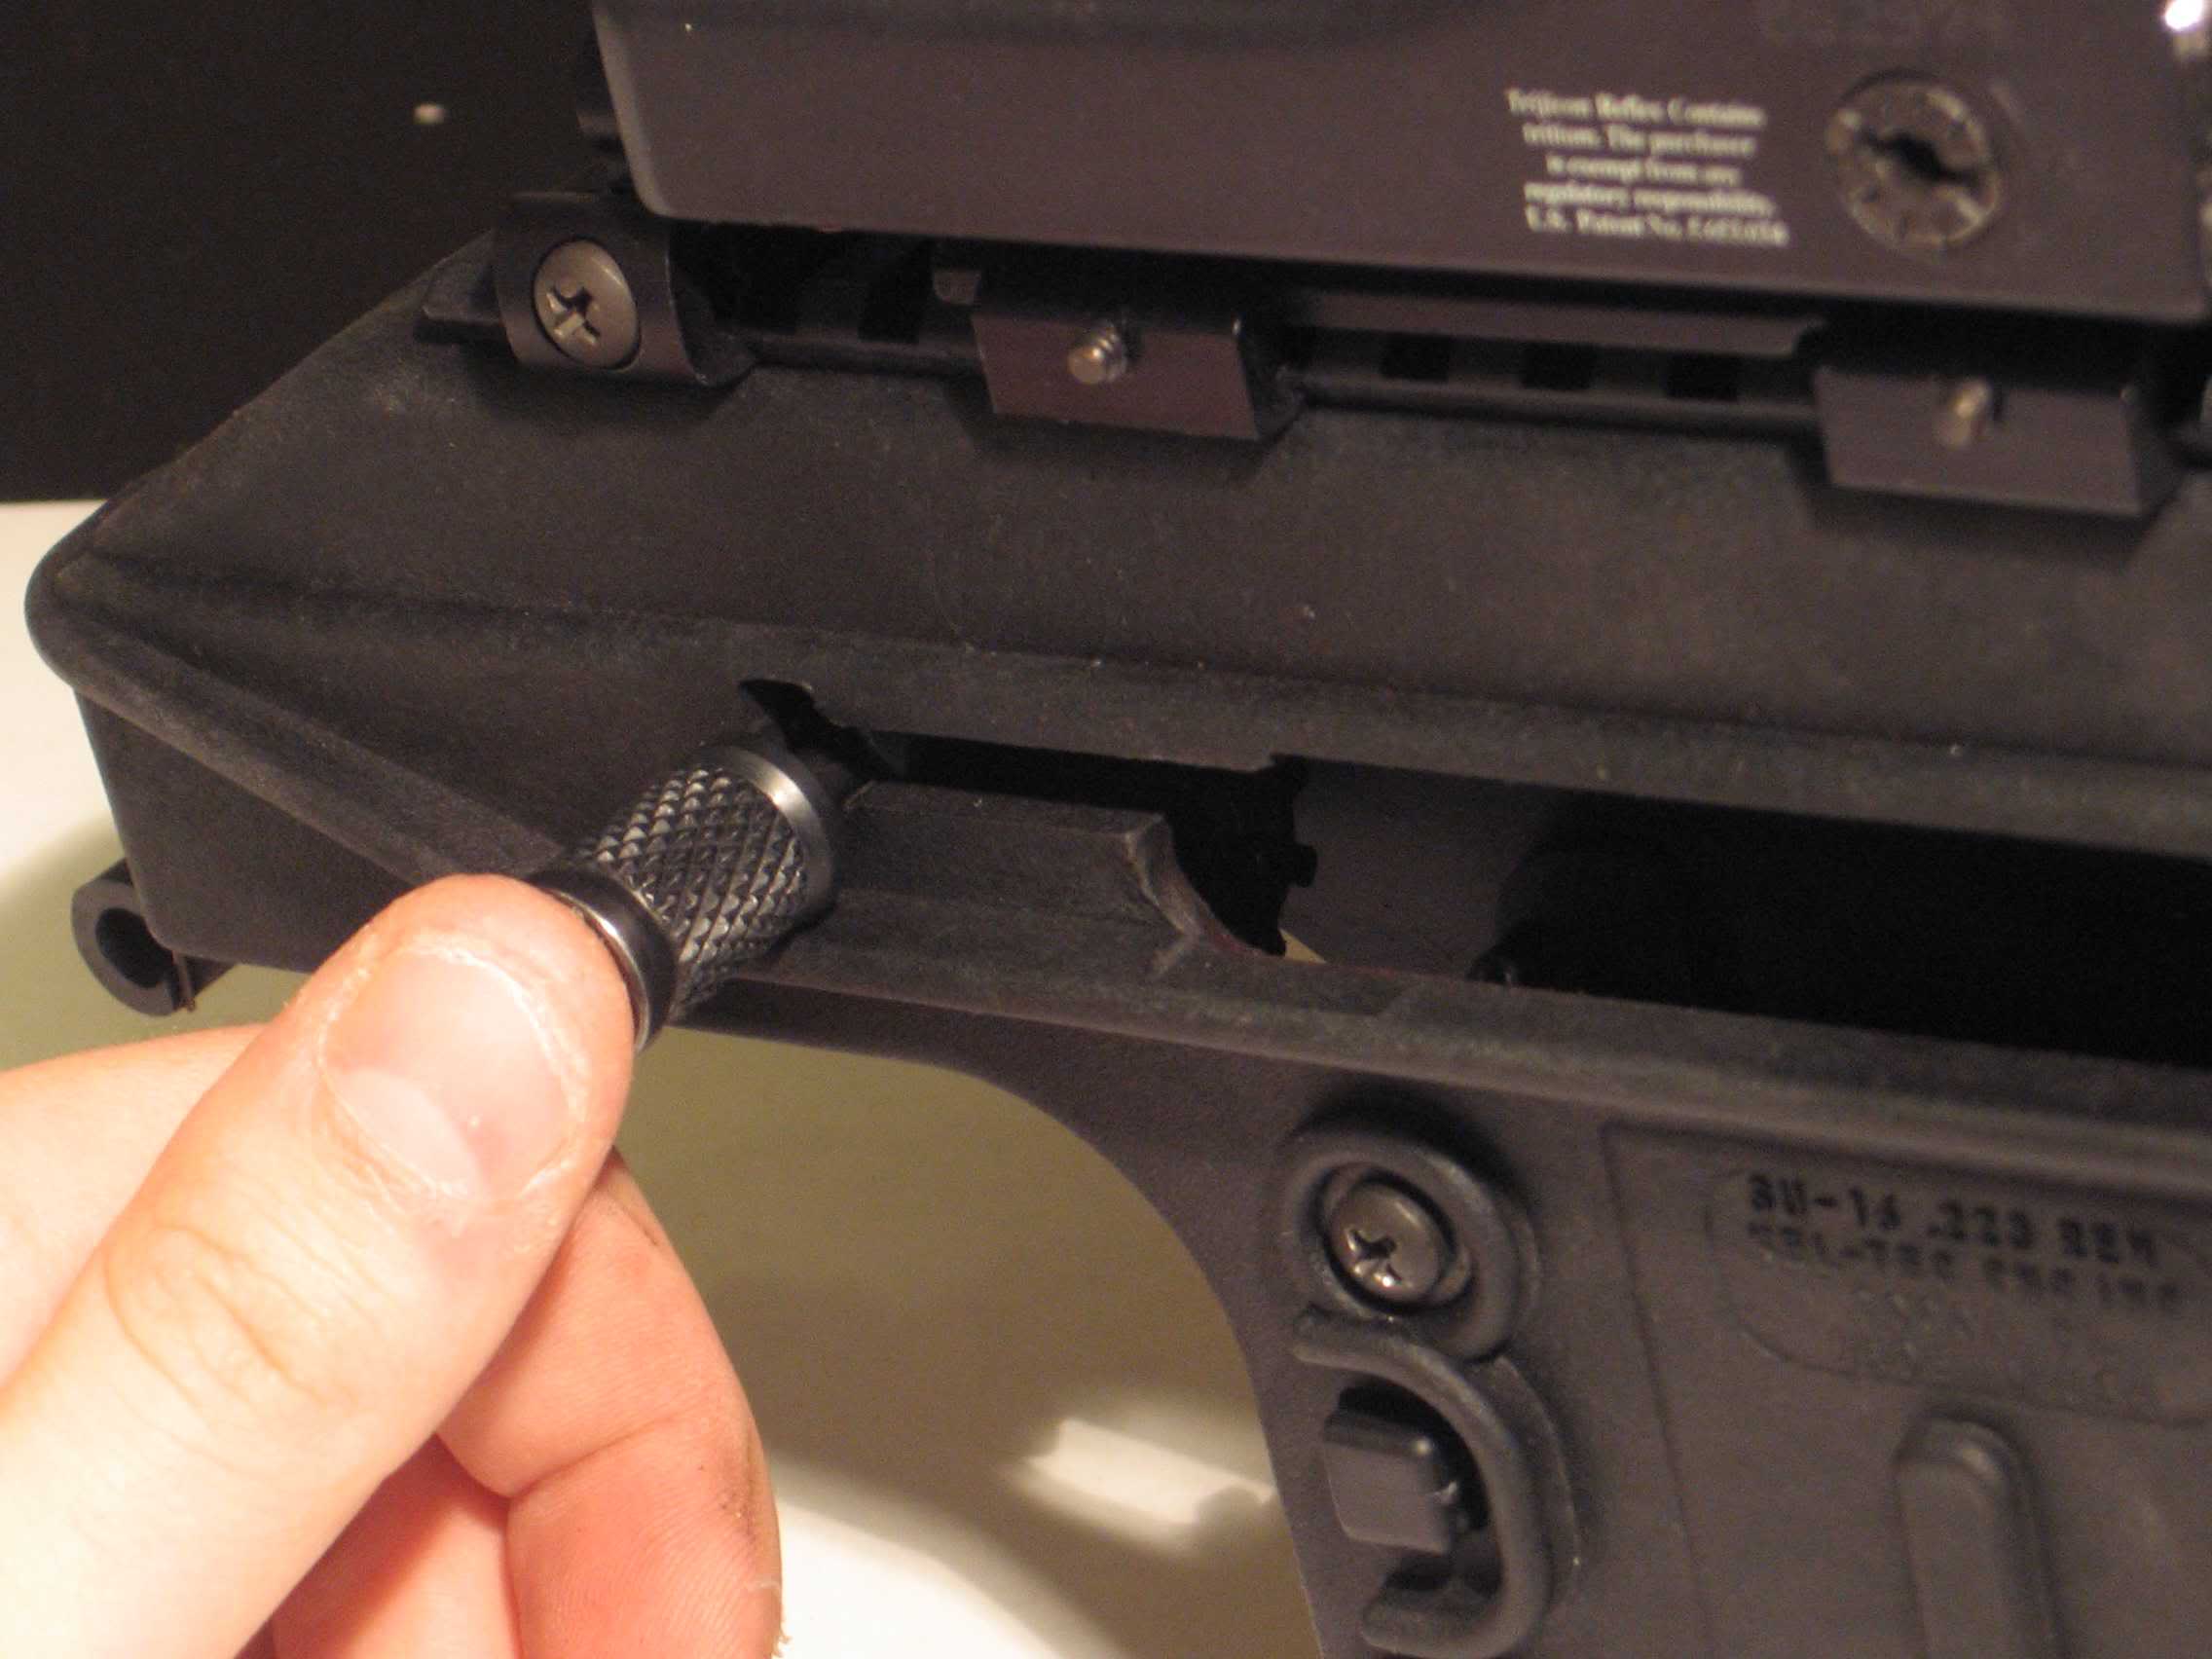
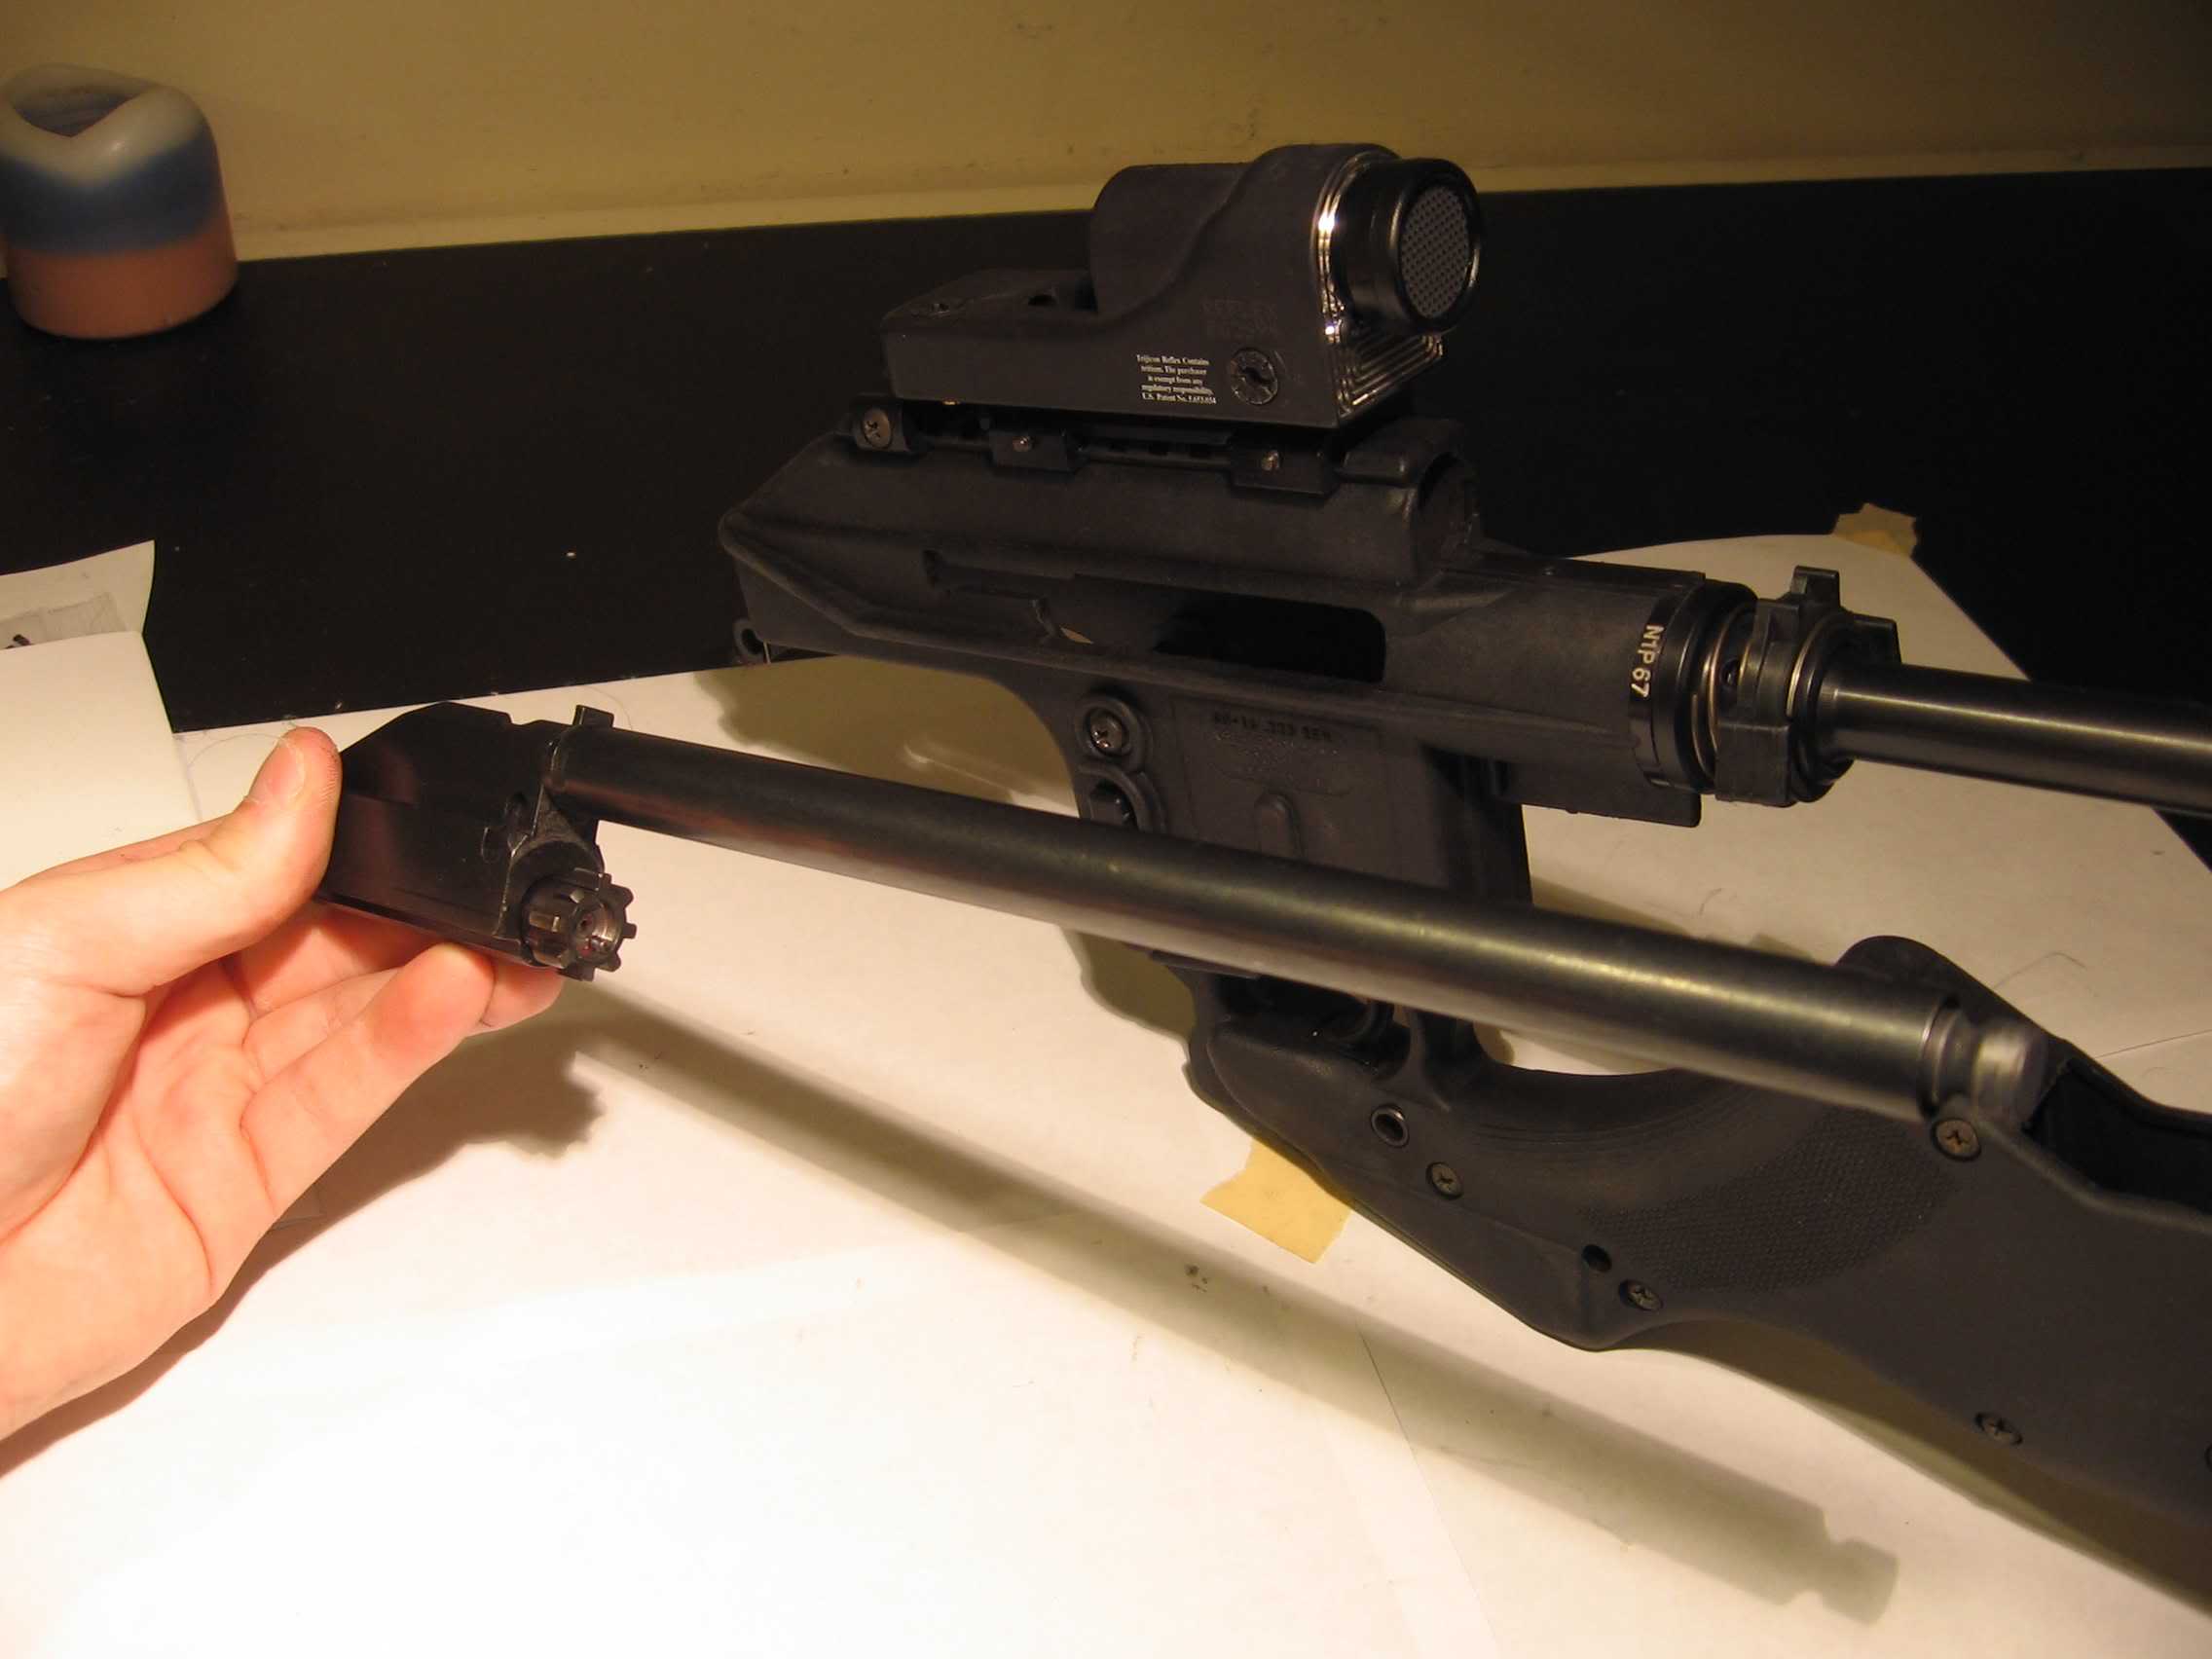
Step 2: Note the location of the takedown pin. It can be removed by pushing from either side using a cartridge, punch, pencil, or other small, thin object.

As a rule, I try to keep live ammunition away from my gun cleaning area in case the cartridge gets a mind of its own and decides to leap into the chamber on its own accord. I haven't actually had this happen yet, but better safe than sorry.

If you're field-stripping your rifle in the field or at the range, and you lack tools, a cartridge is a perfectly suitable means of removing this pin. I just don't like having live ammo around when I'm cleaning.

Step 3: It is quite helpful at this stage to release the front handguards and use them as a bipod. It also makes access to the gas system much easier.

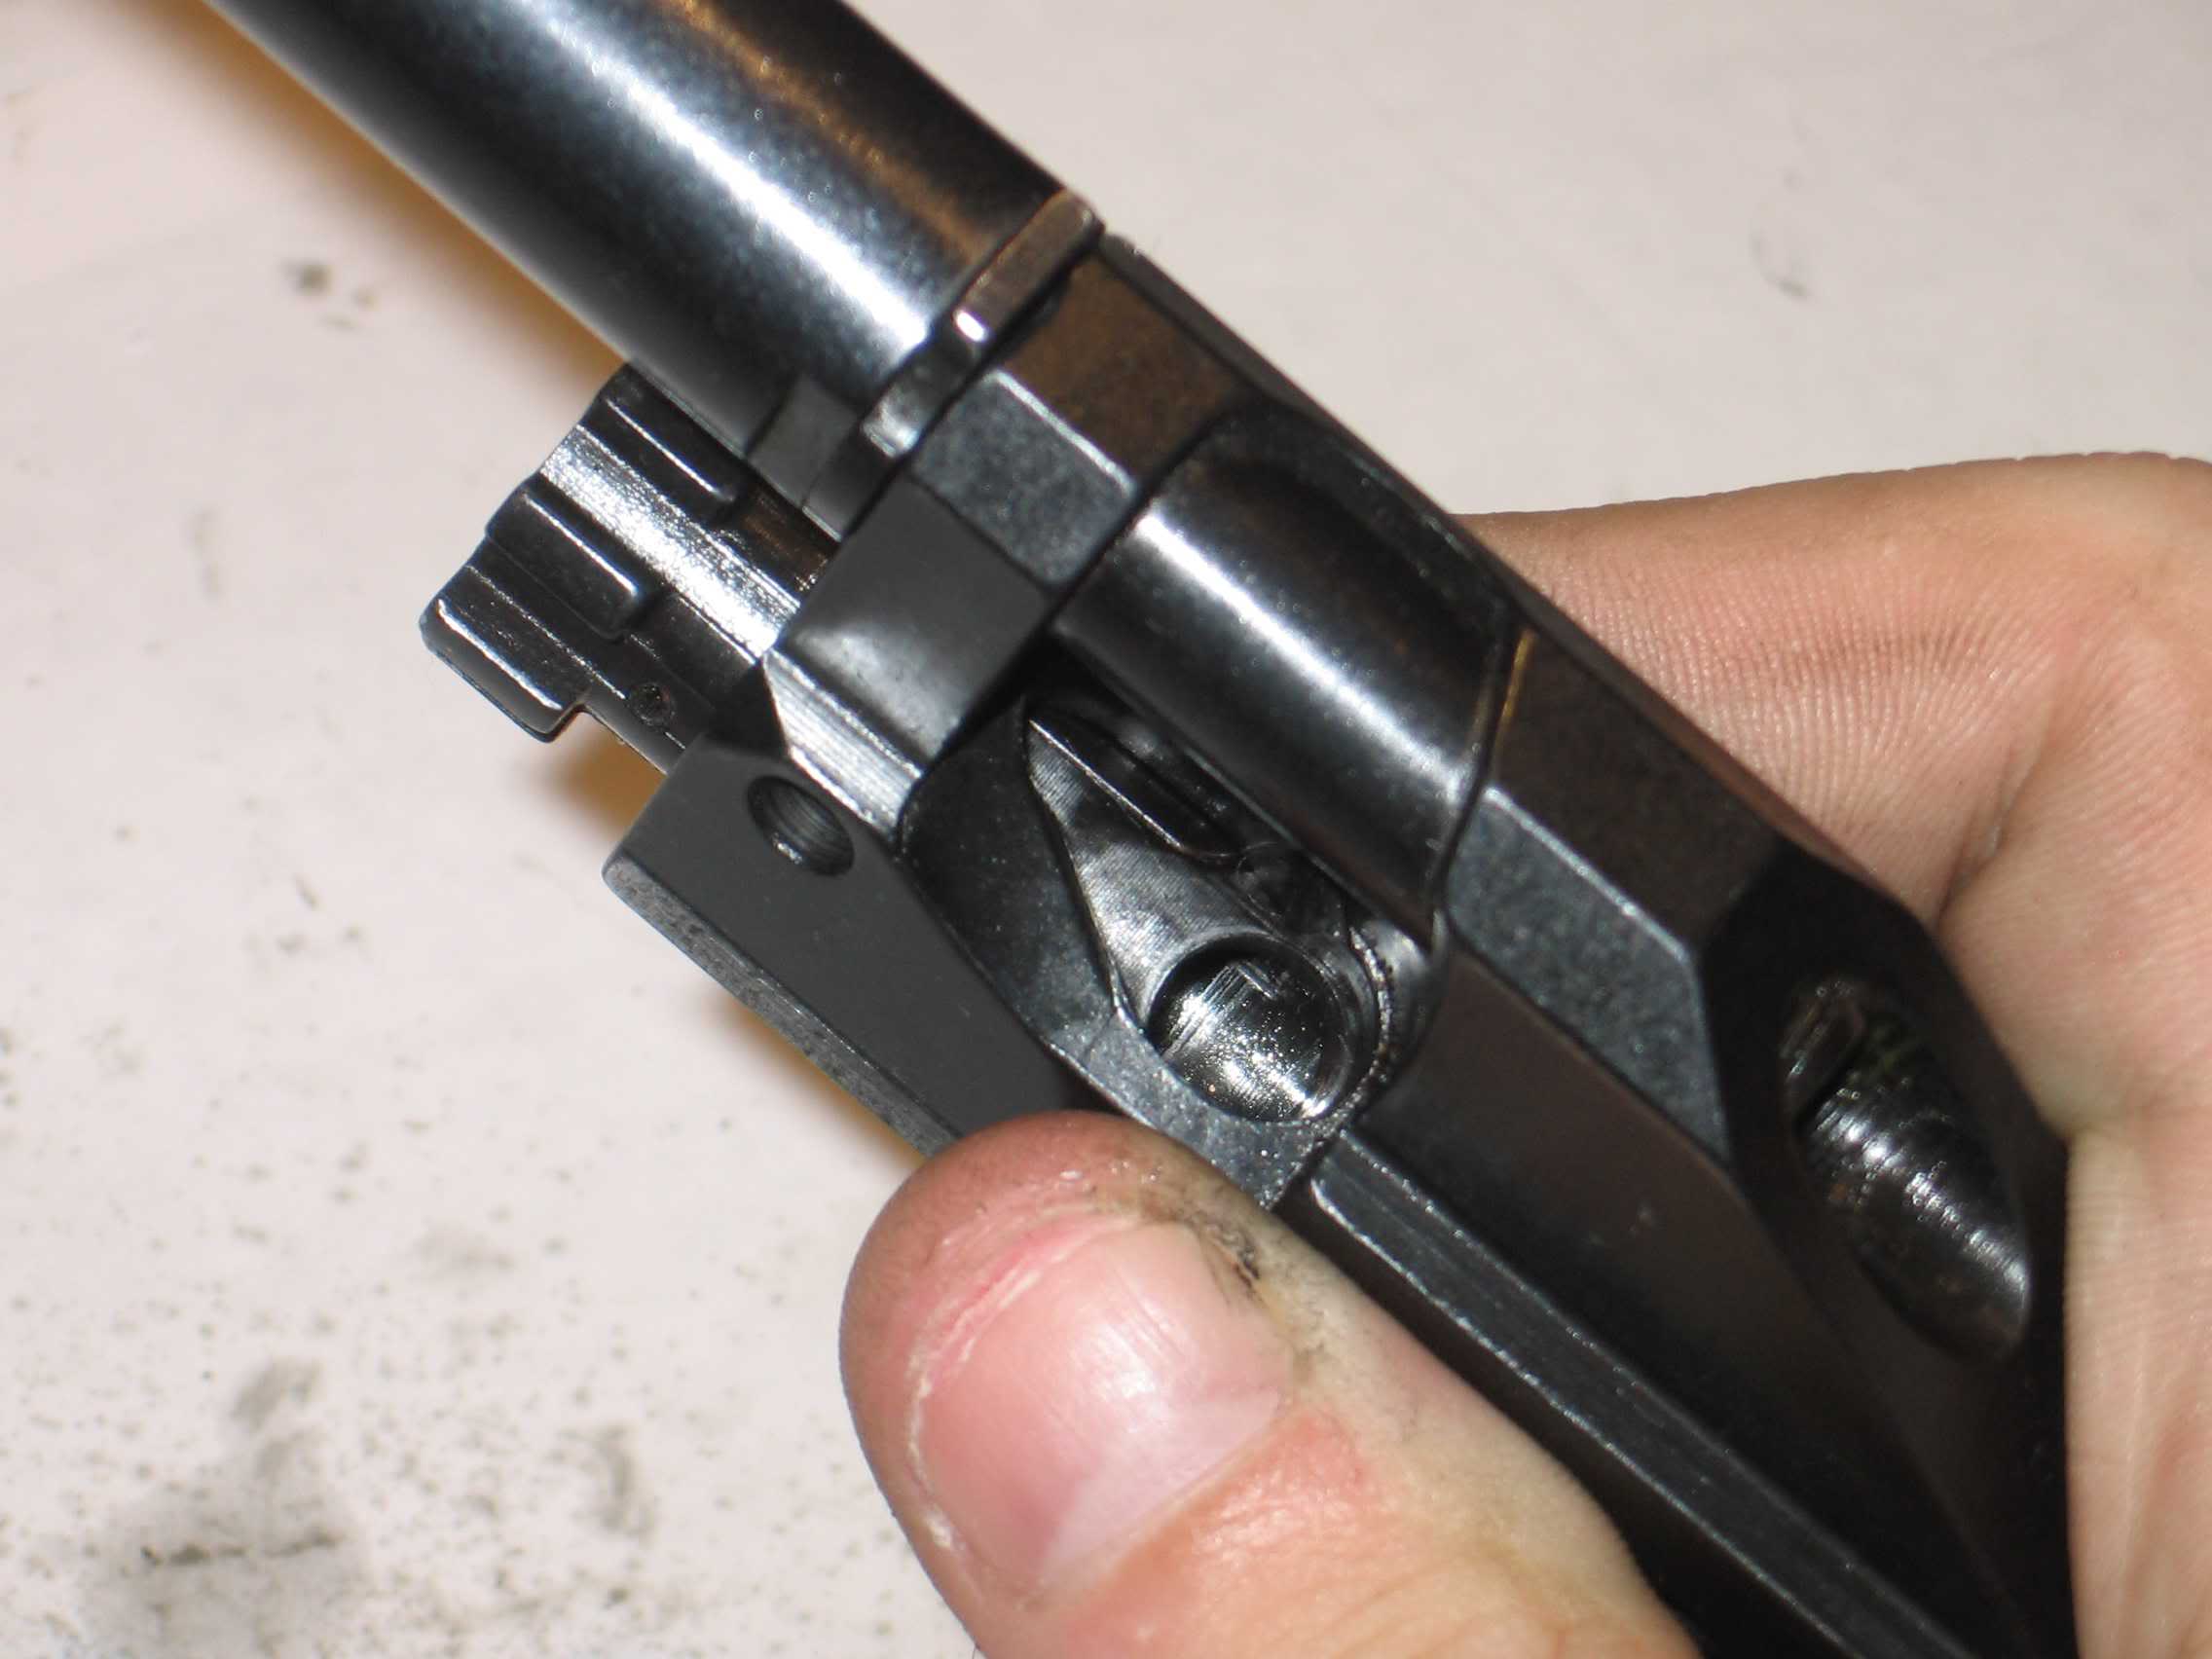
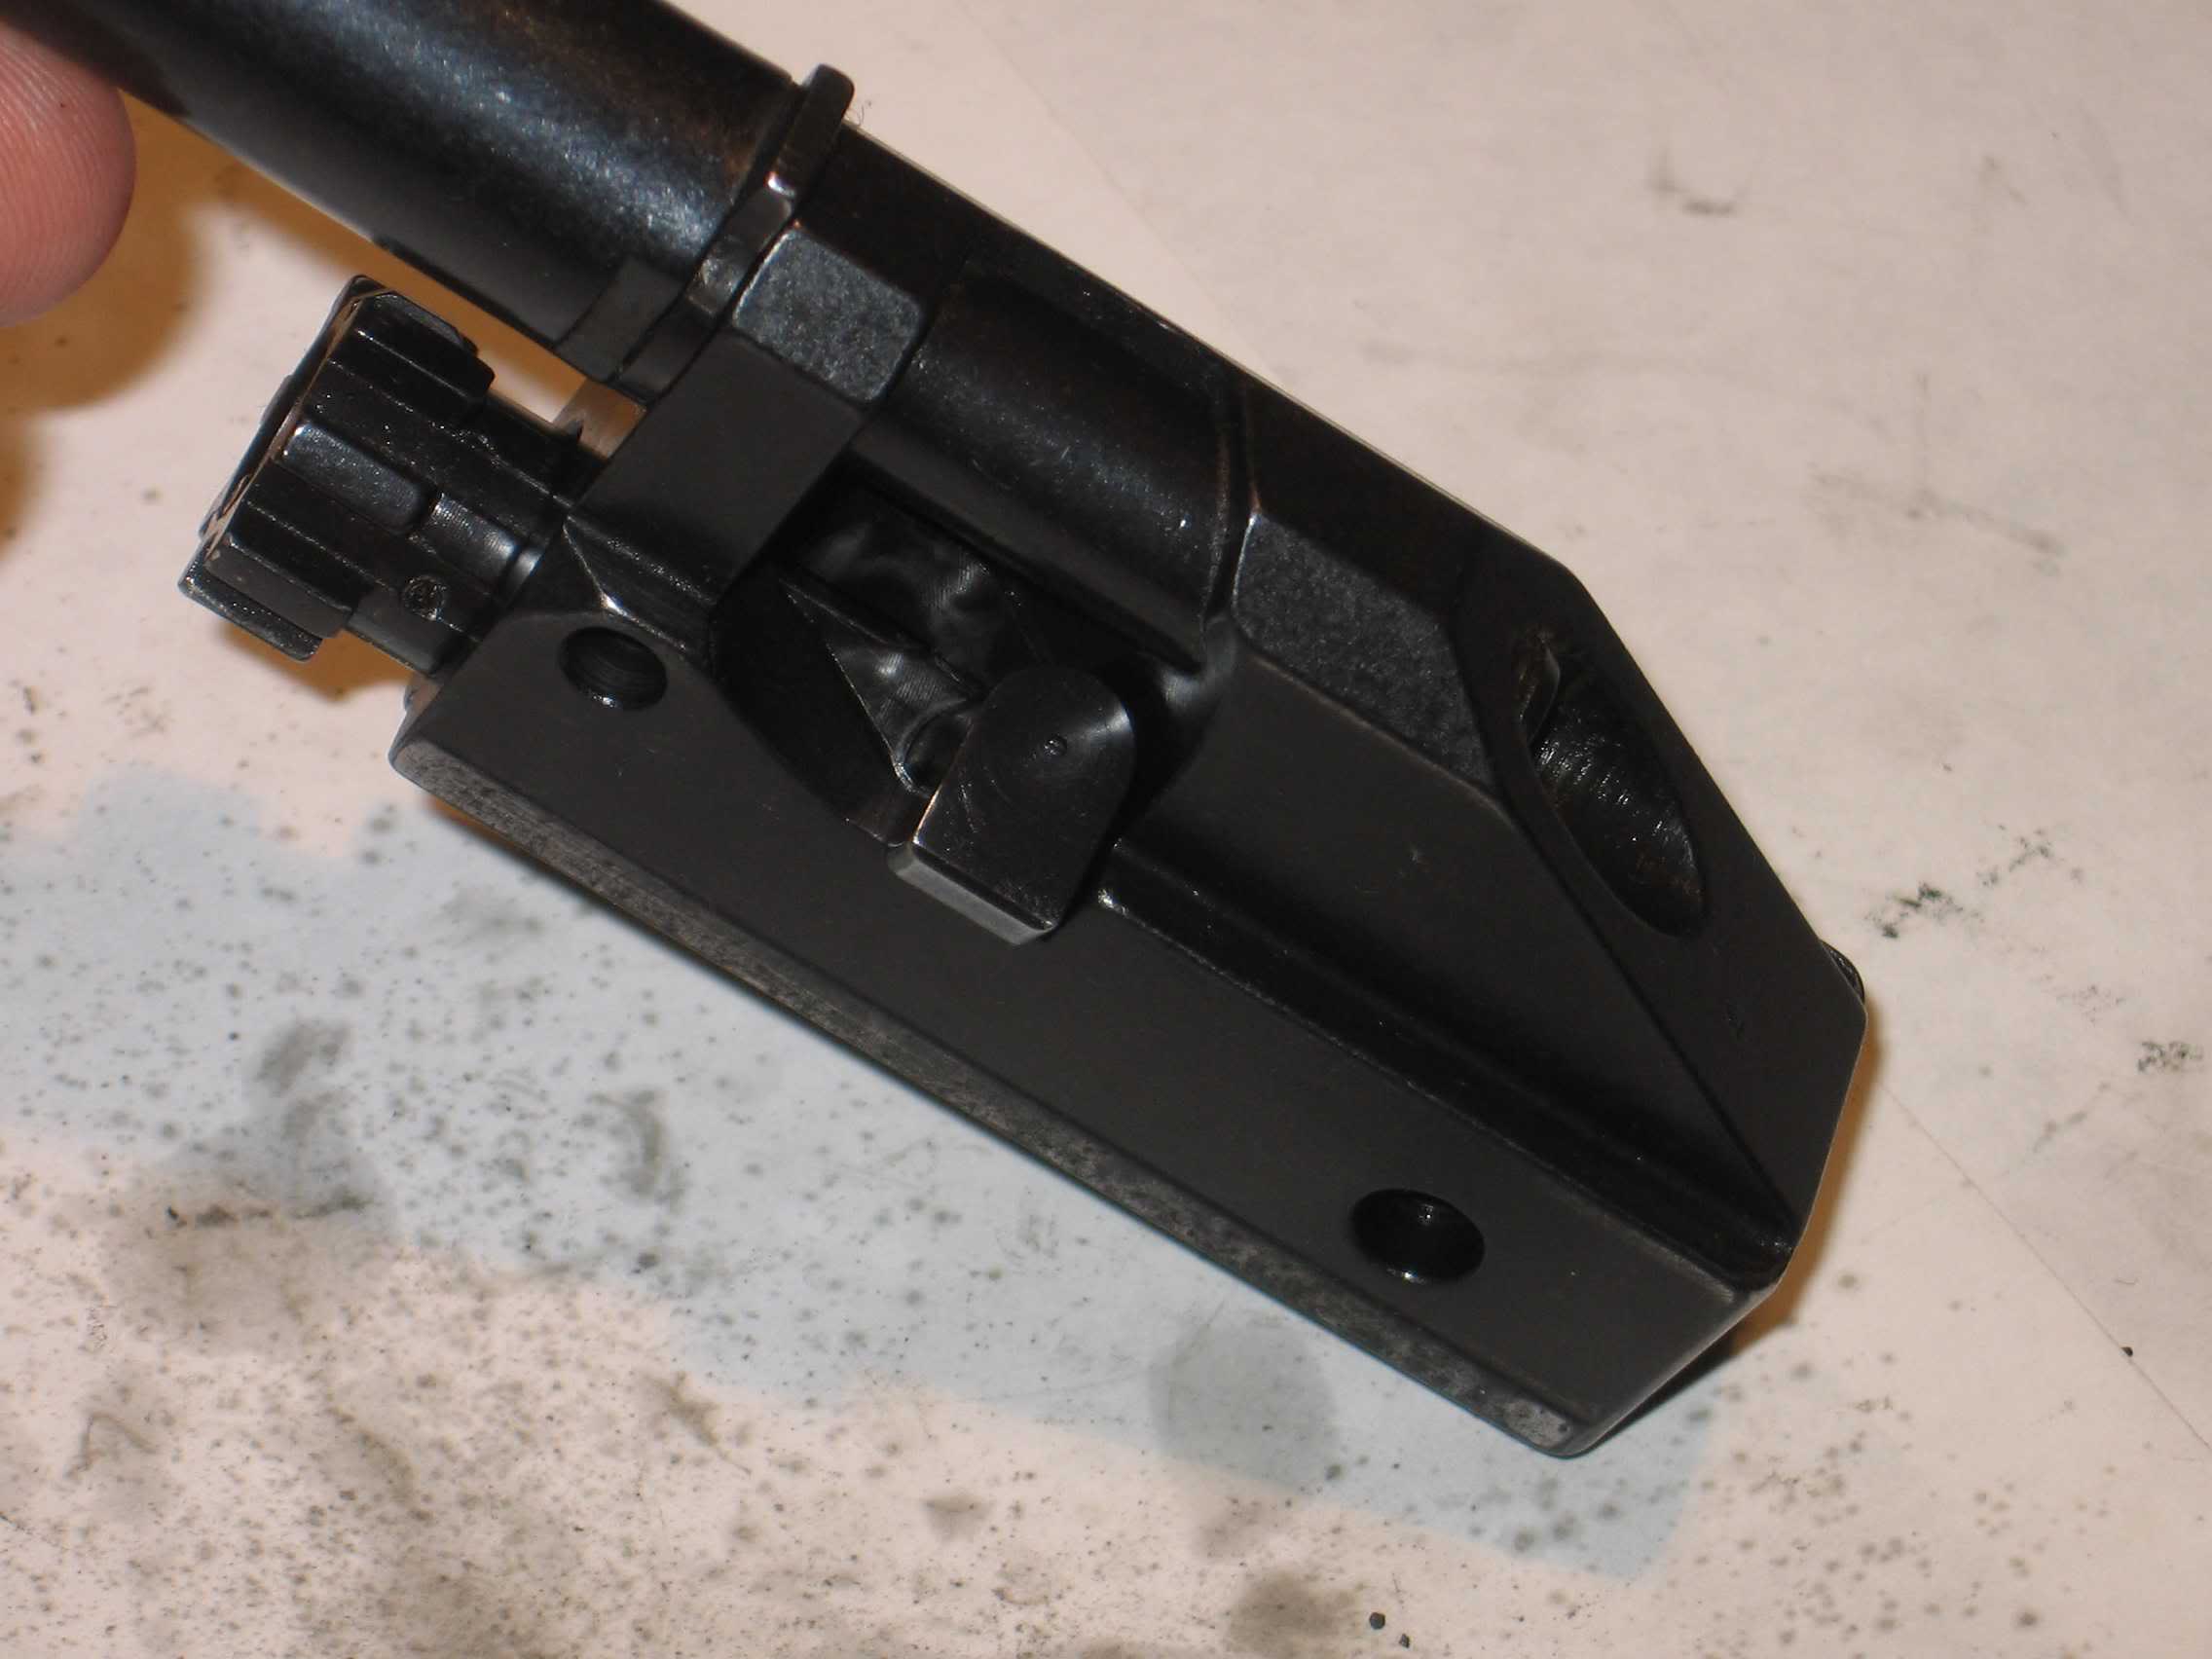
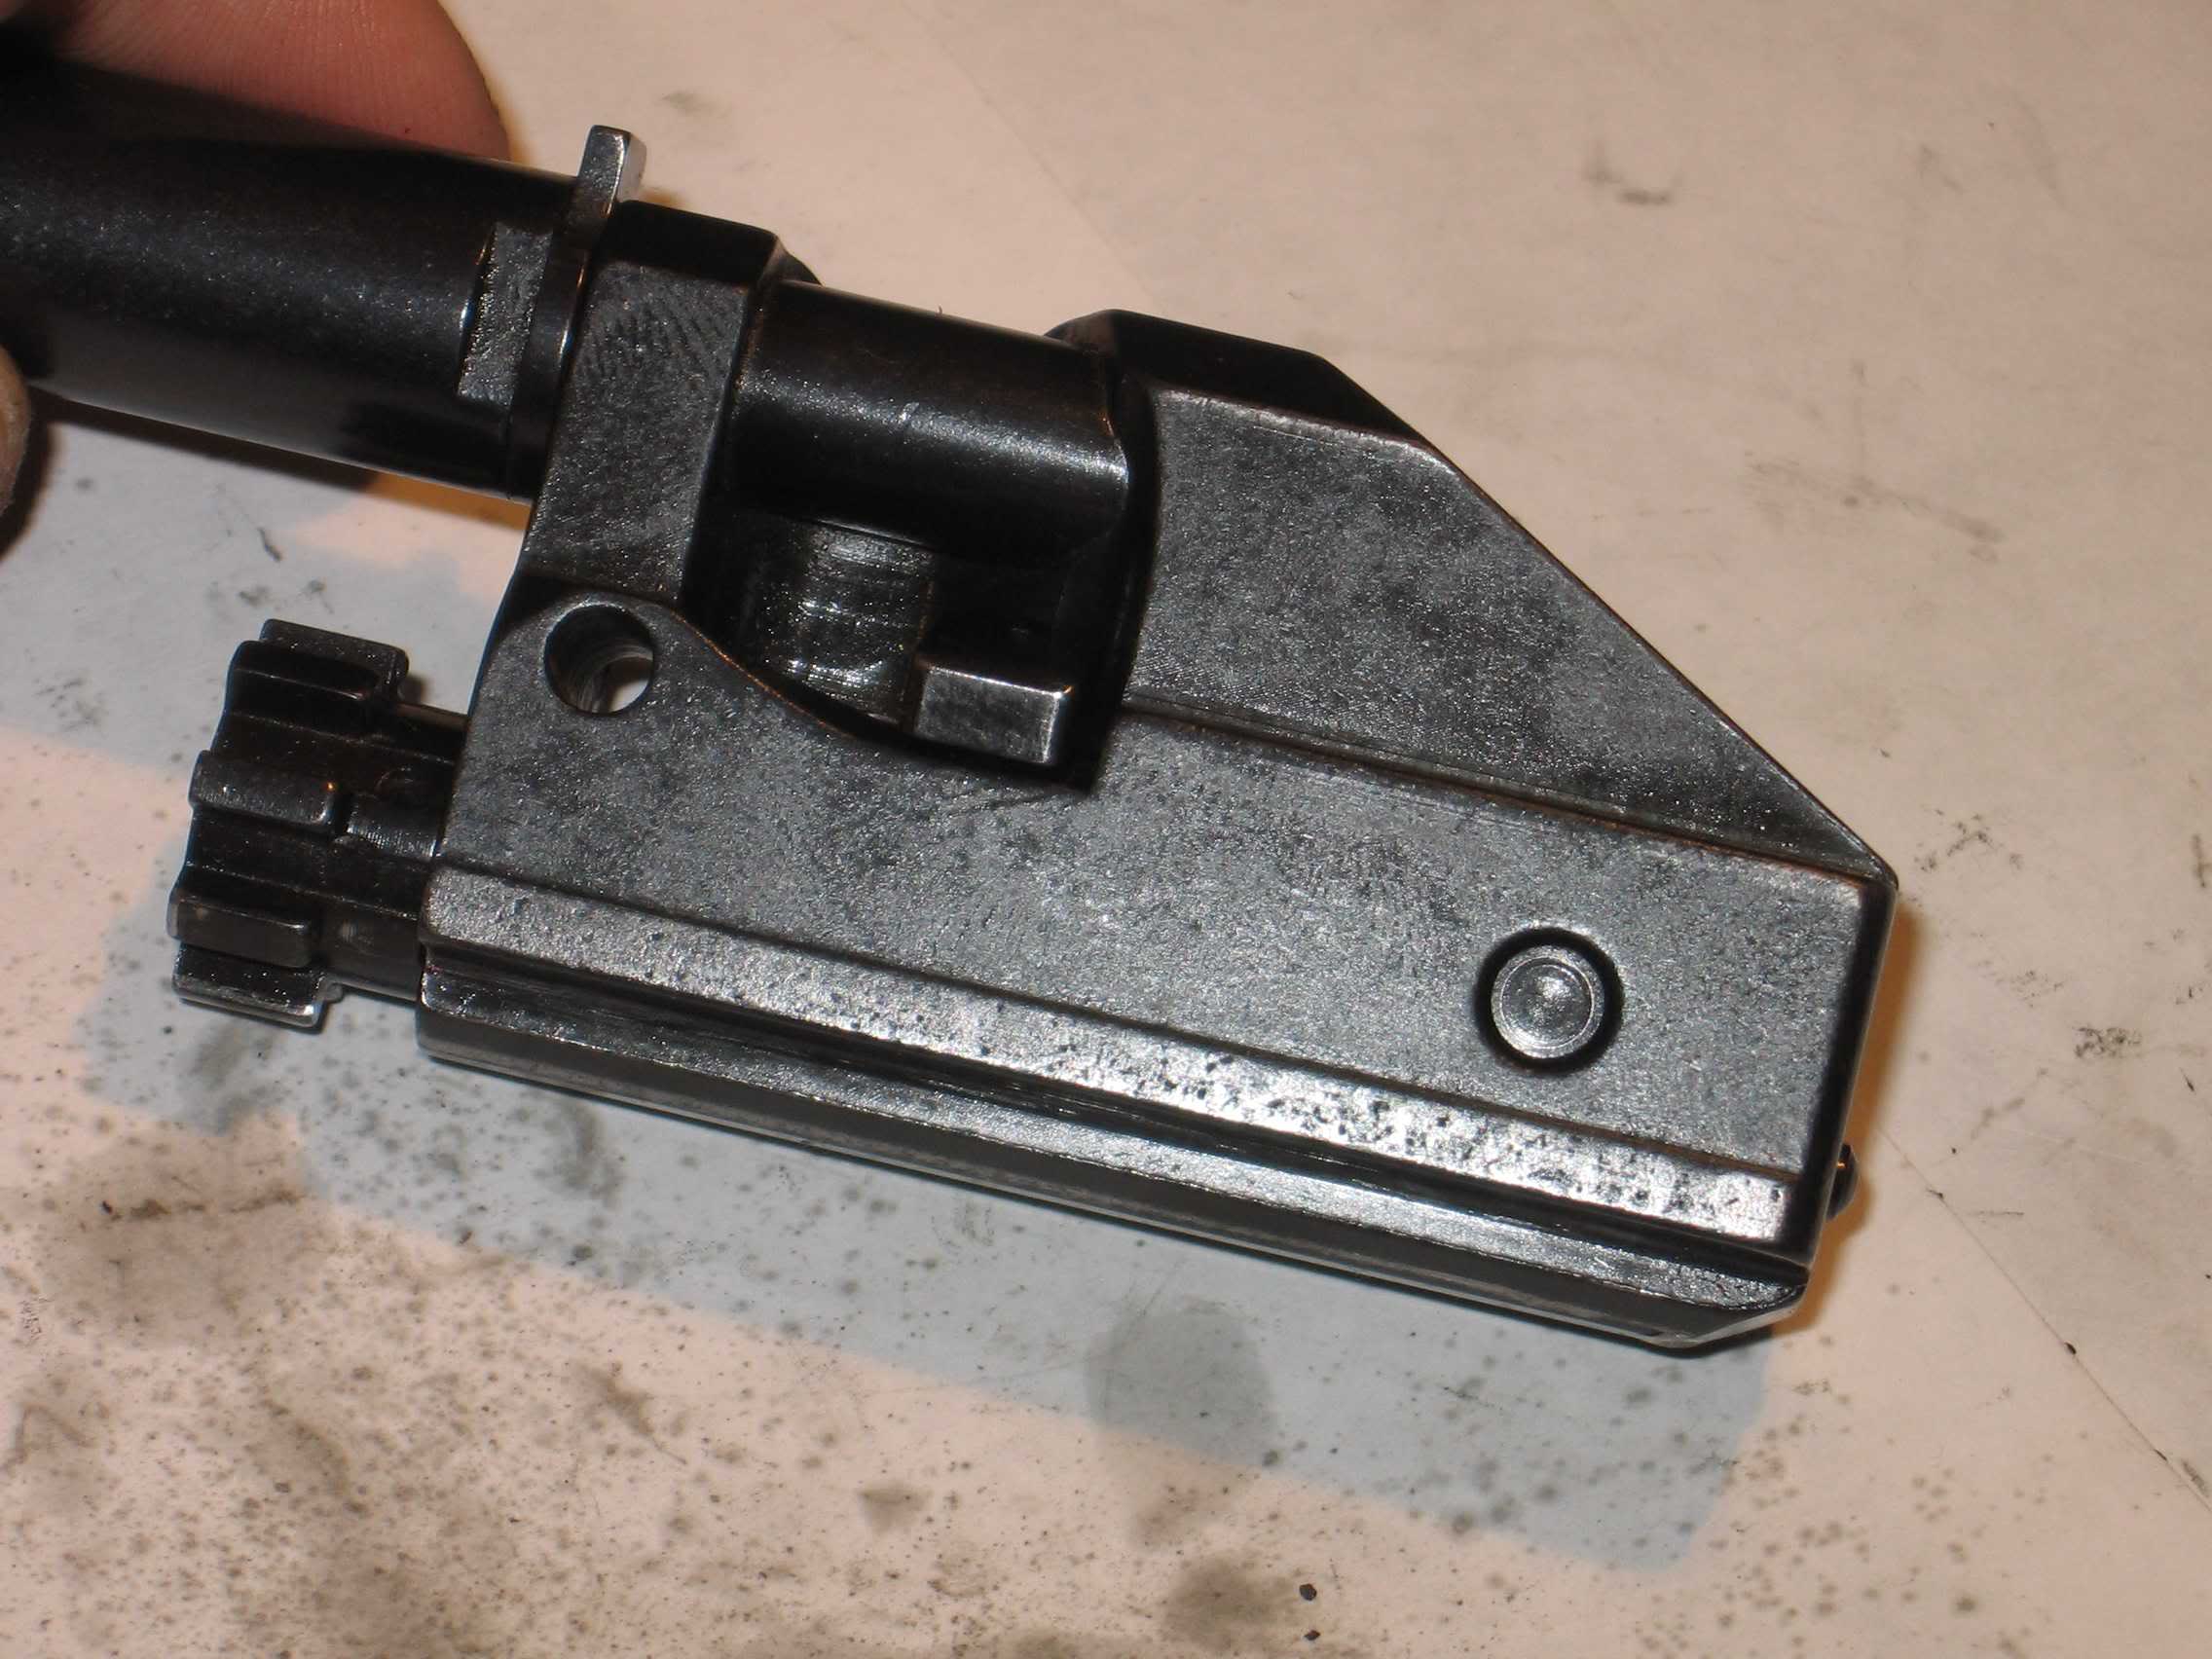
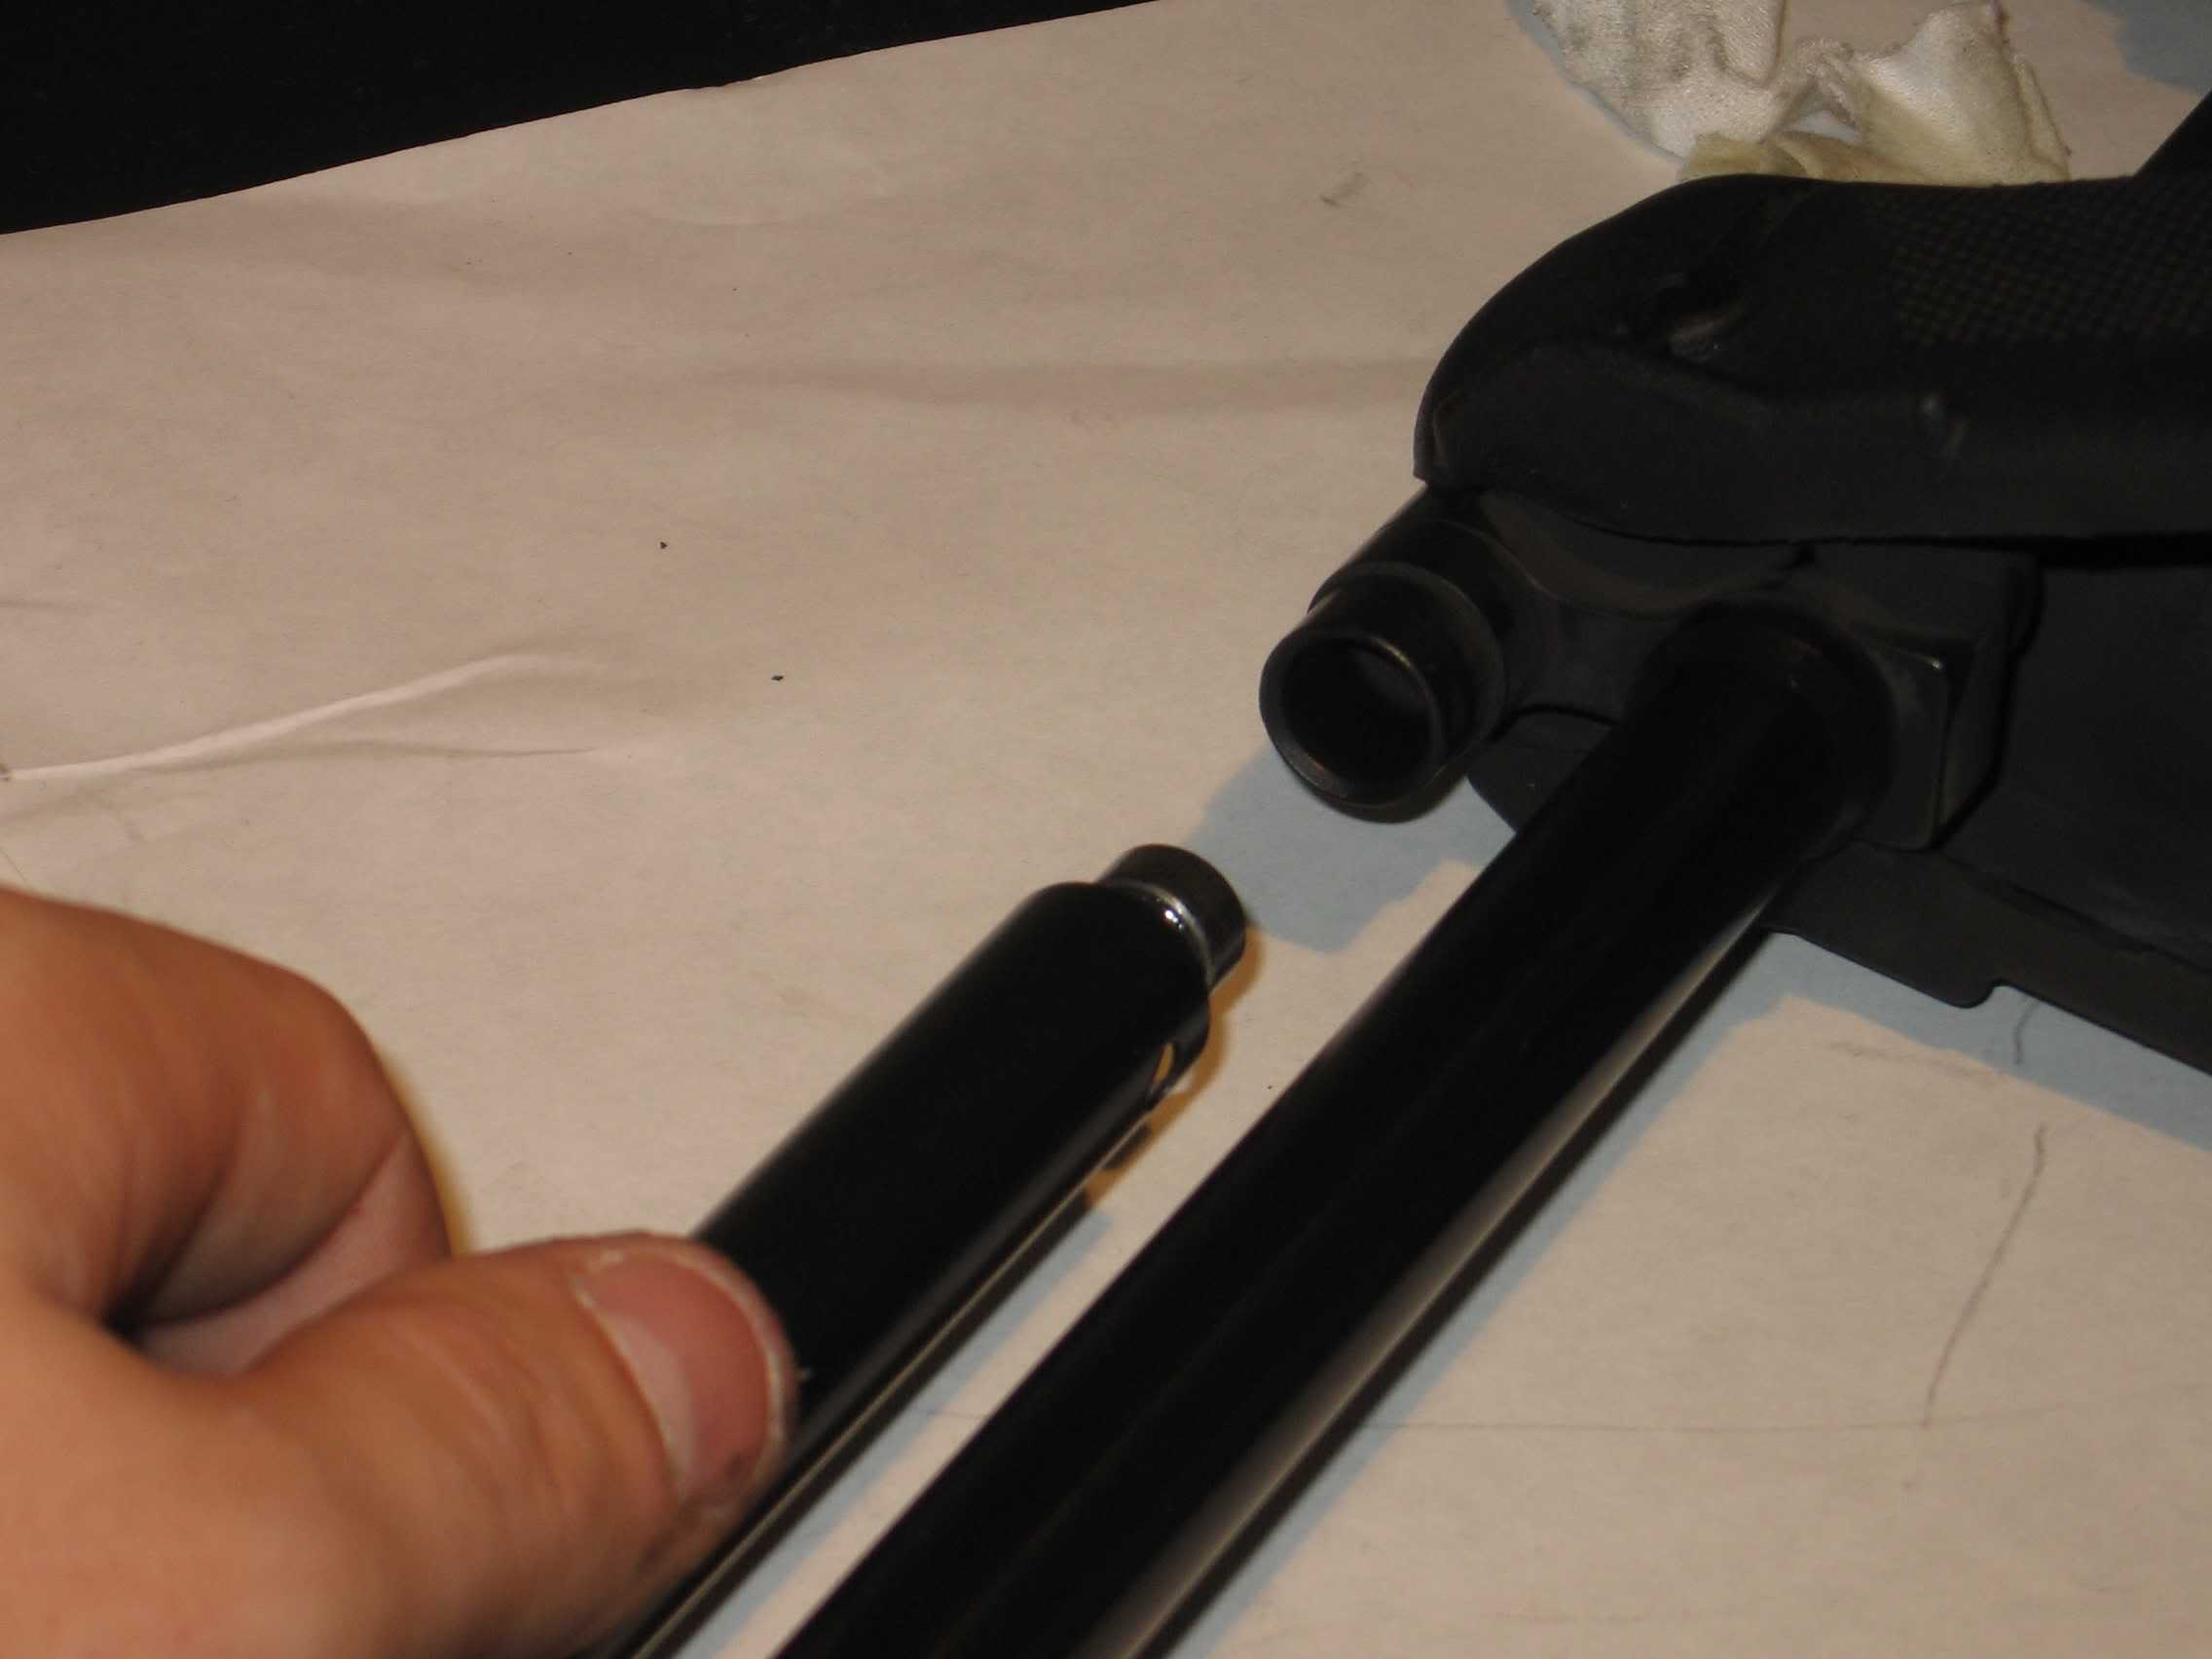
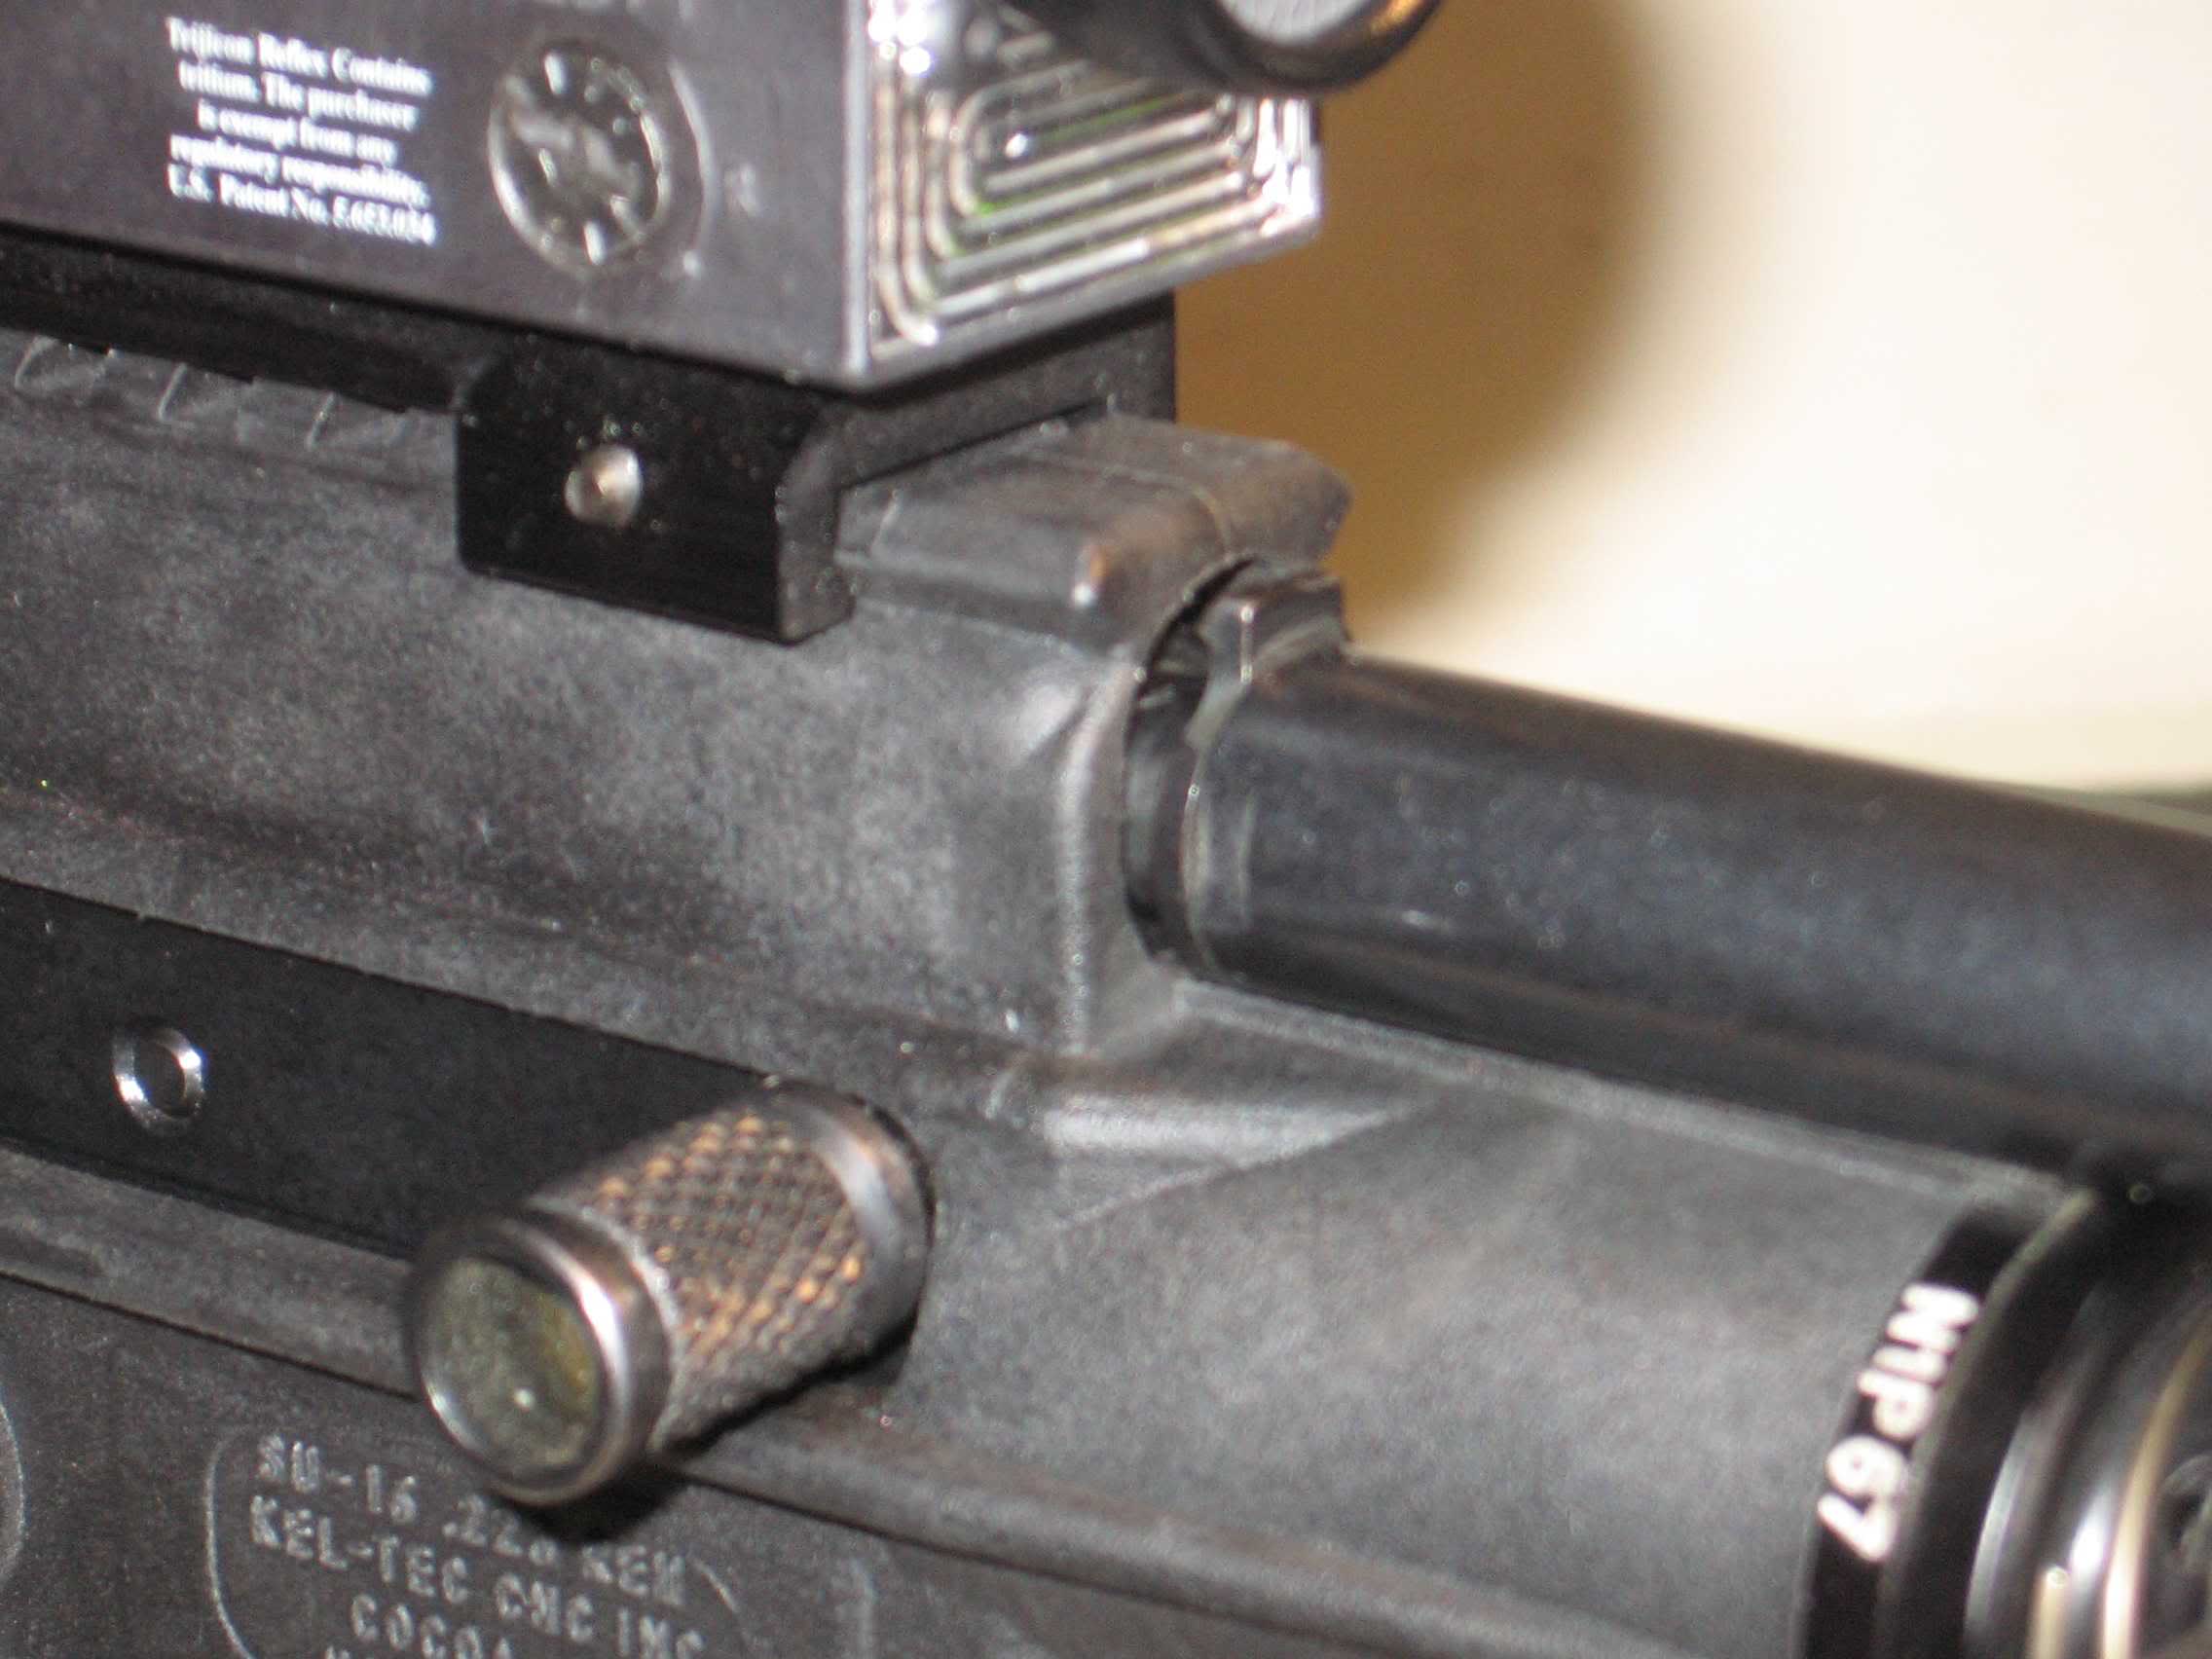
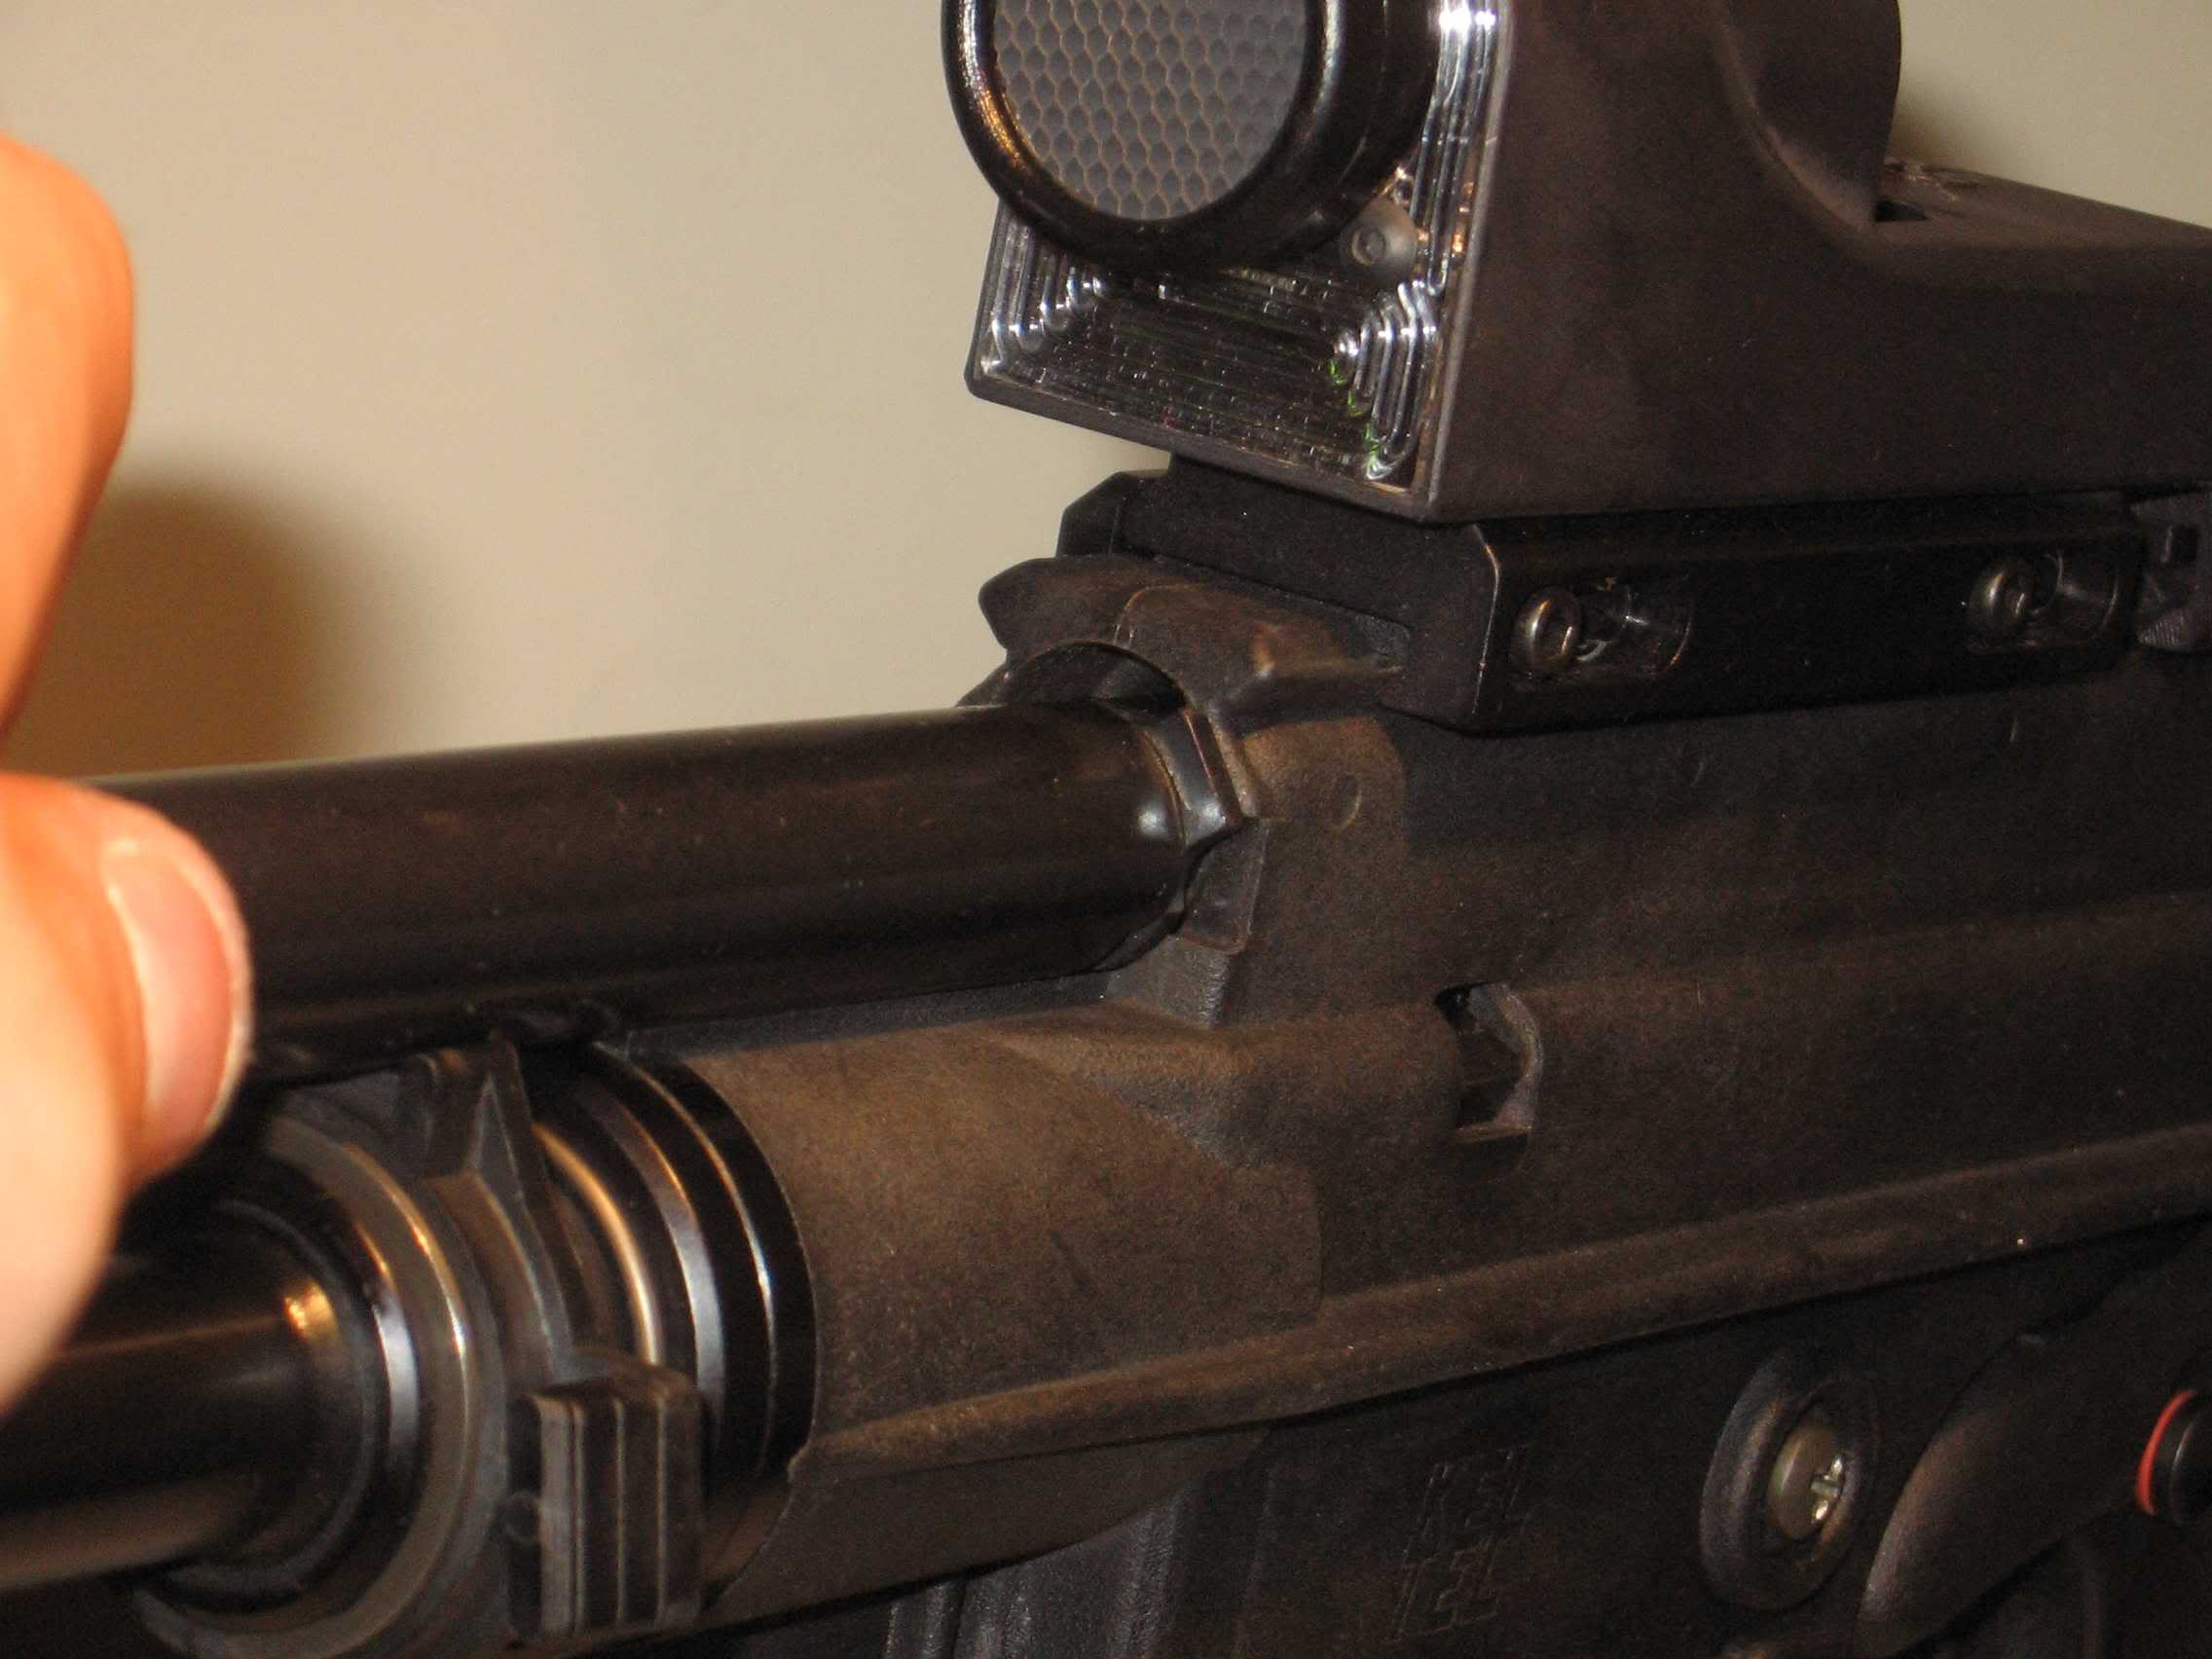
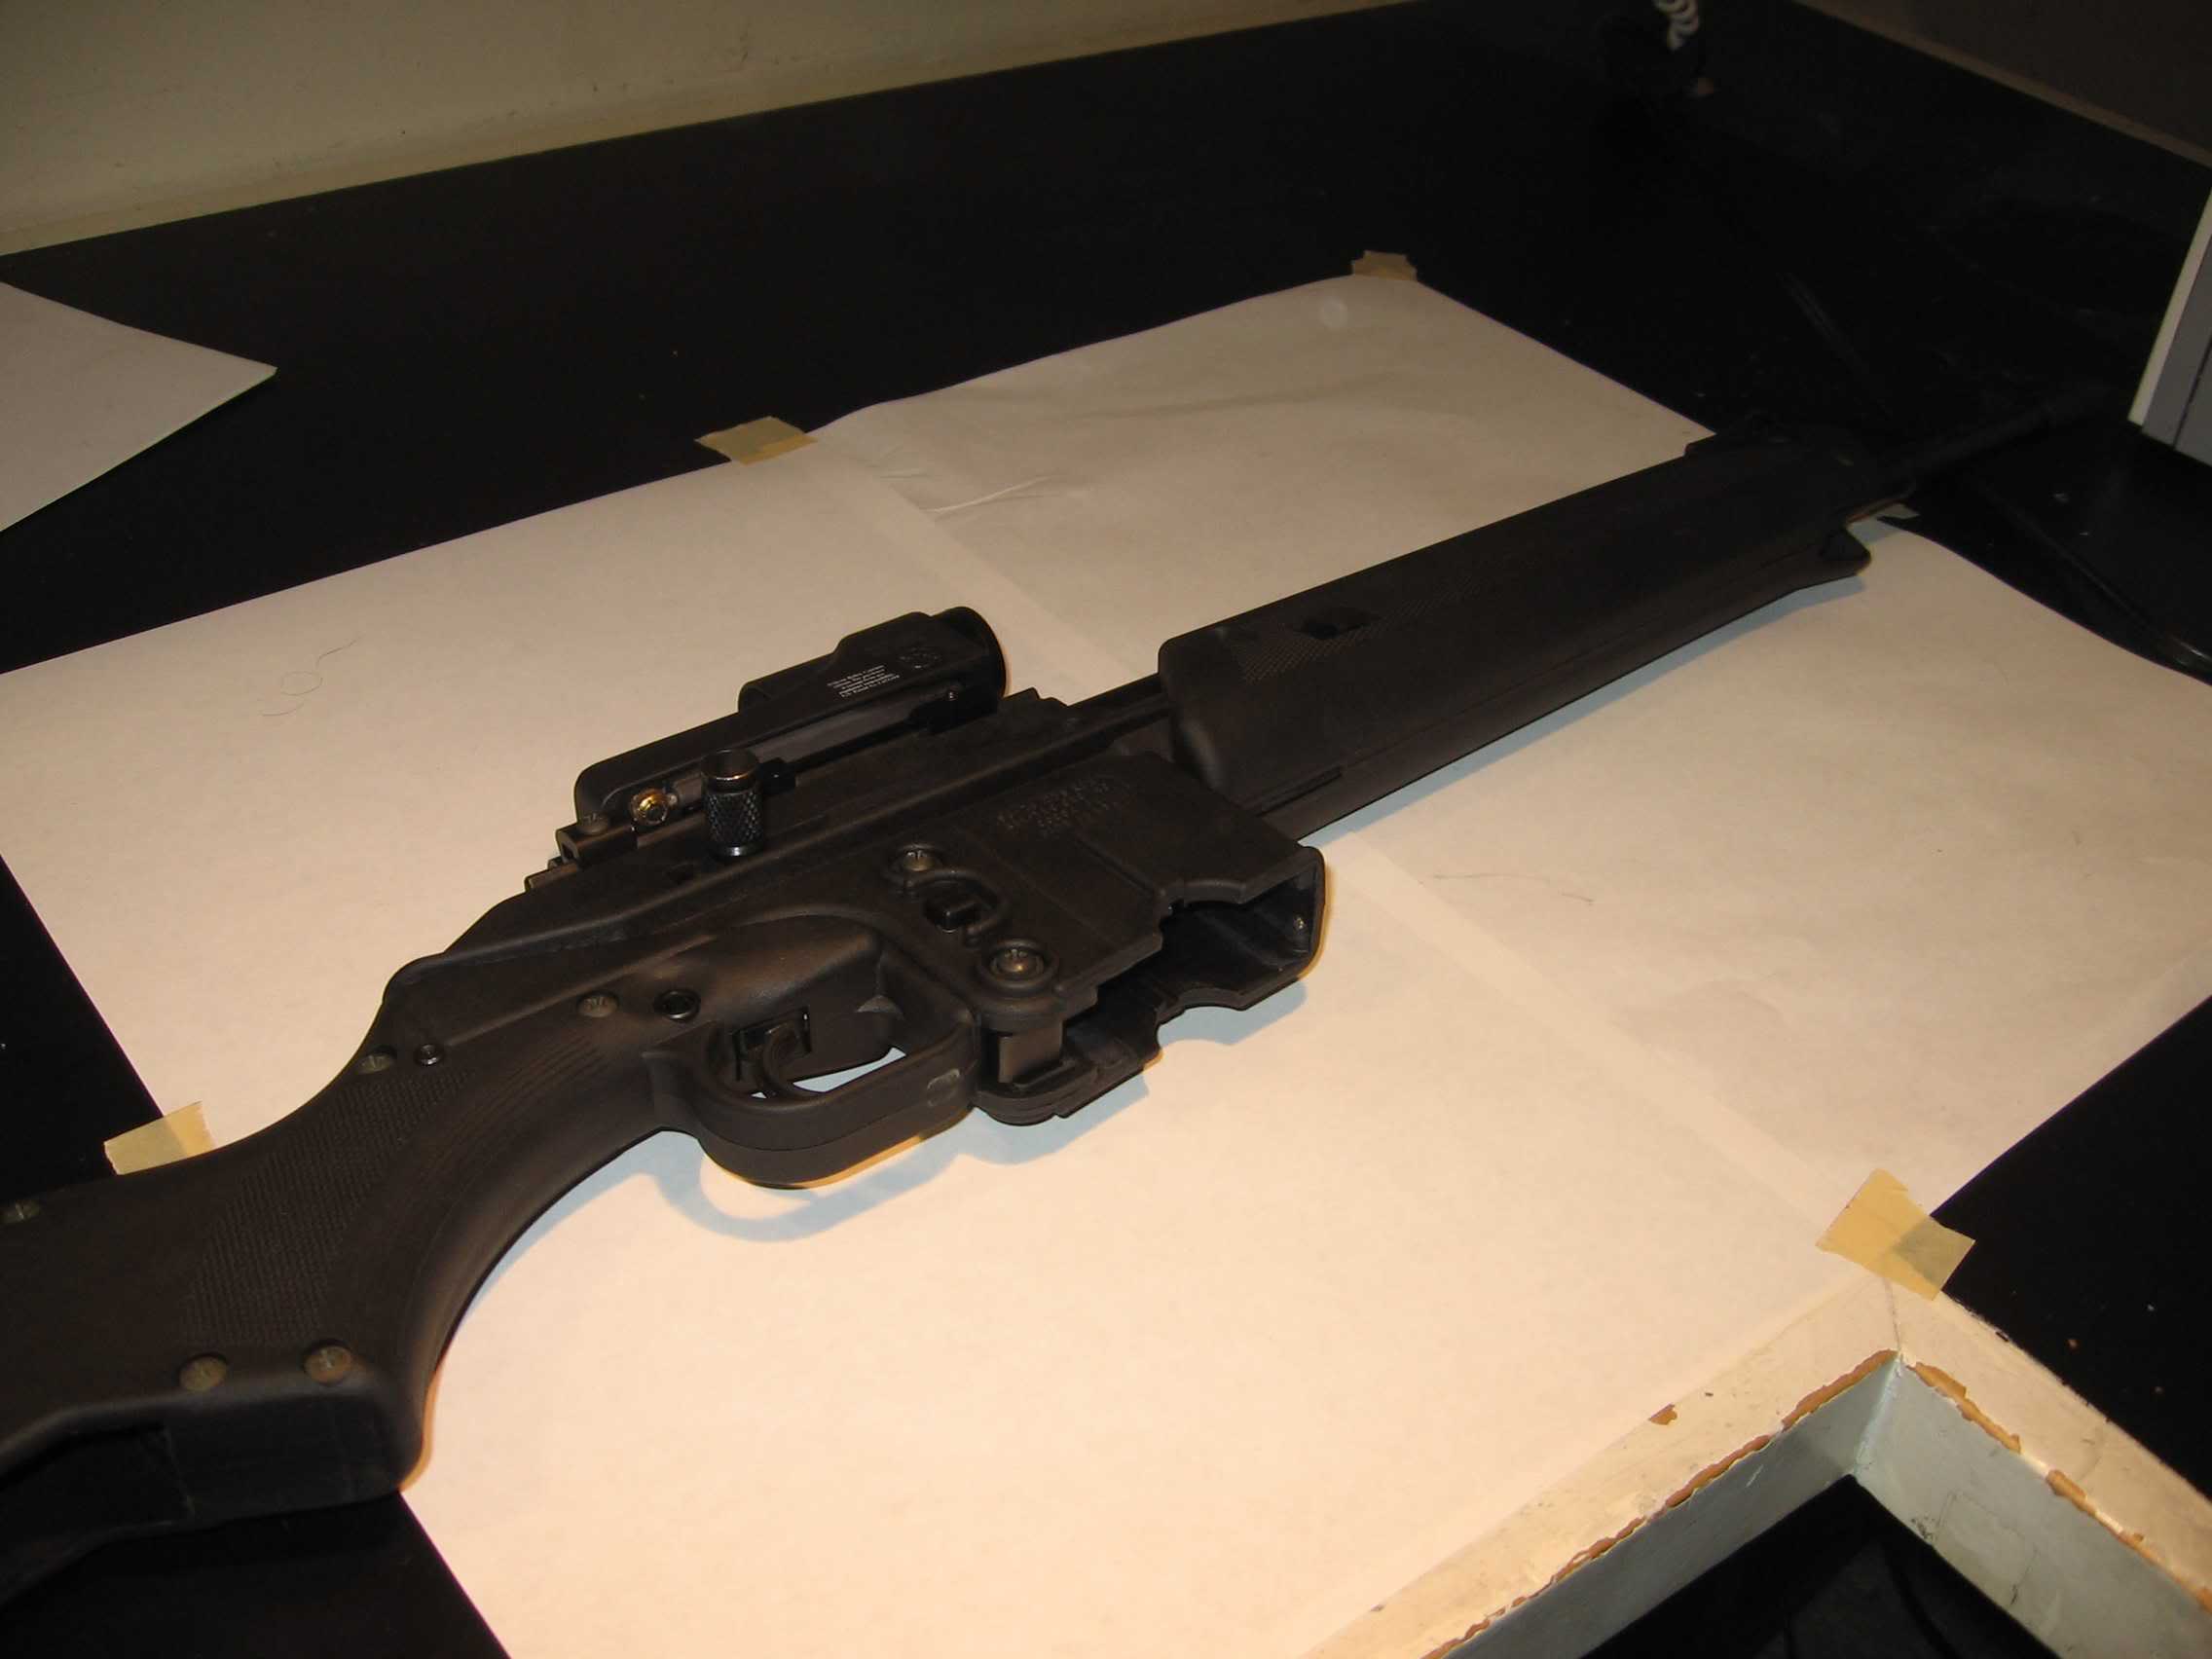
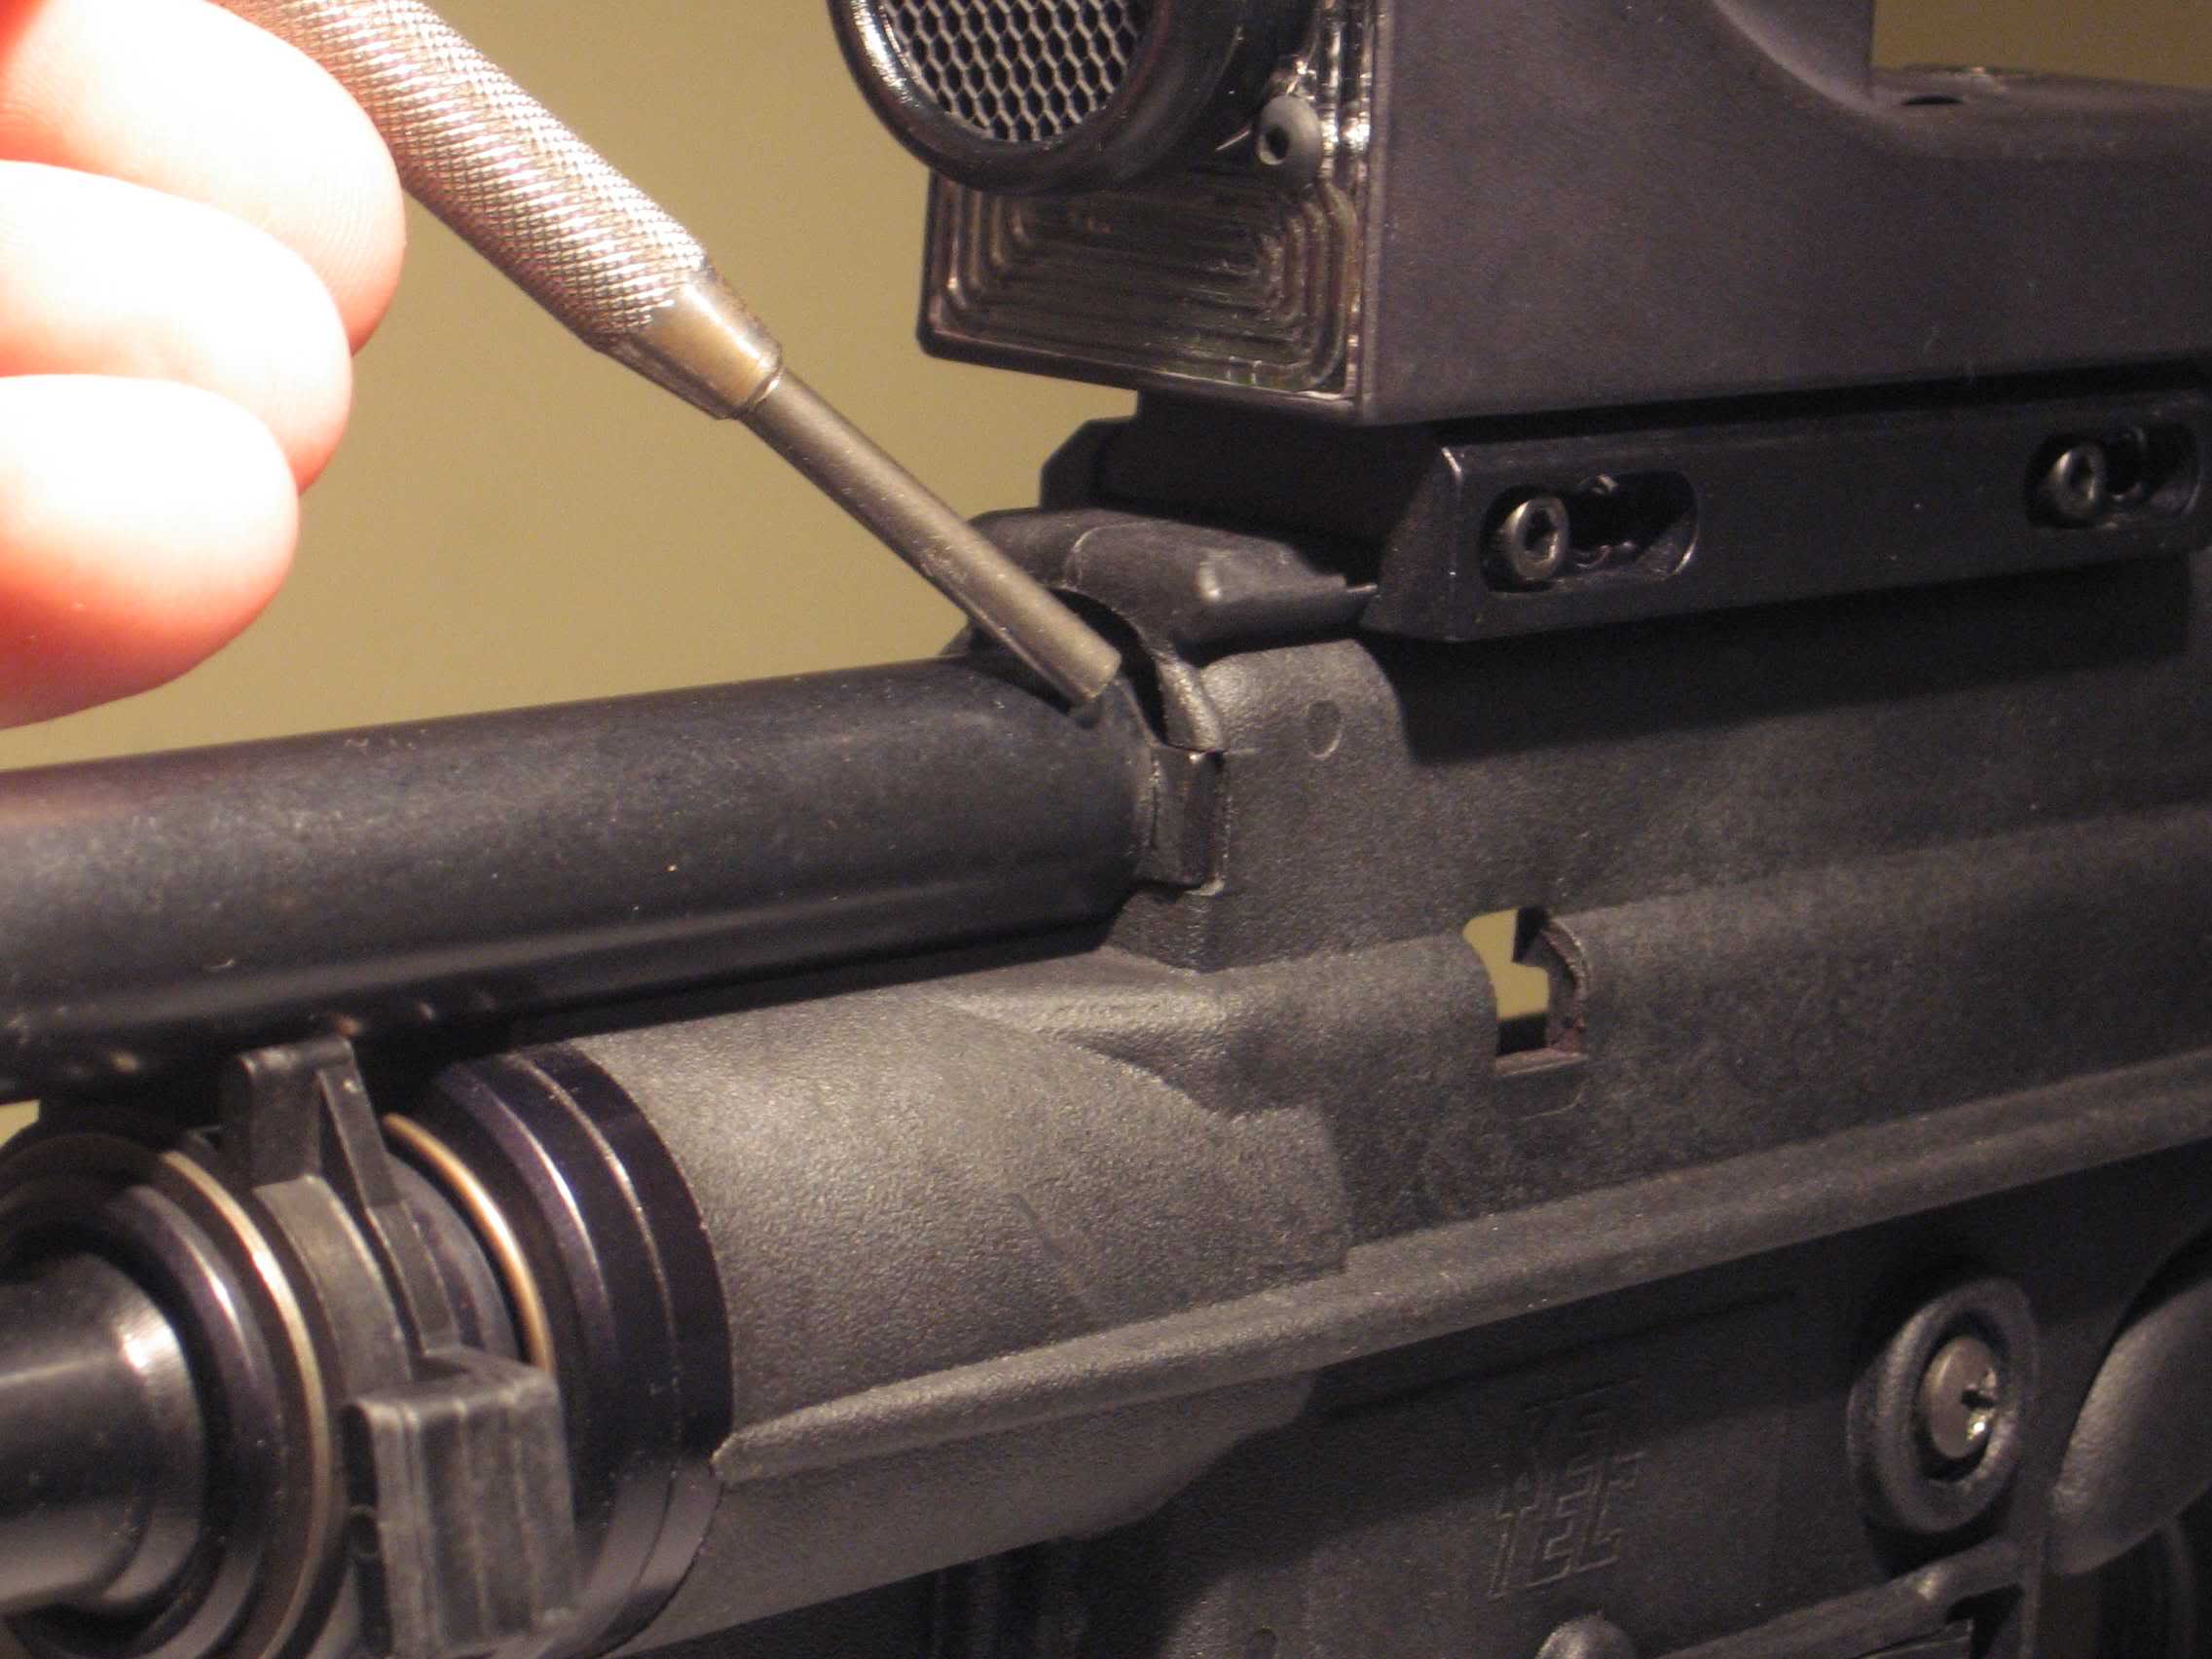
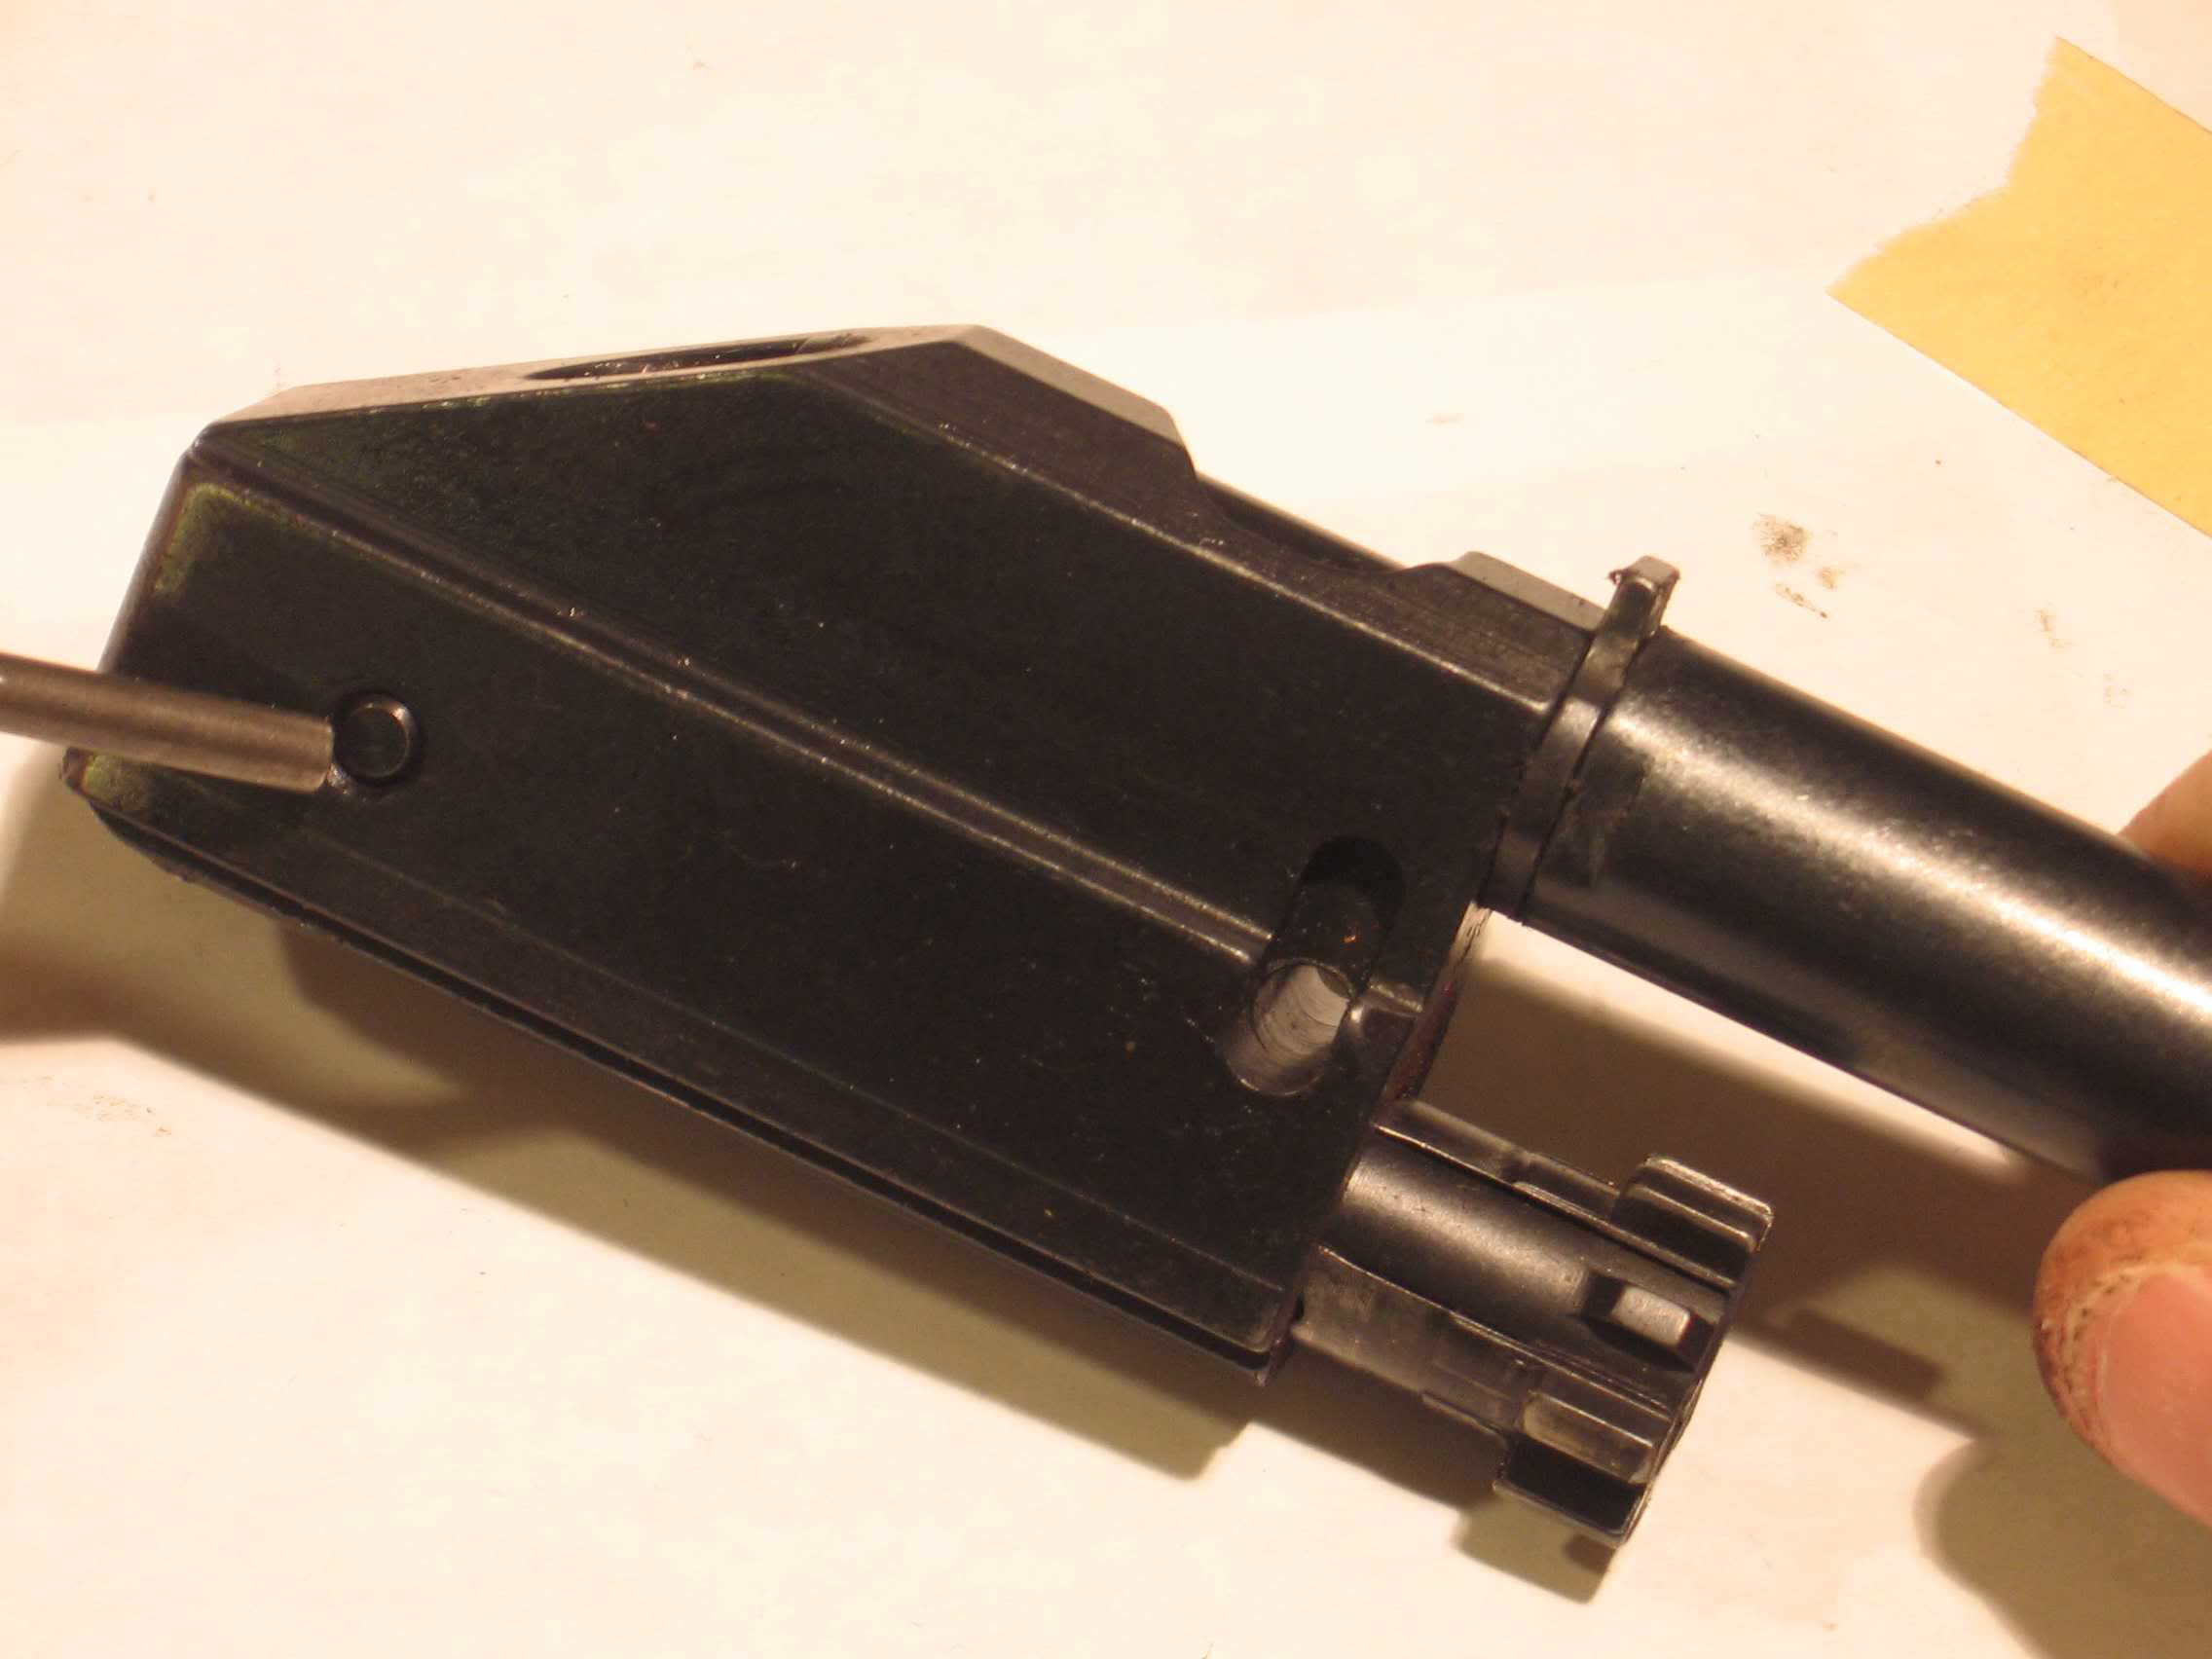
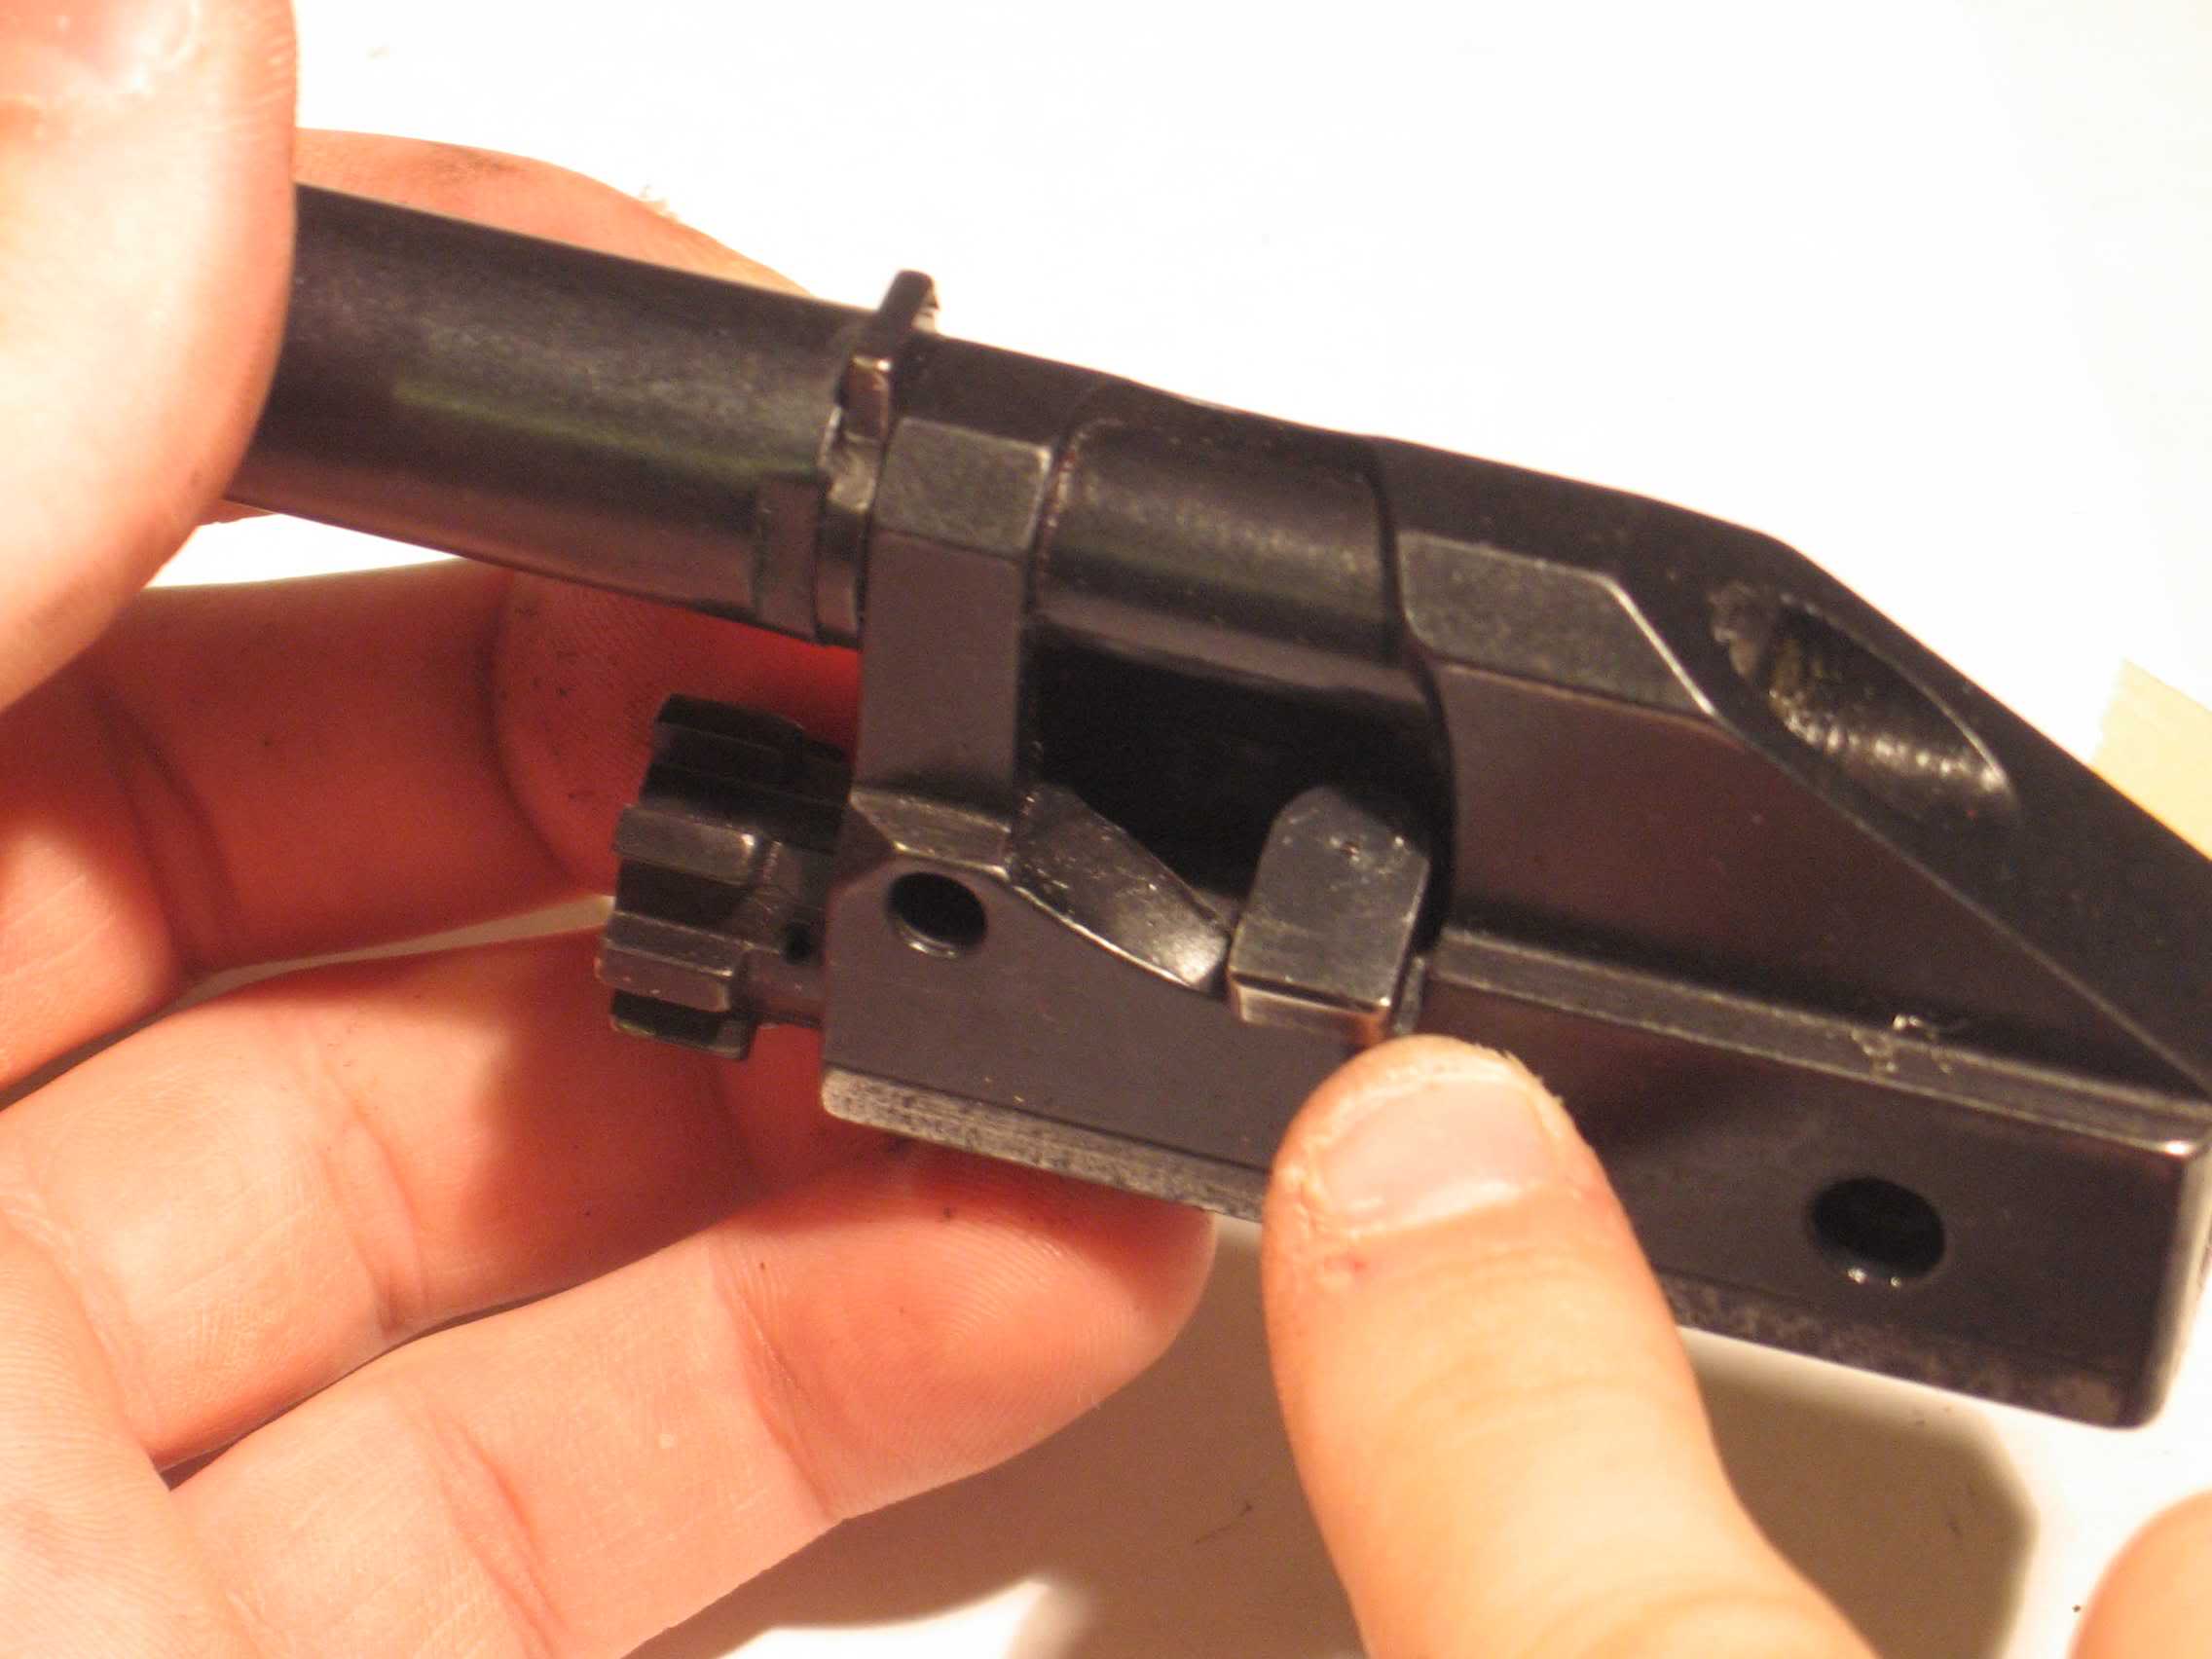
On the left side of the rifle where the gas system joins the receiver, you'll notice a small tab. First, close the bolt. Then grasp the gas tube, pull toward the front of the rifle, and rotate counterclockwise. When the tab reaches the vertical position, the gas system and bolt carrier will no longer be under spring tension.


Step 4: Fold the stock forward, which will allow you to remove the bolt carrier. Move the charging handle to the rear. When it reaches the rearmost position, move it down a milimeter or so, then remove the charging handle.

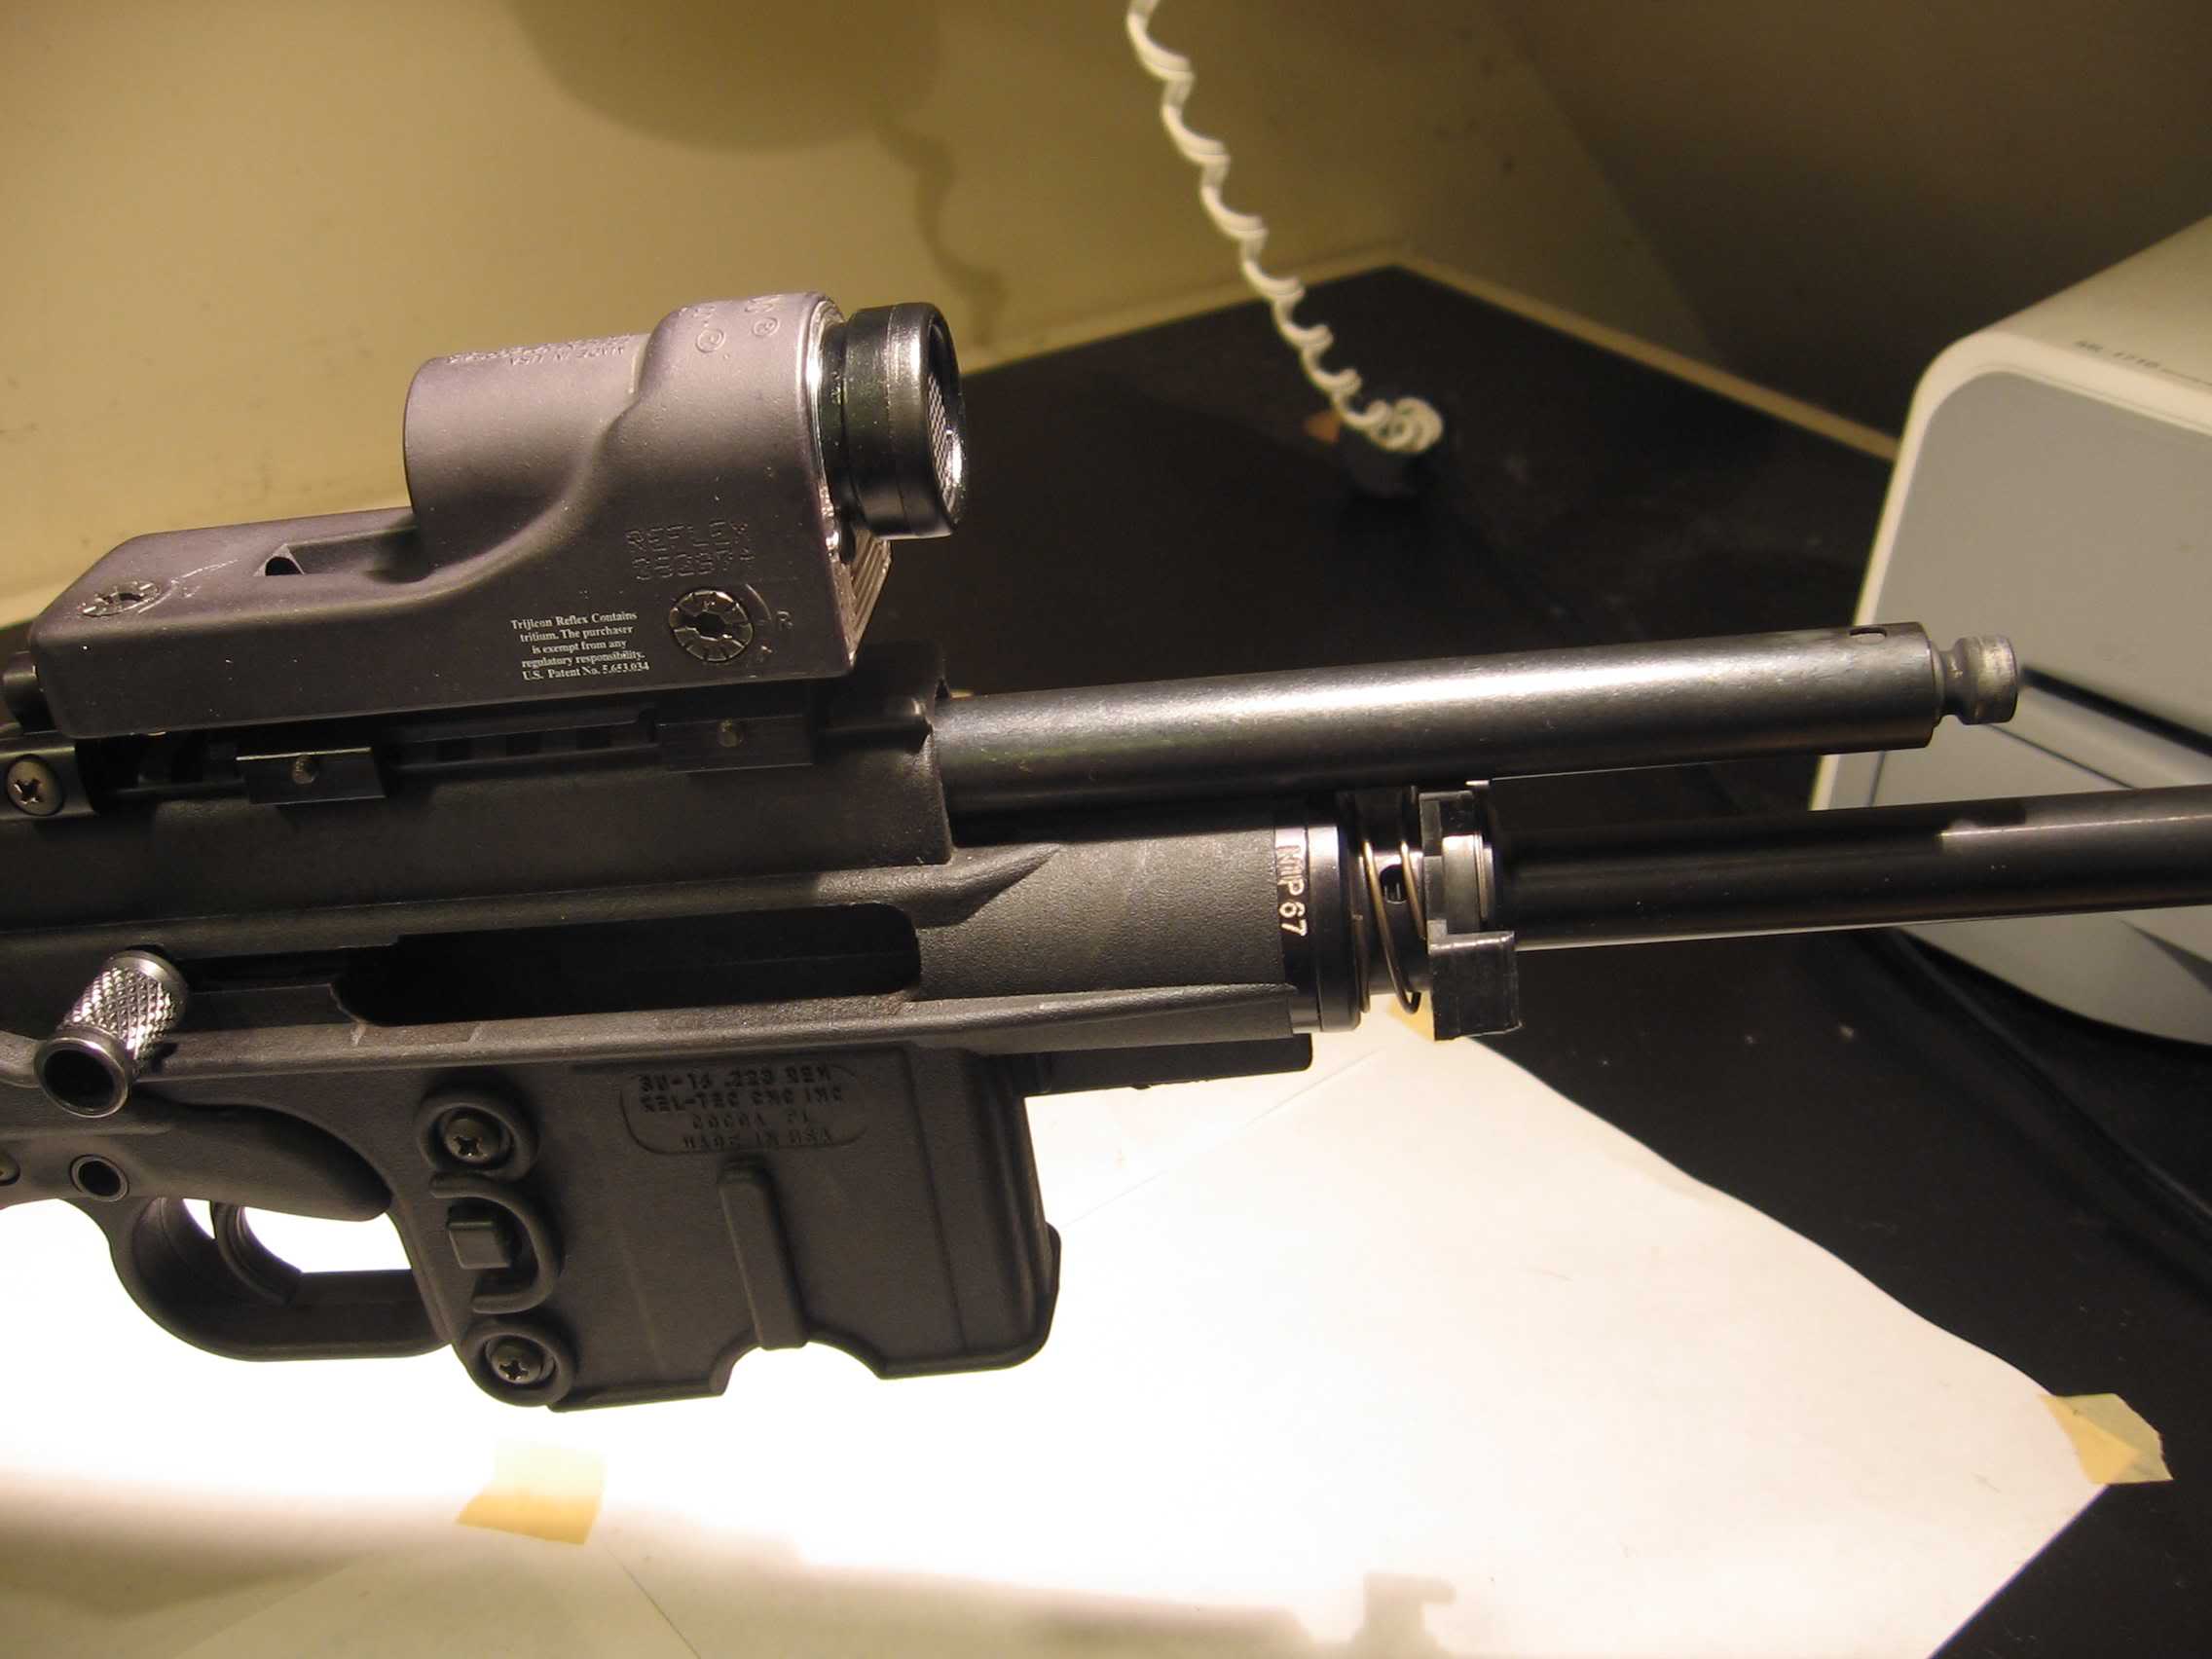
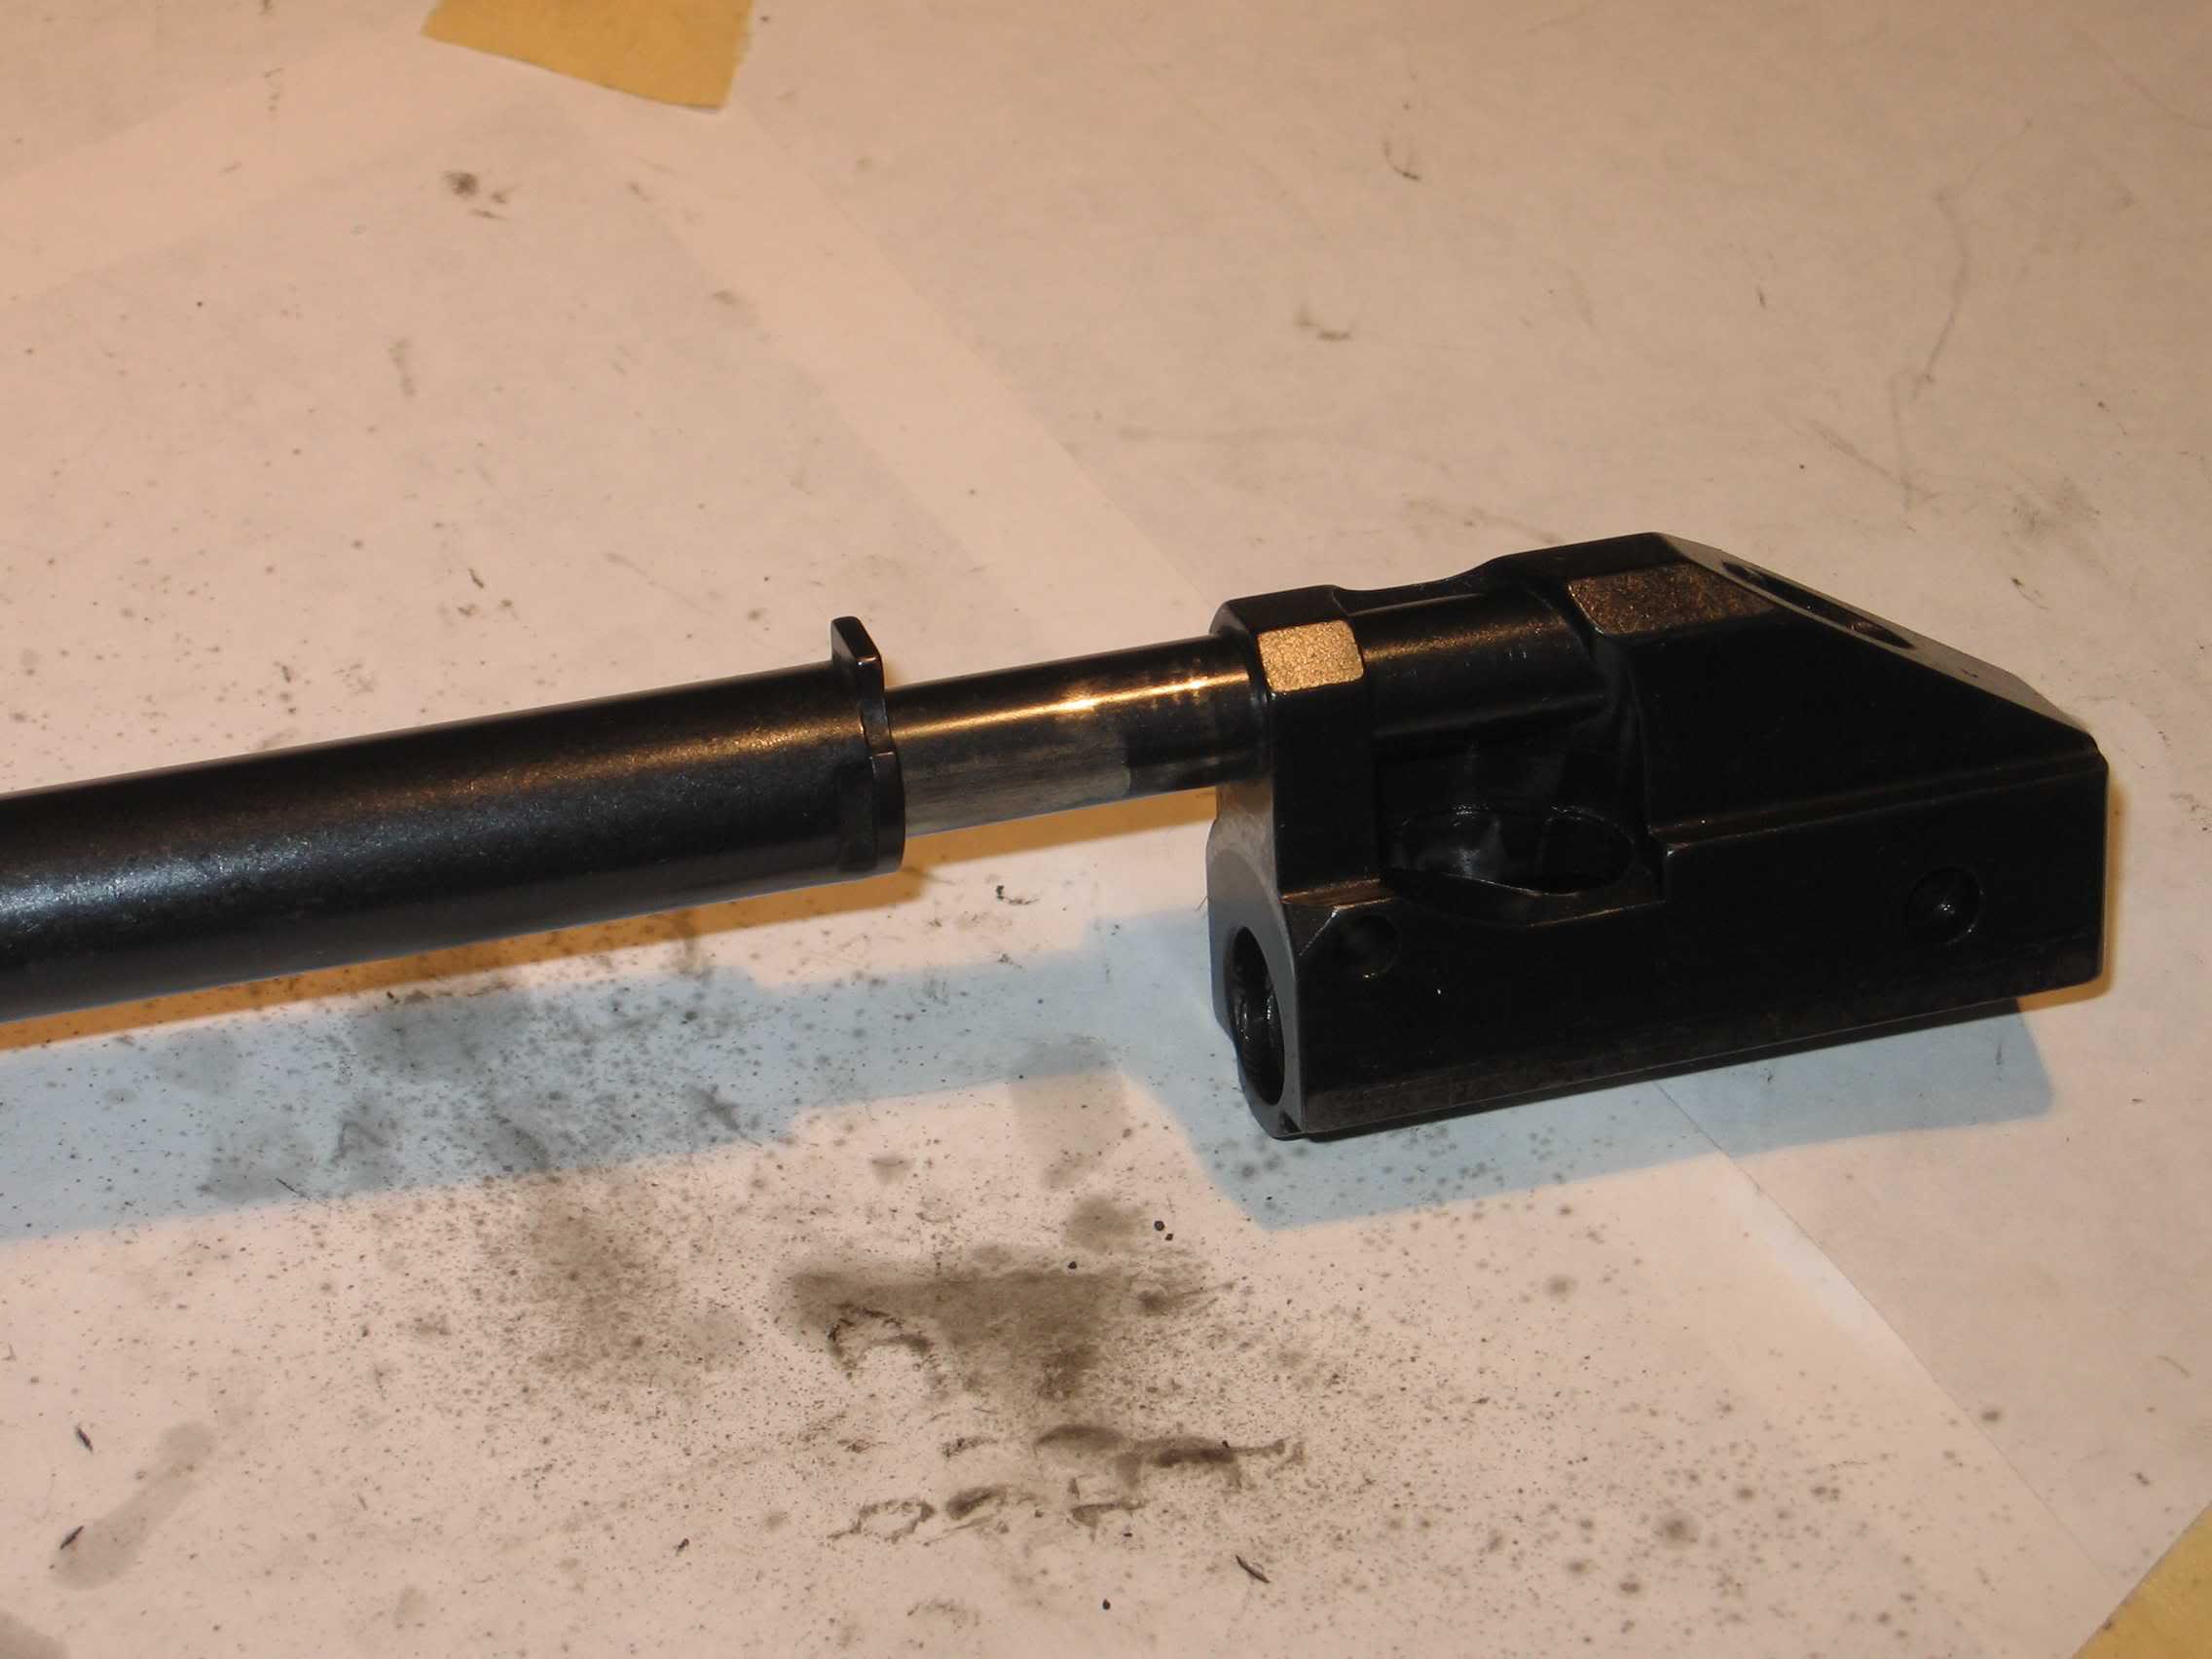
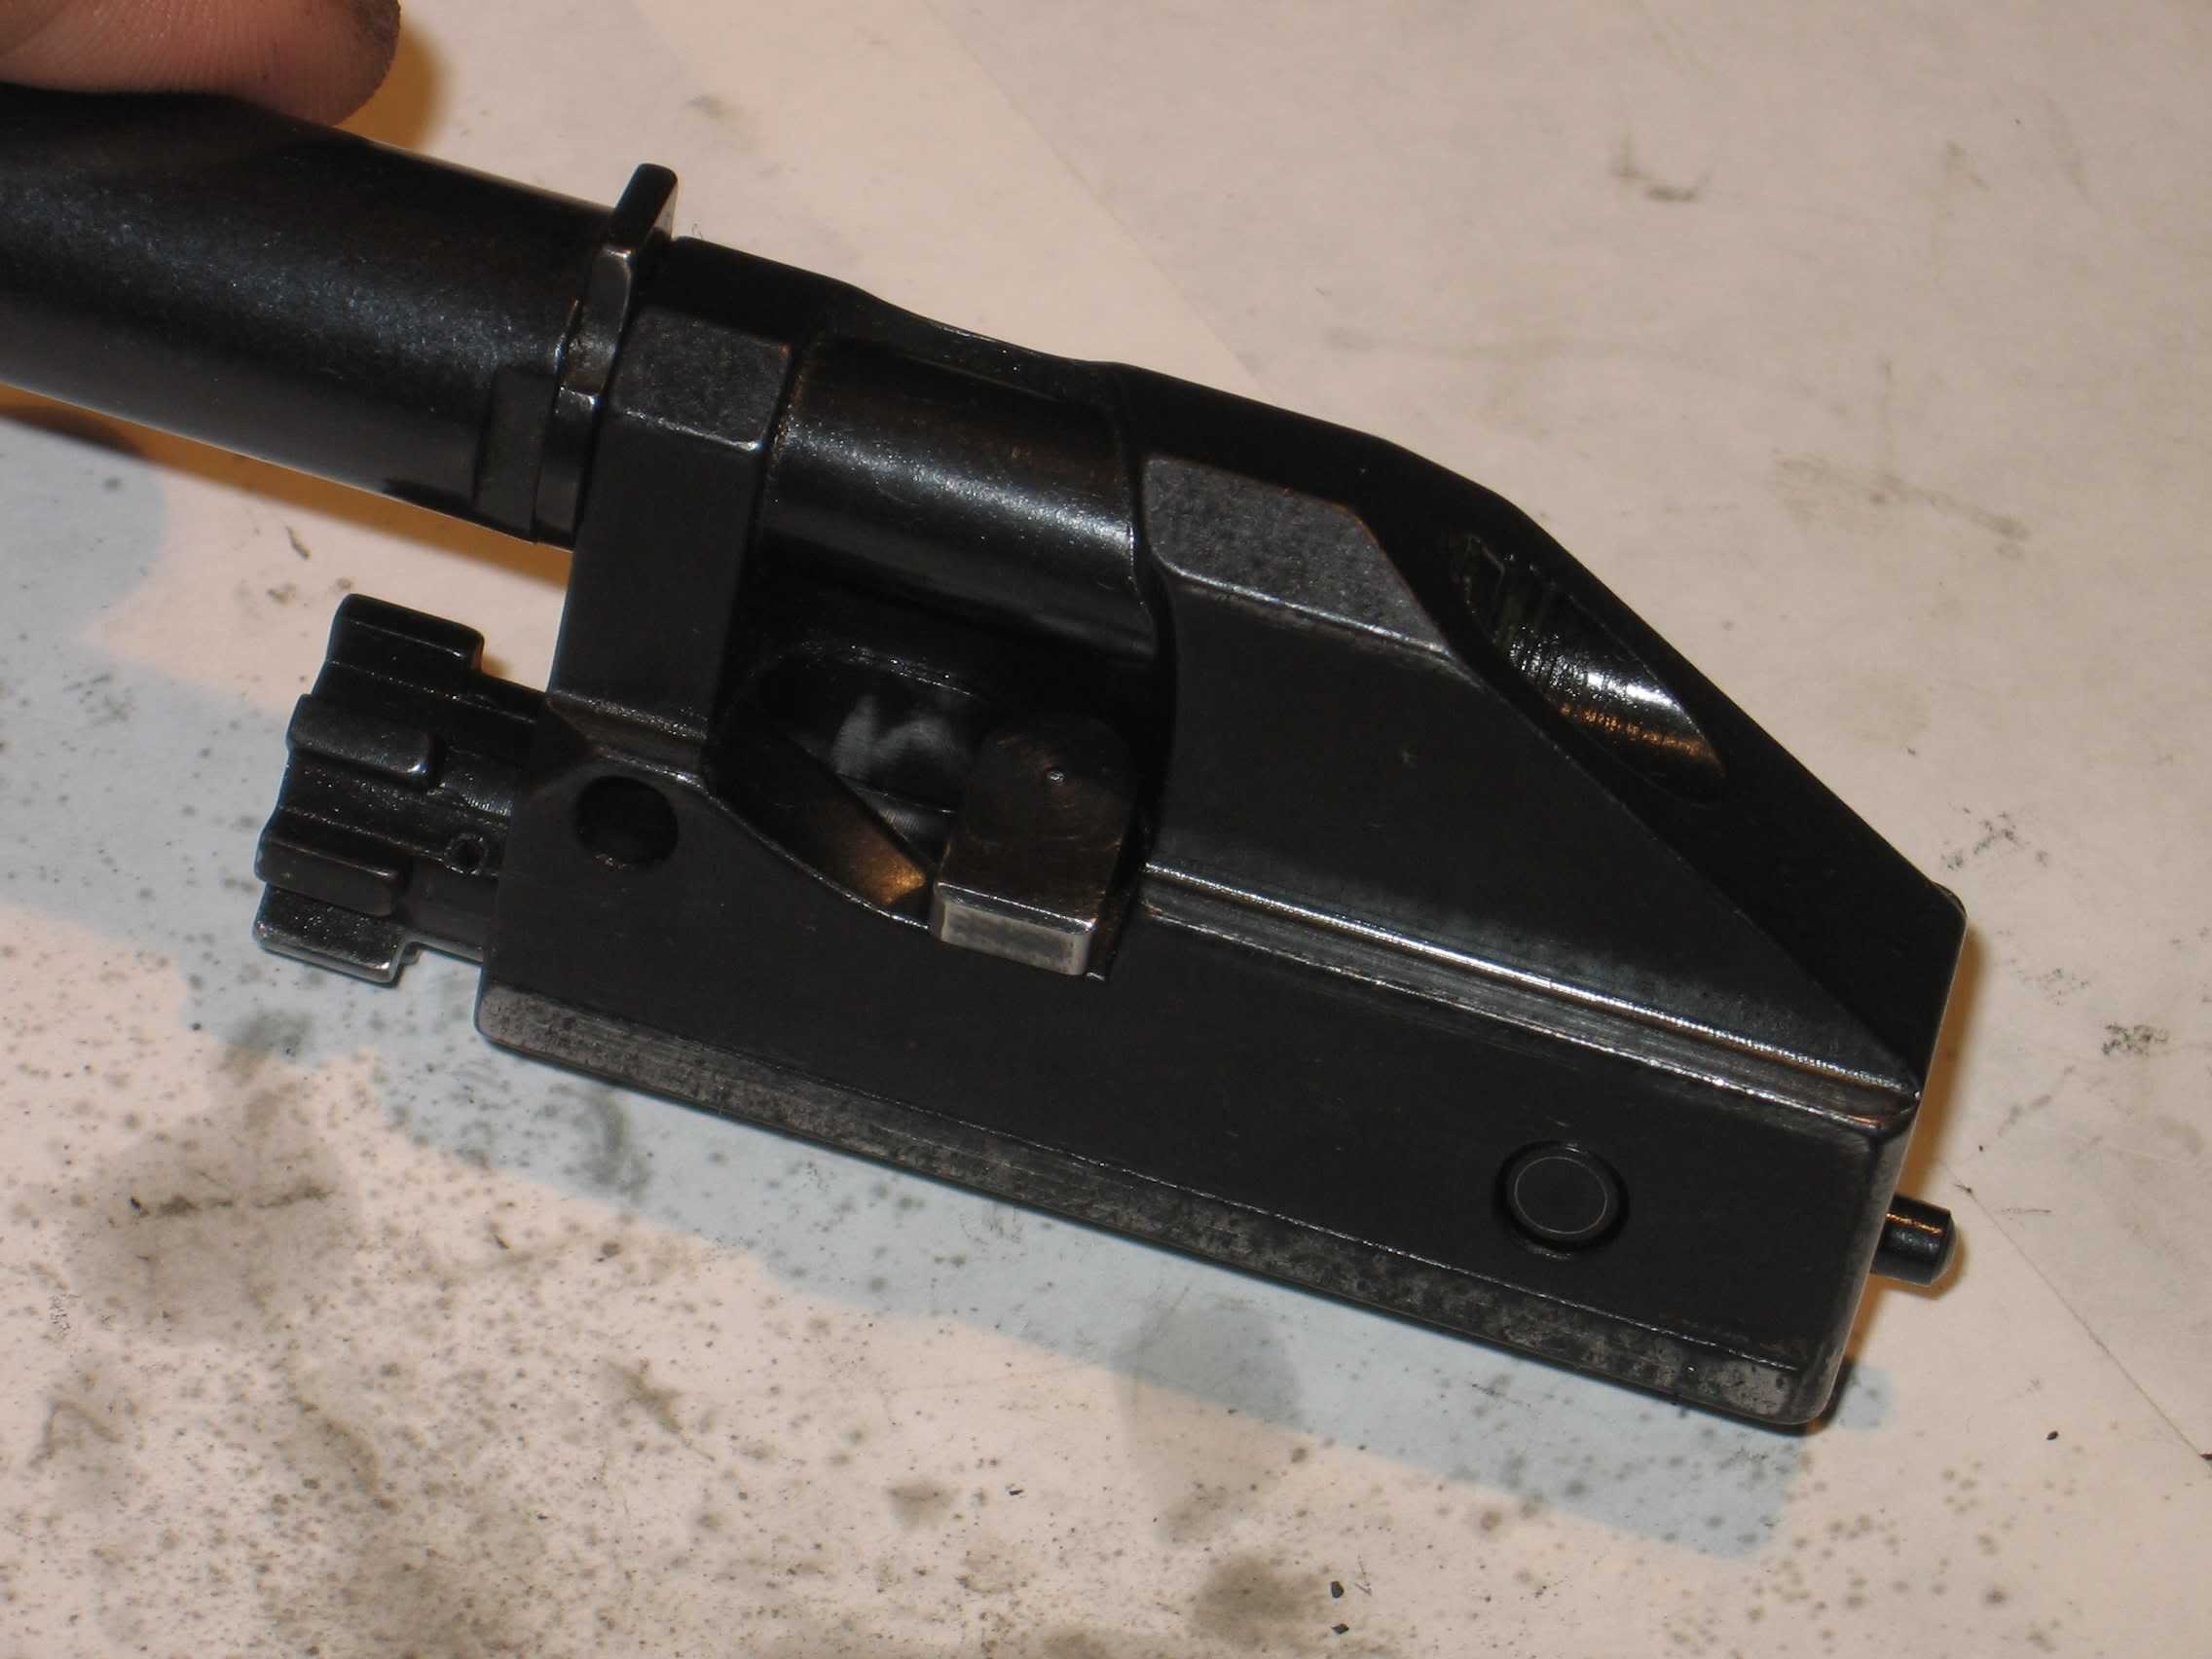
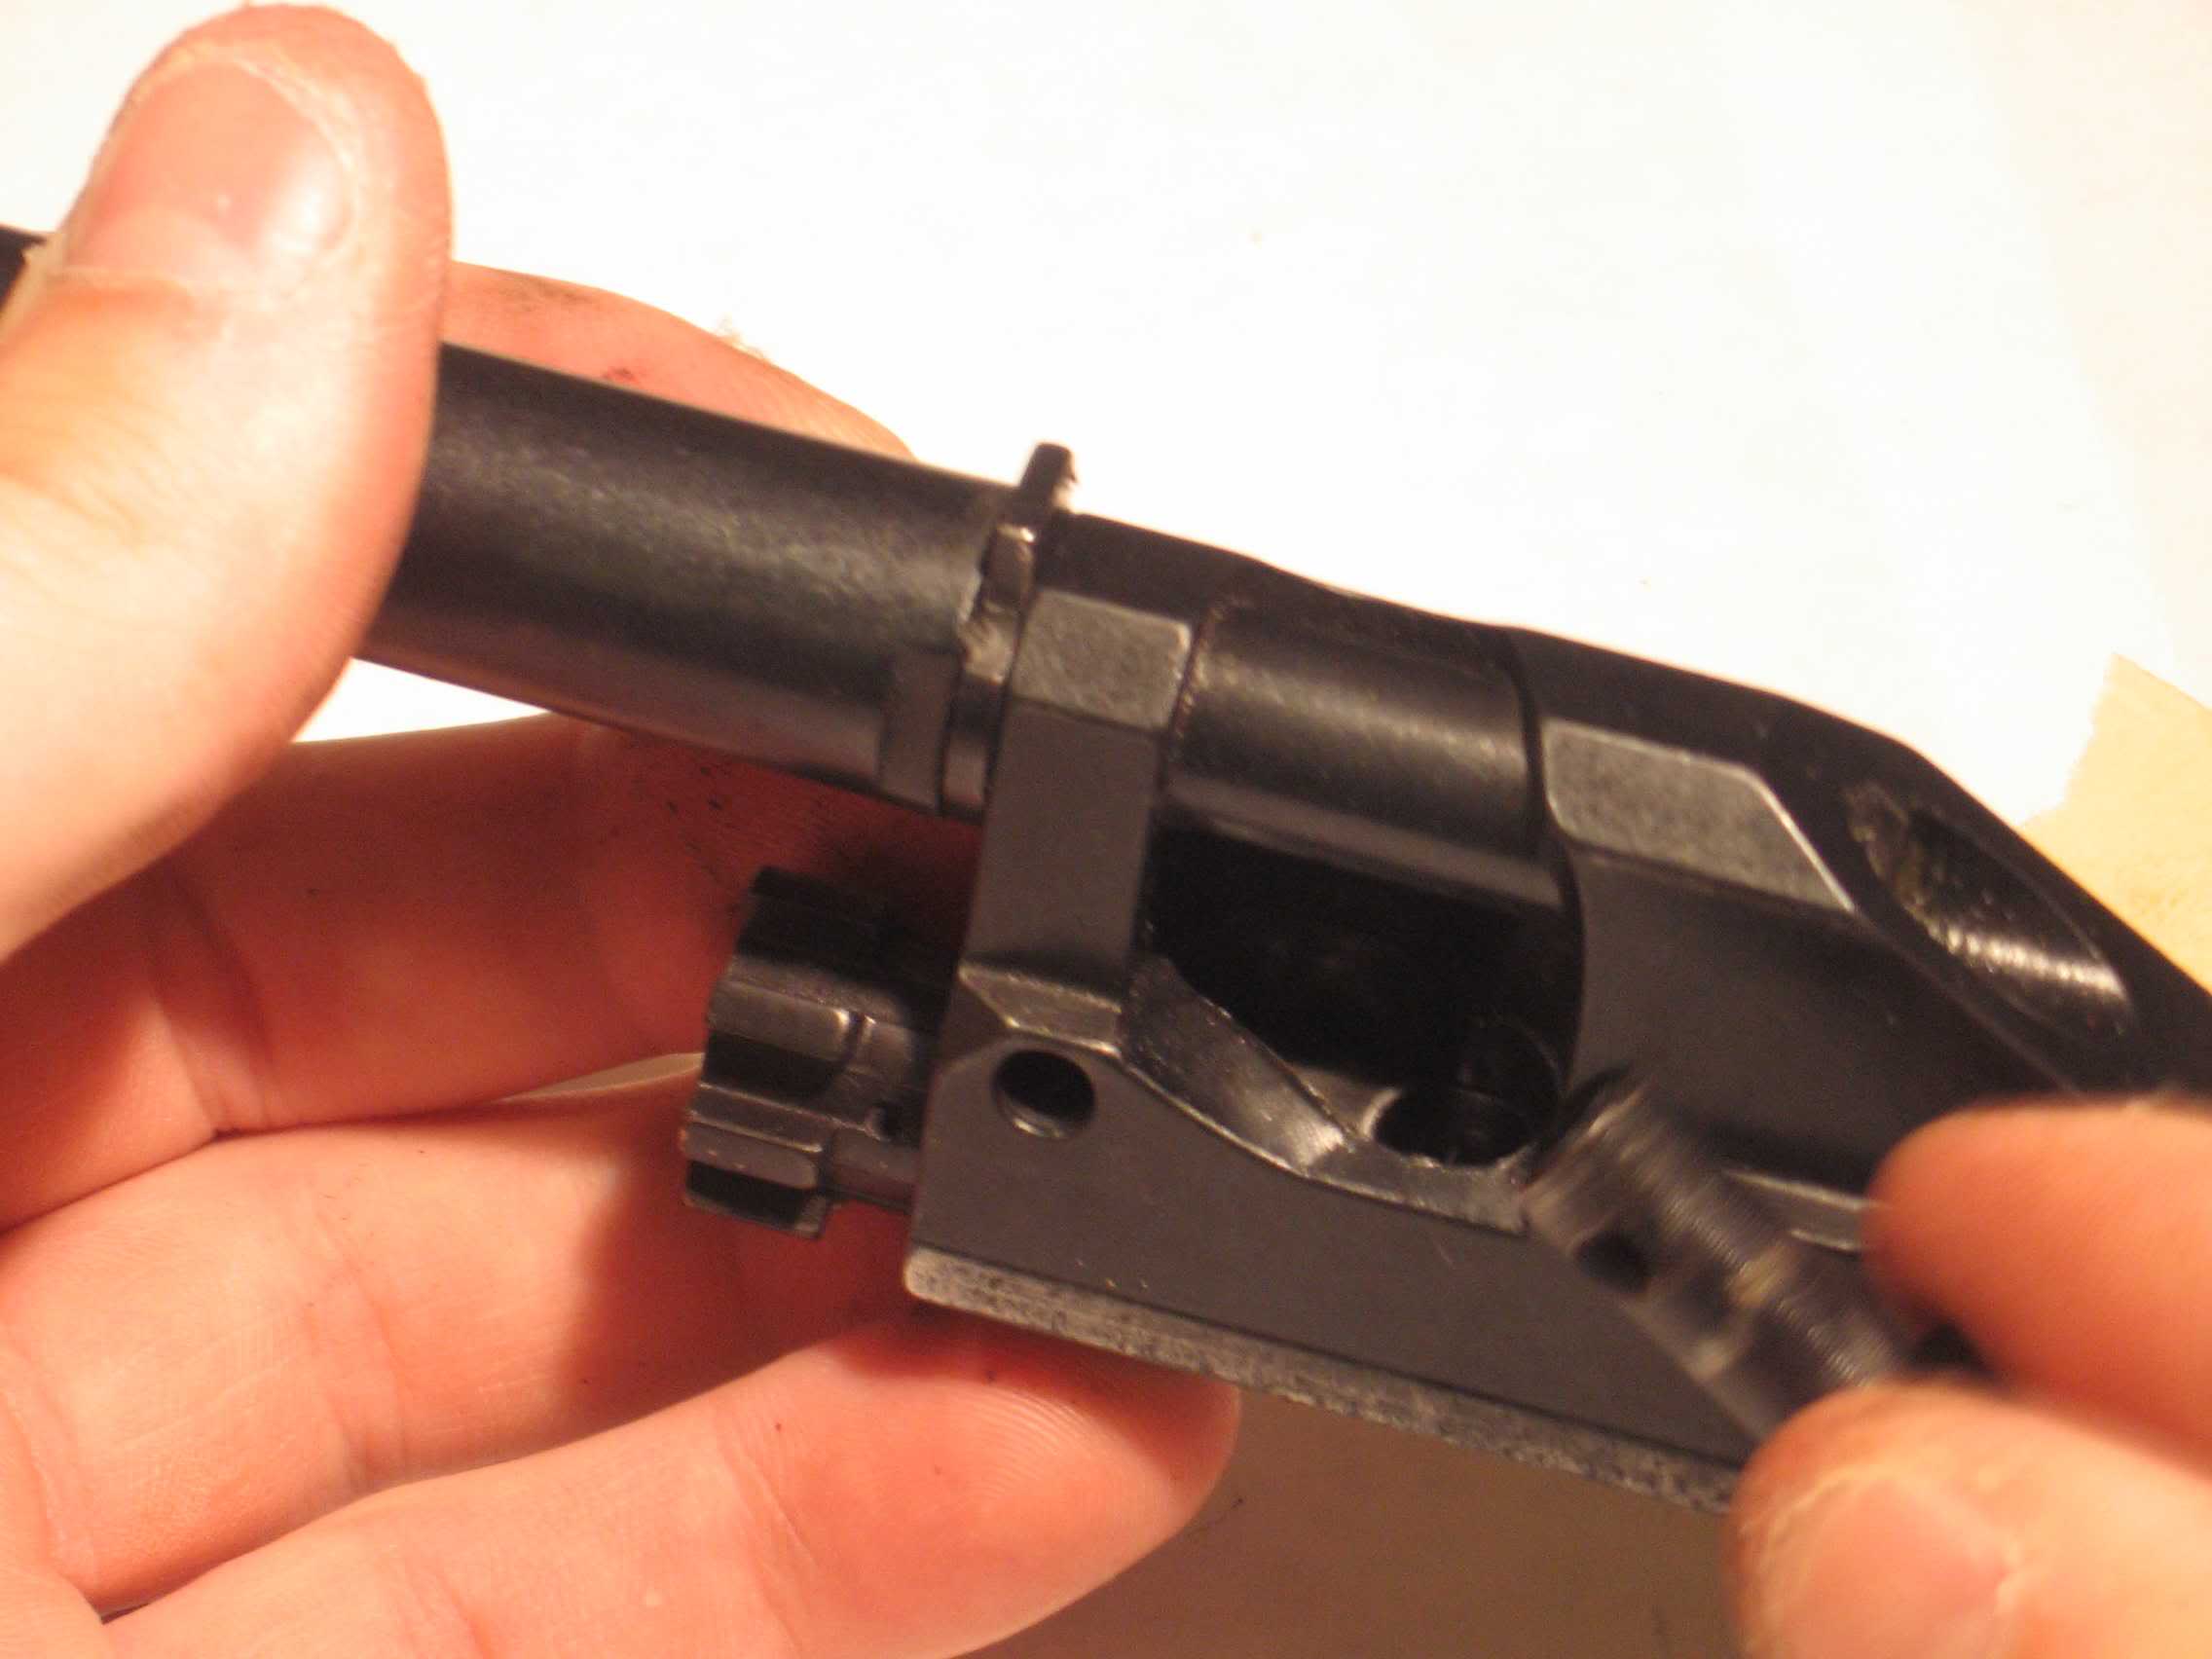
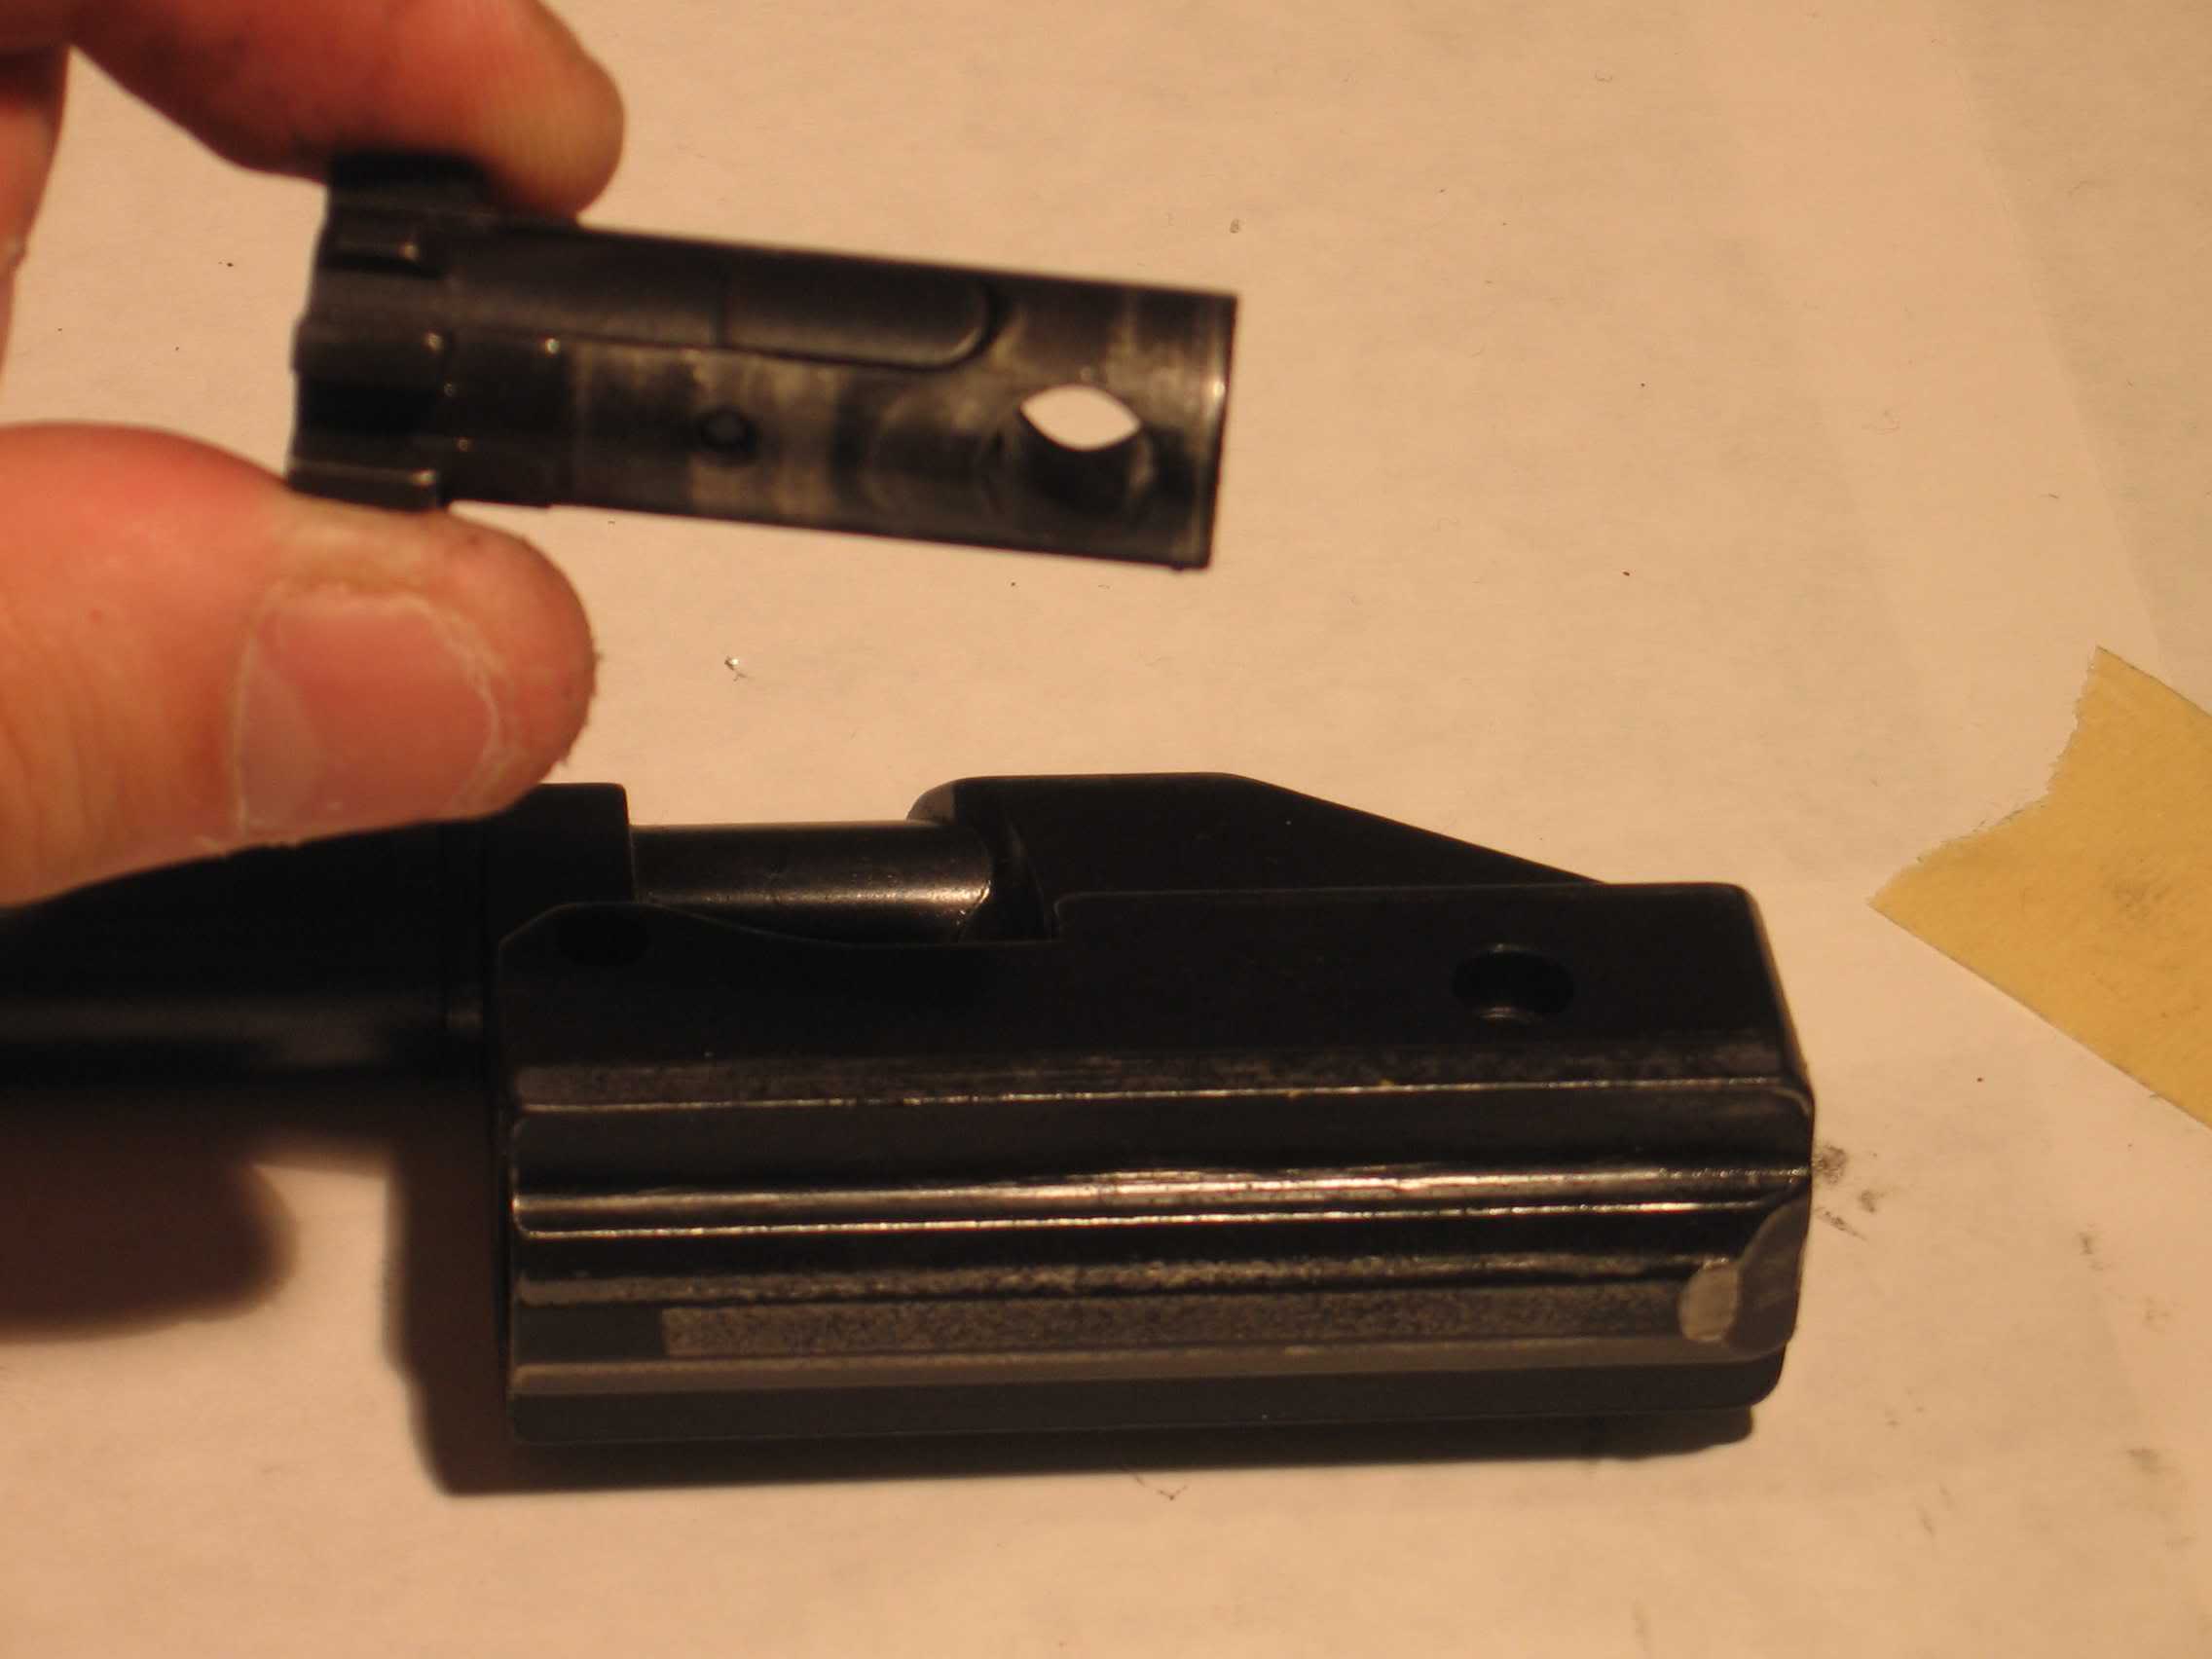
Lift up on the gas tube, which will drop the bolt carrier down through the bottom of the receiver. Remove the bolt carrier and gas tube as shown.


Step 5: Note the presence of the firing pin retaining pin on the right side of the bolt carrier. Push the pin from the right, and remove it from the left side of the bolt carrier.

Tilt the bolt carrier so the firing pin falls out the rear. Remove the cam pin (indicated by my finger). After removing the cam pin, remove the bolt.


Step 6: CAUTION: THIS STEP INVOLVES SPRINGS UNDER TENSION Please exercise caution, as various parts can be propelled at high velocity.

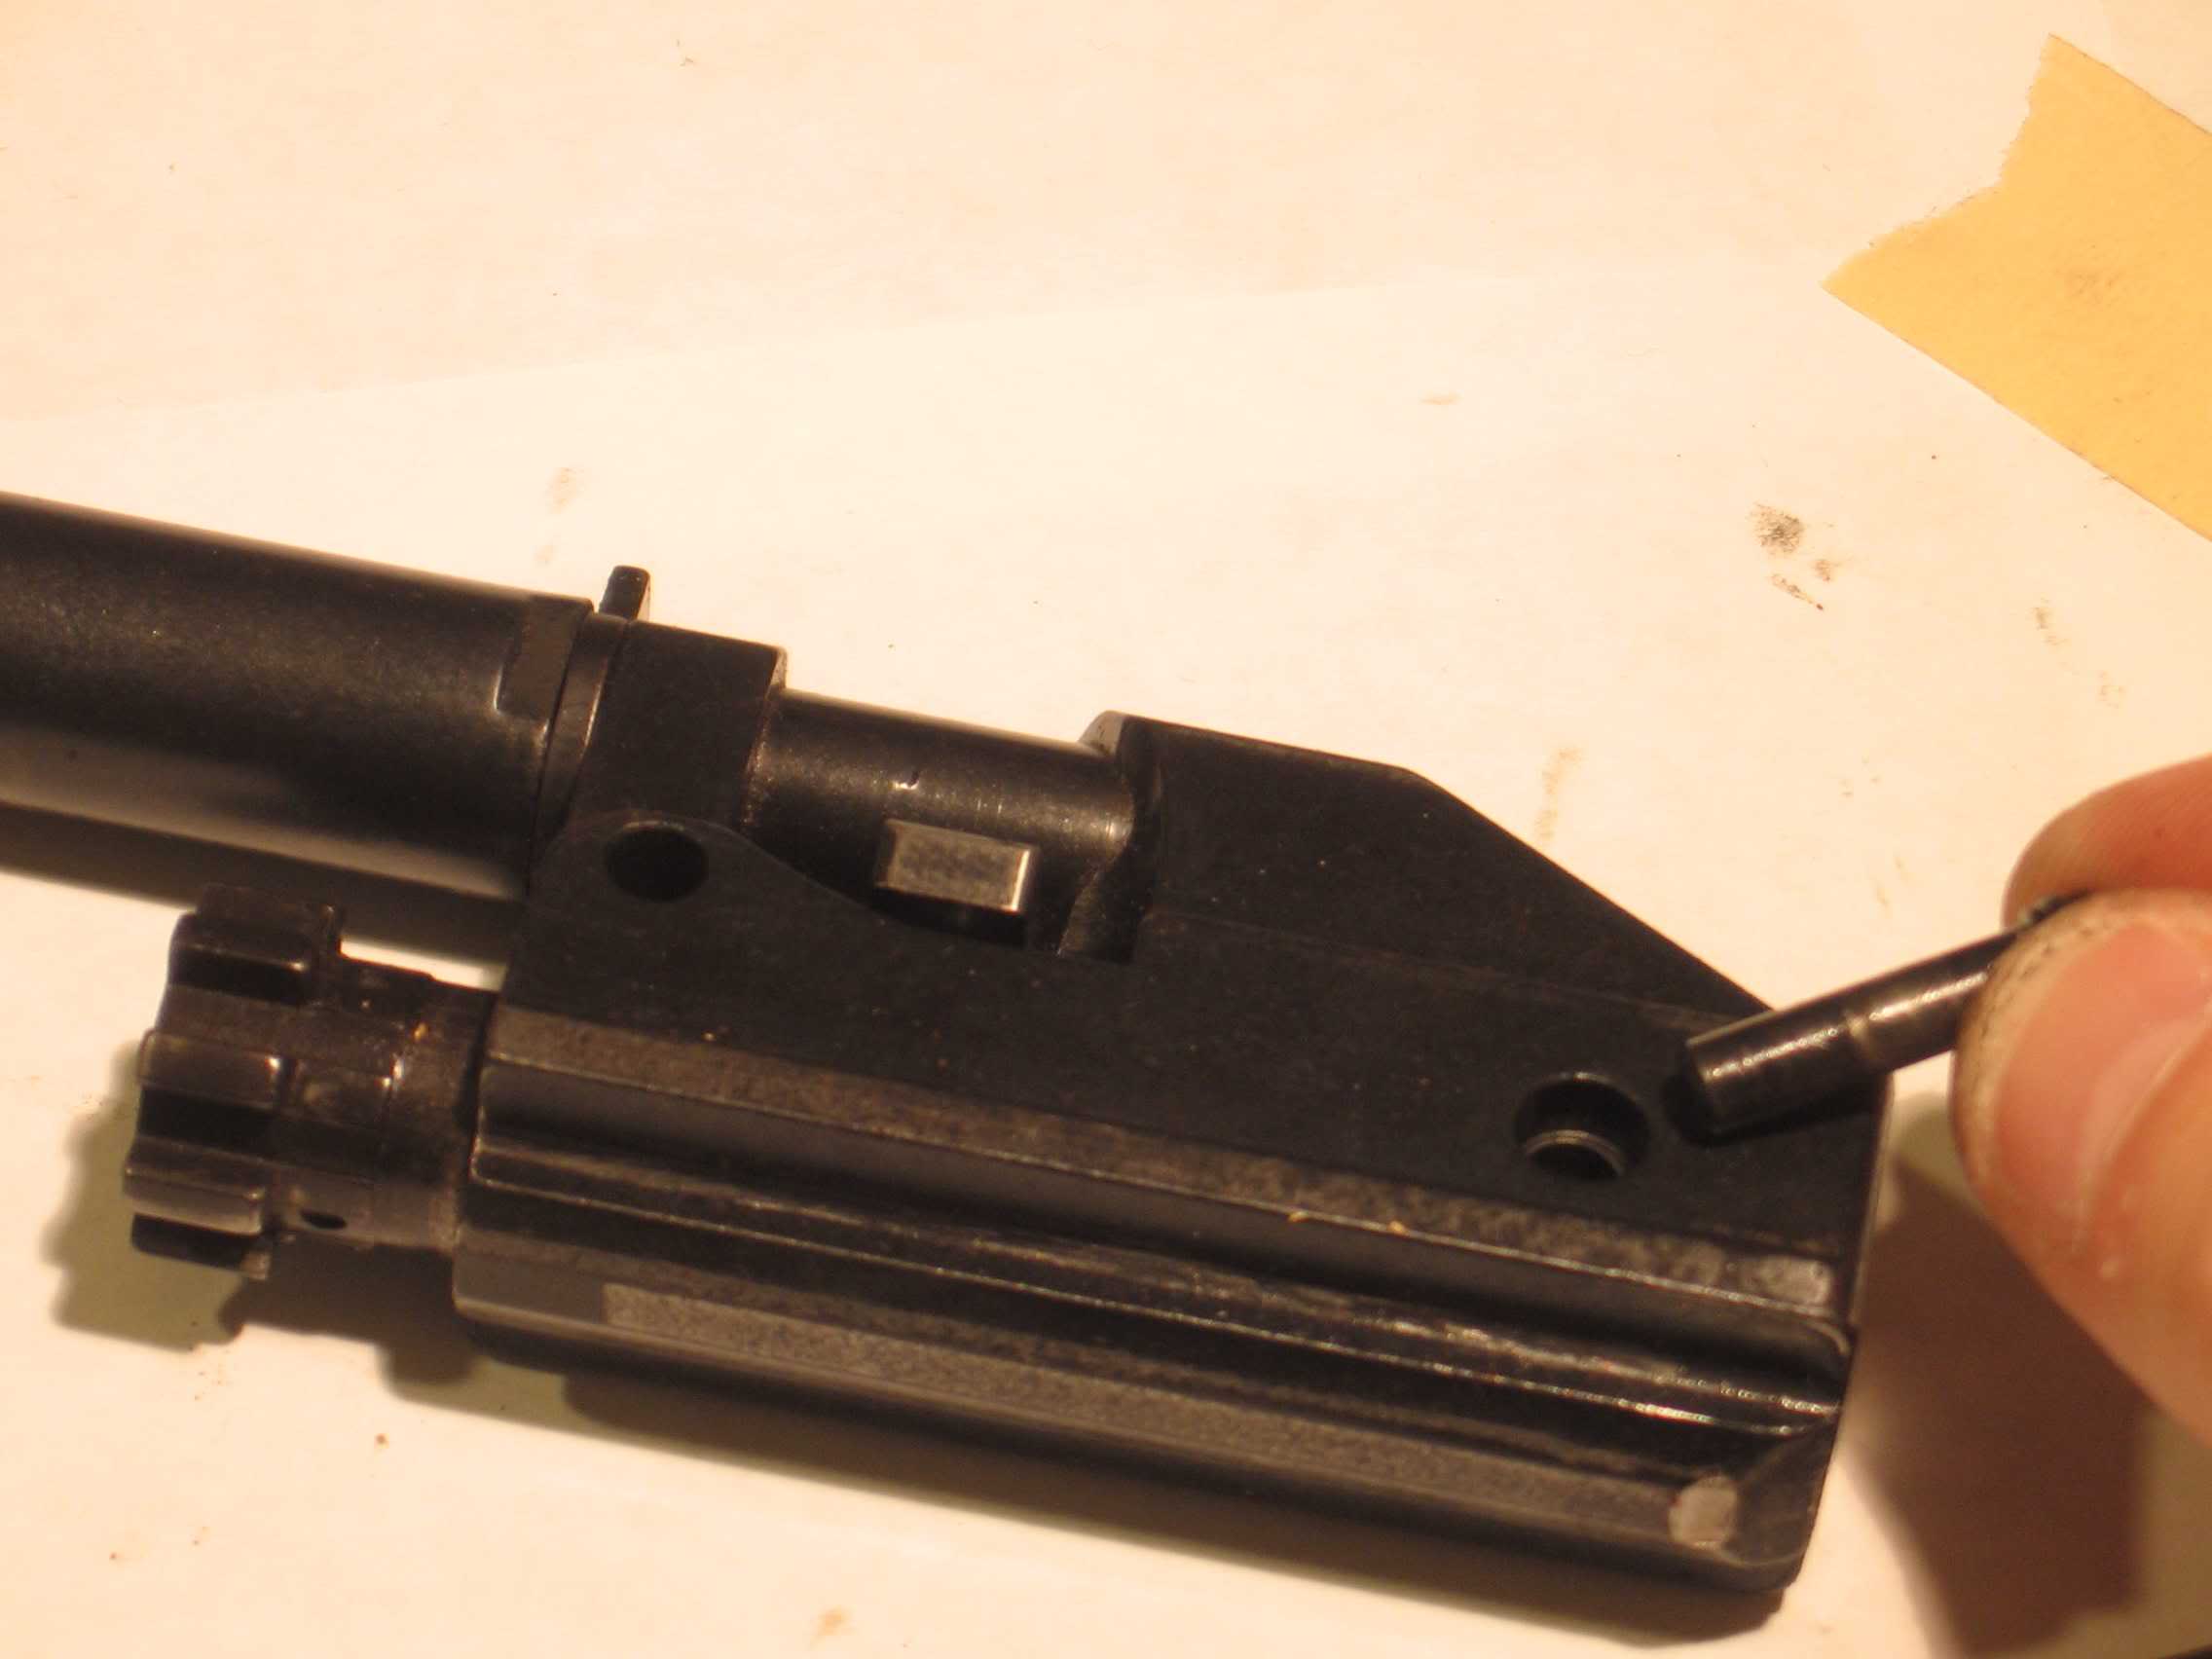
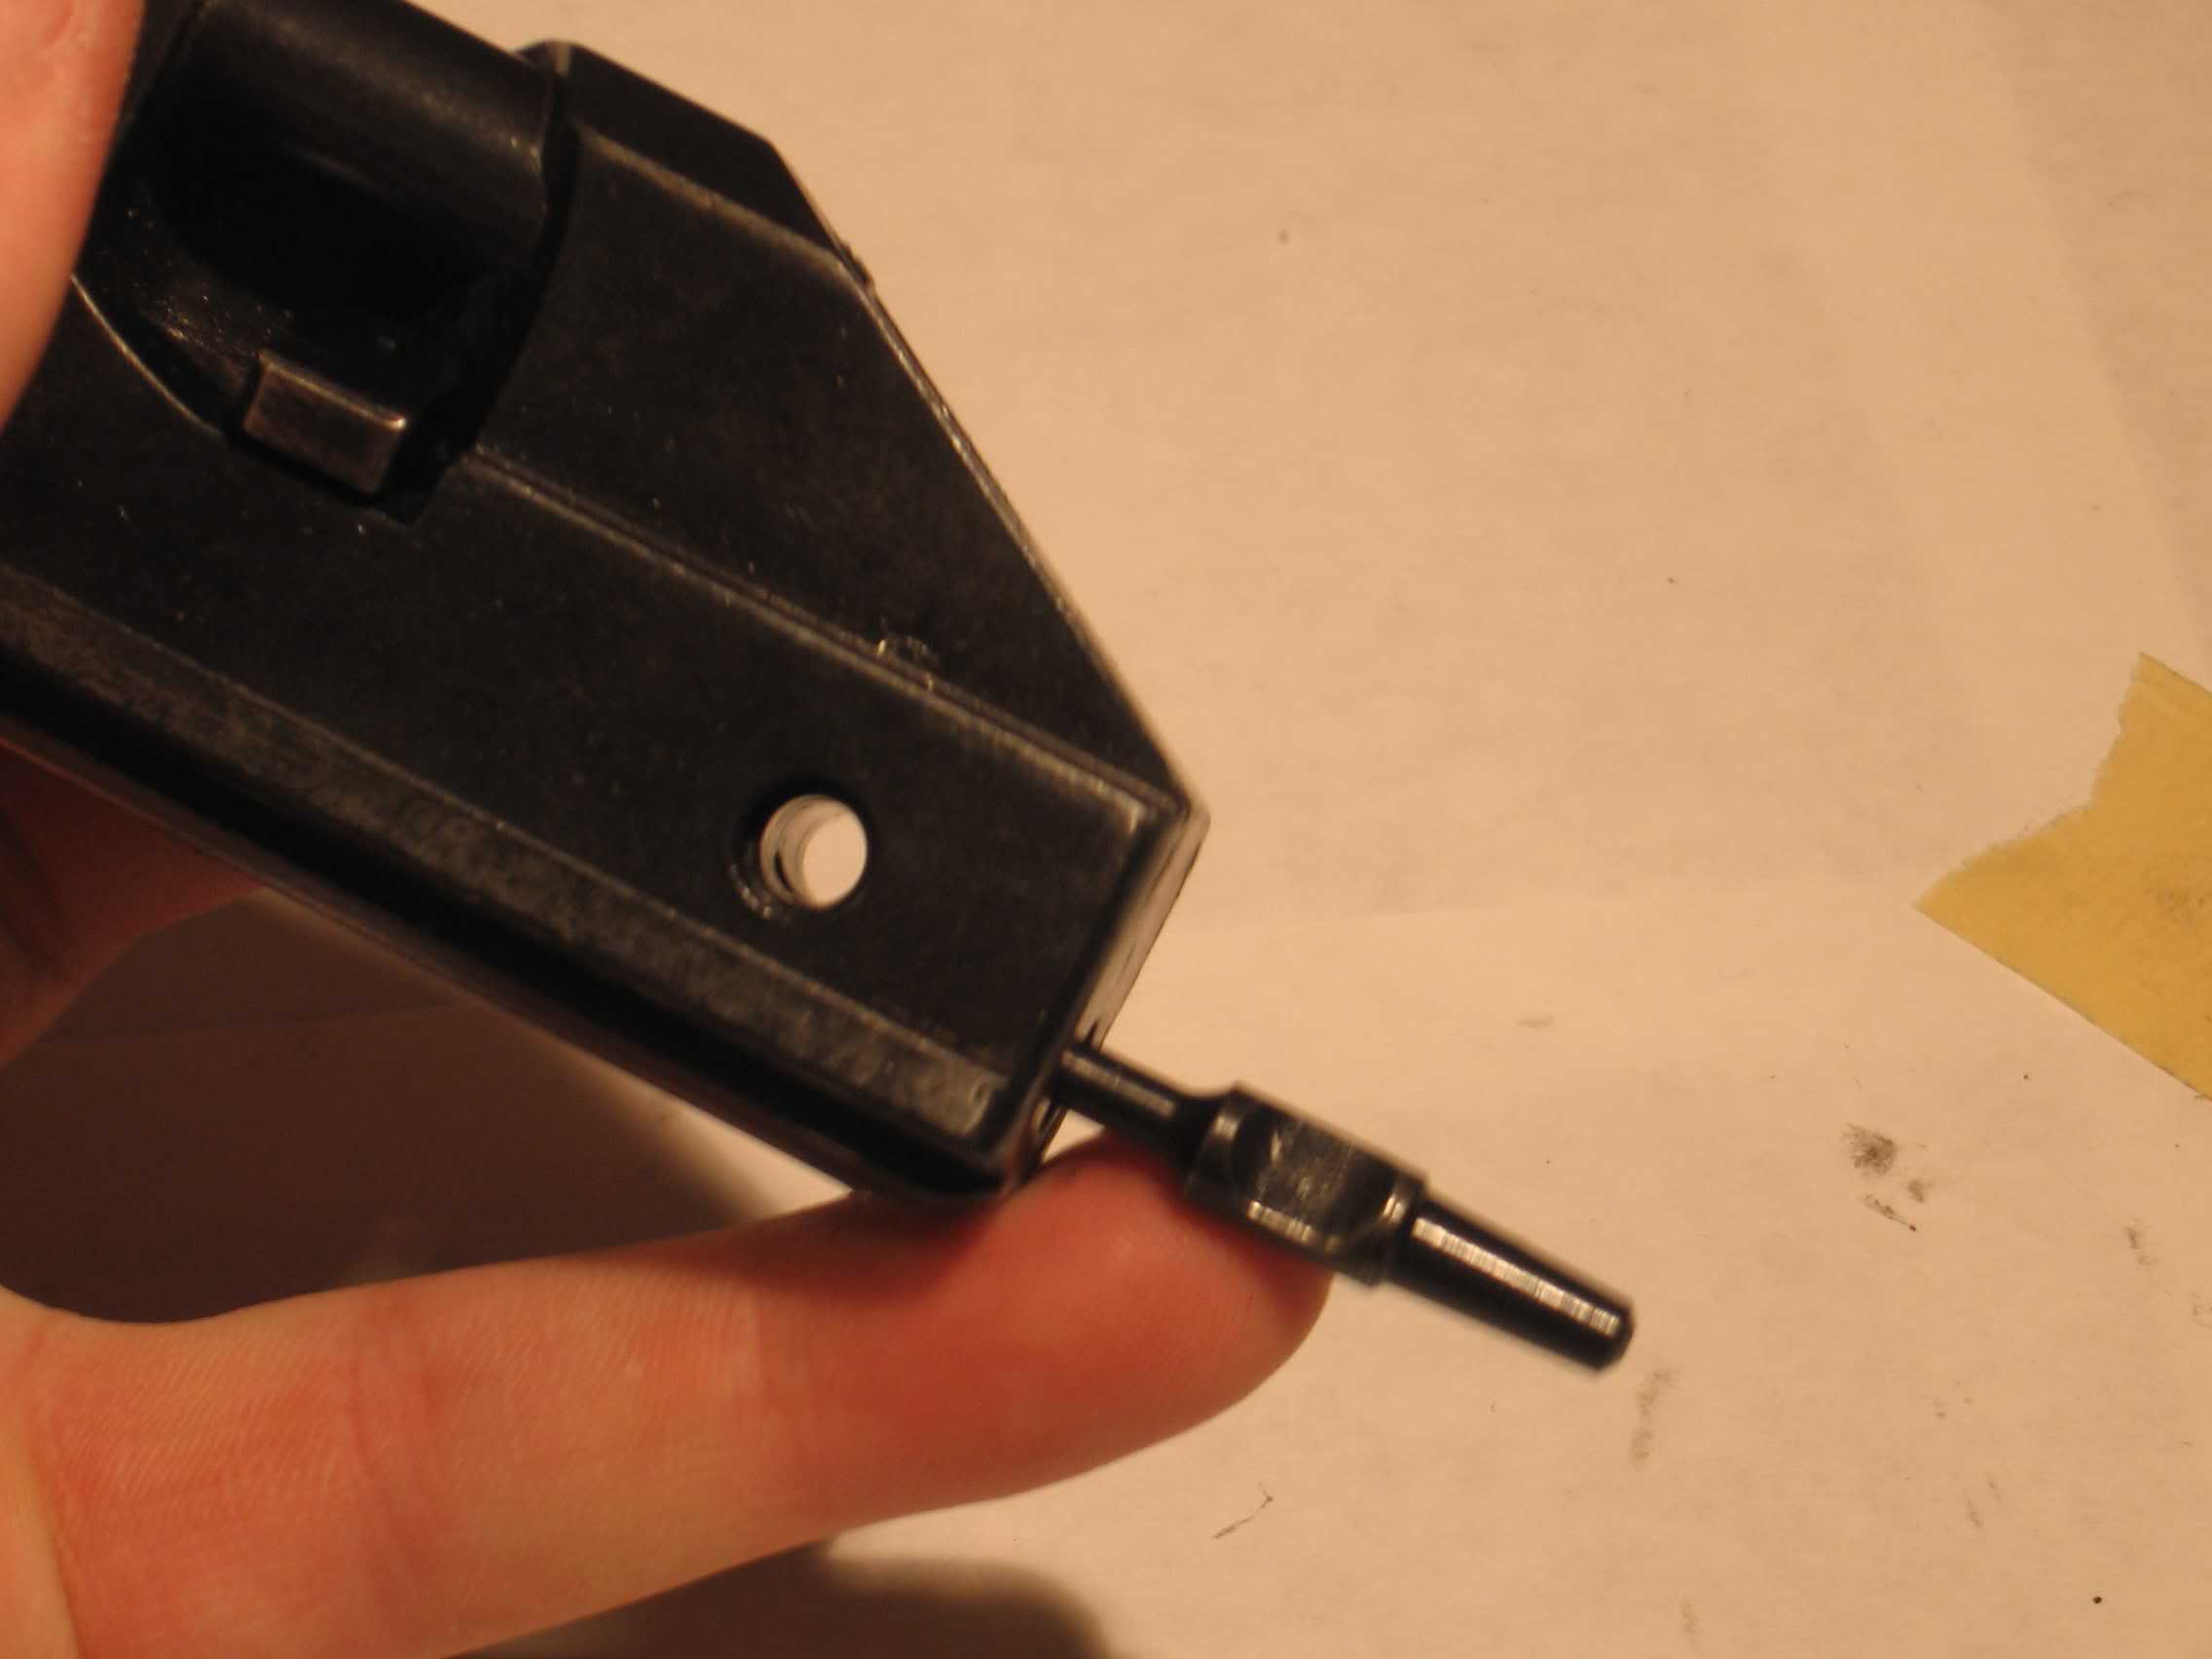
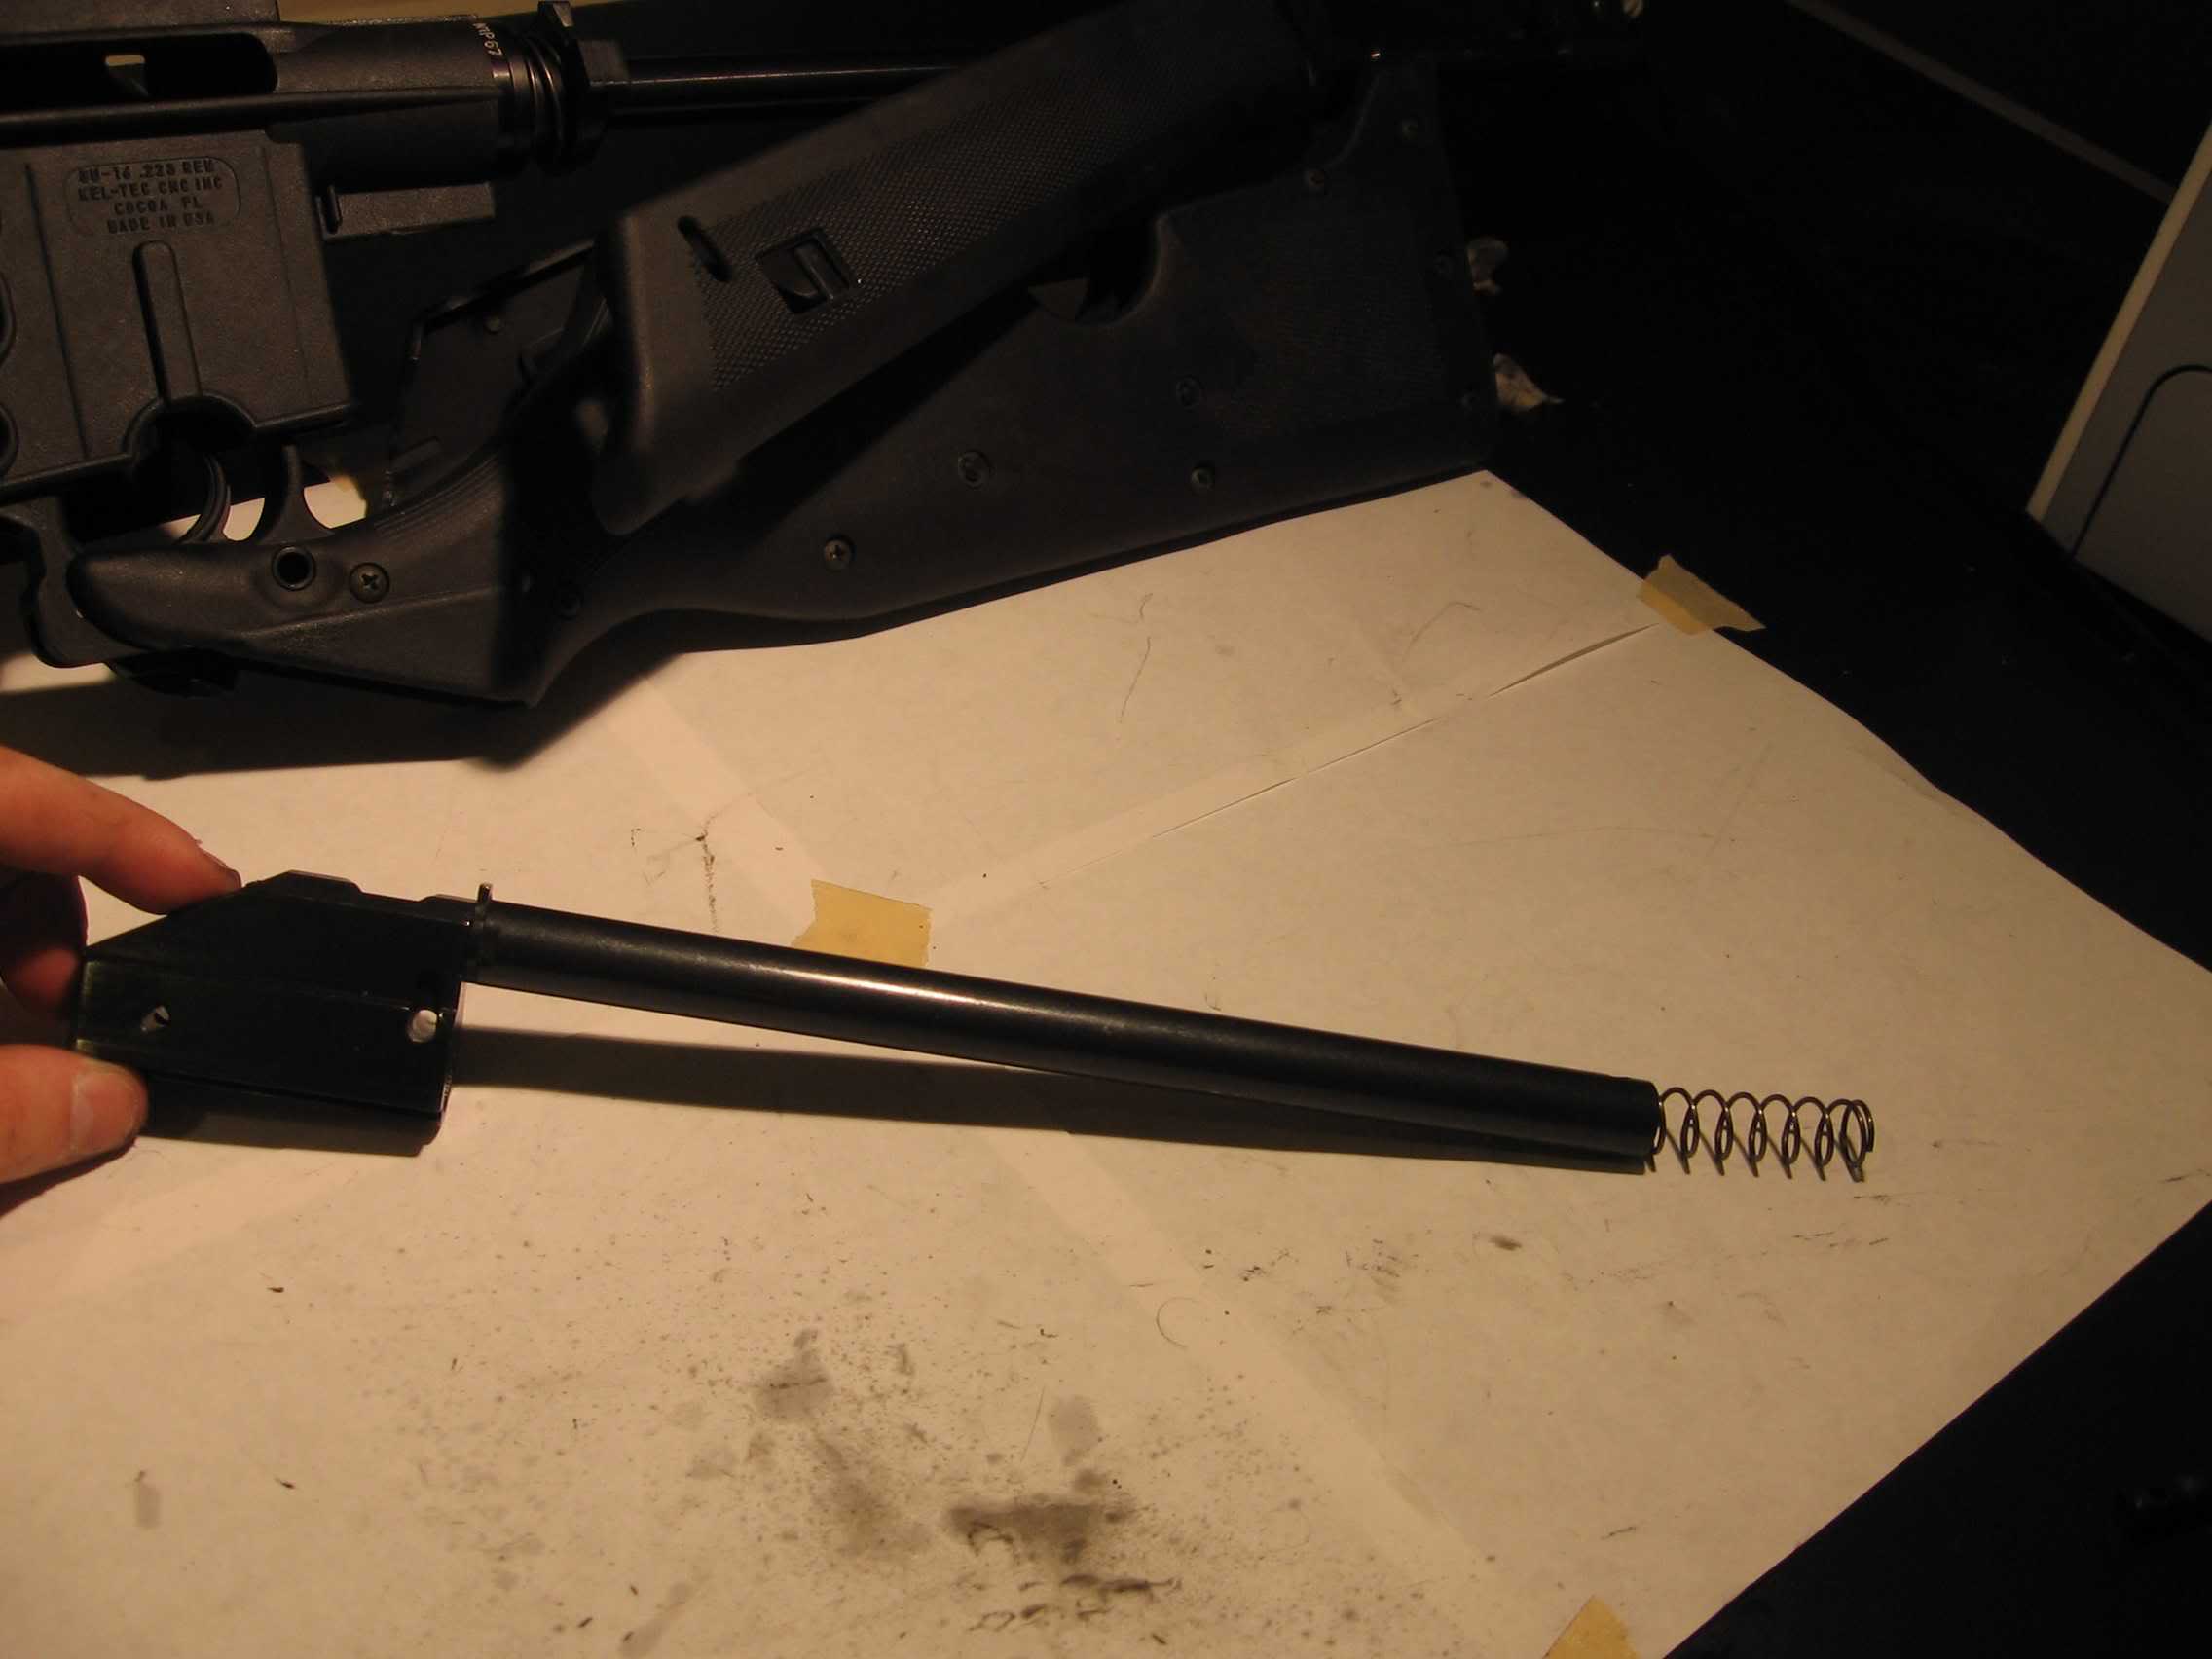
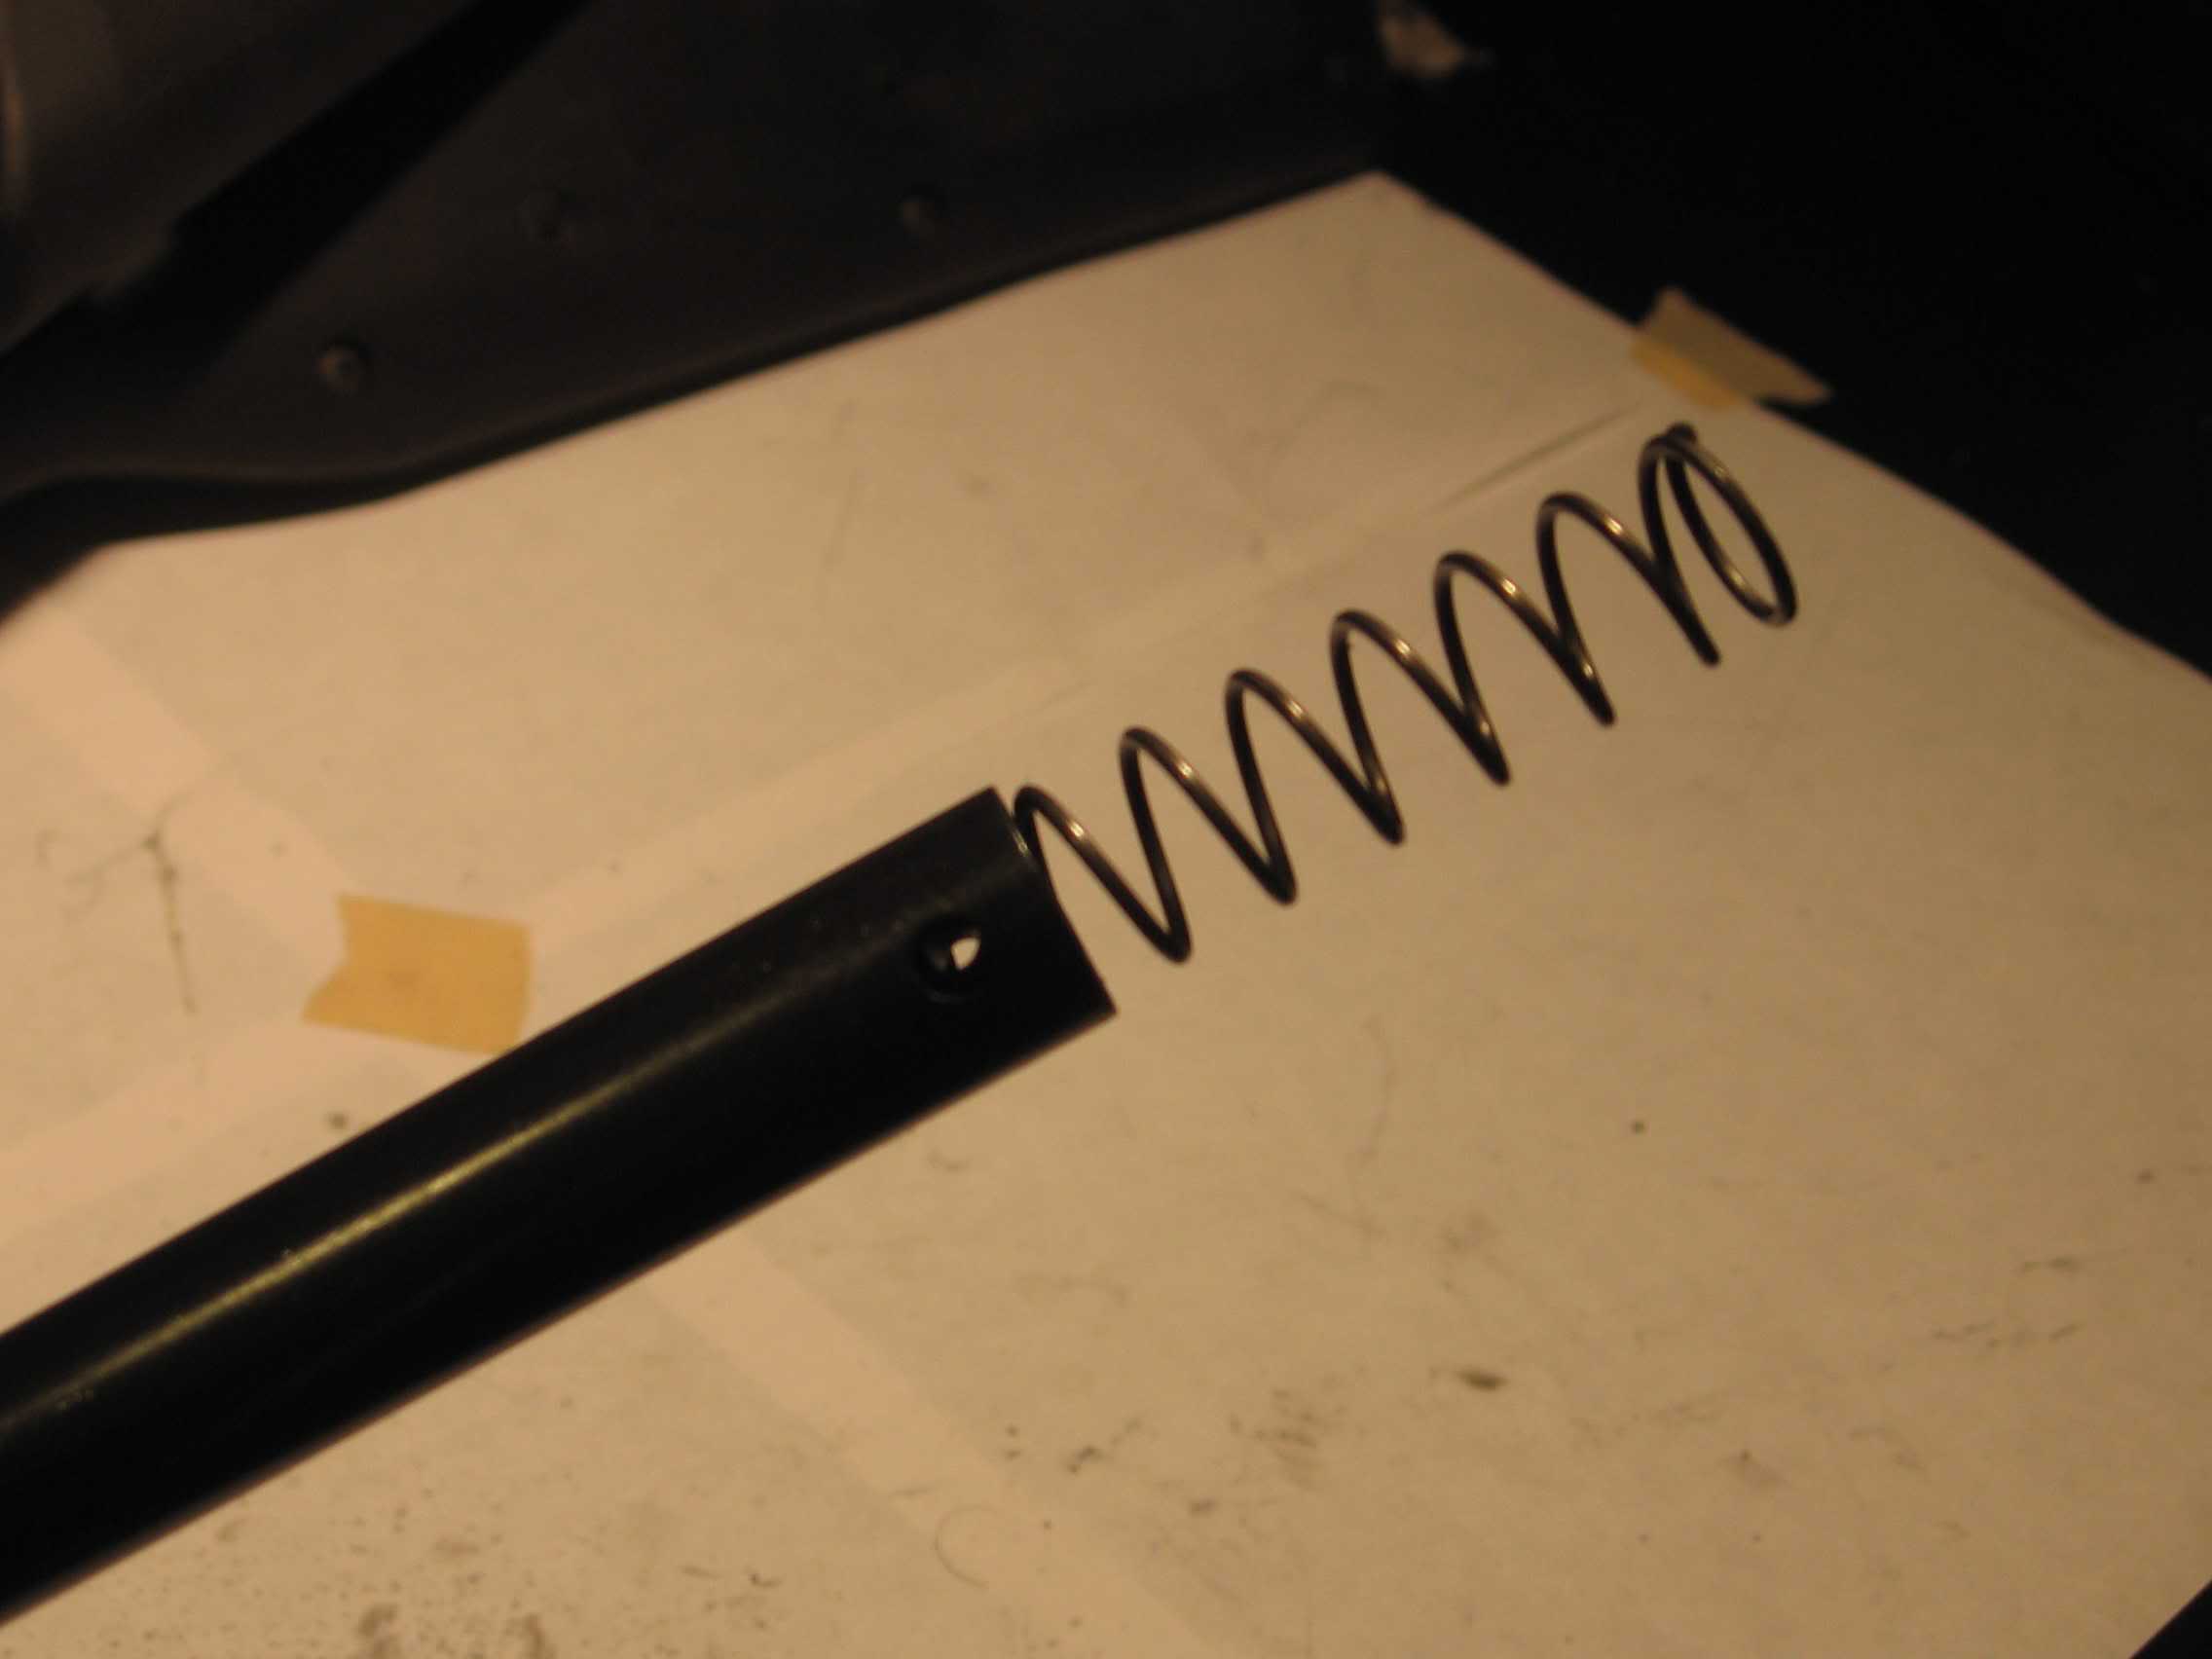
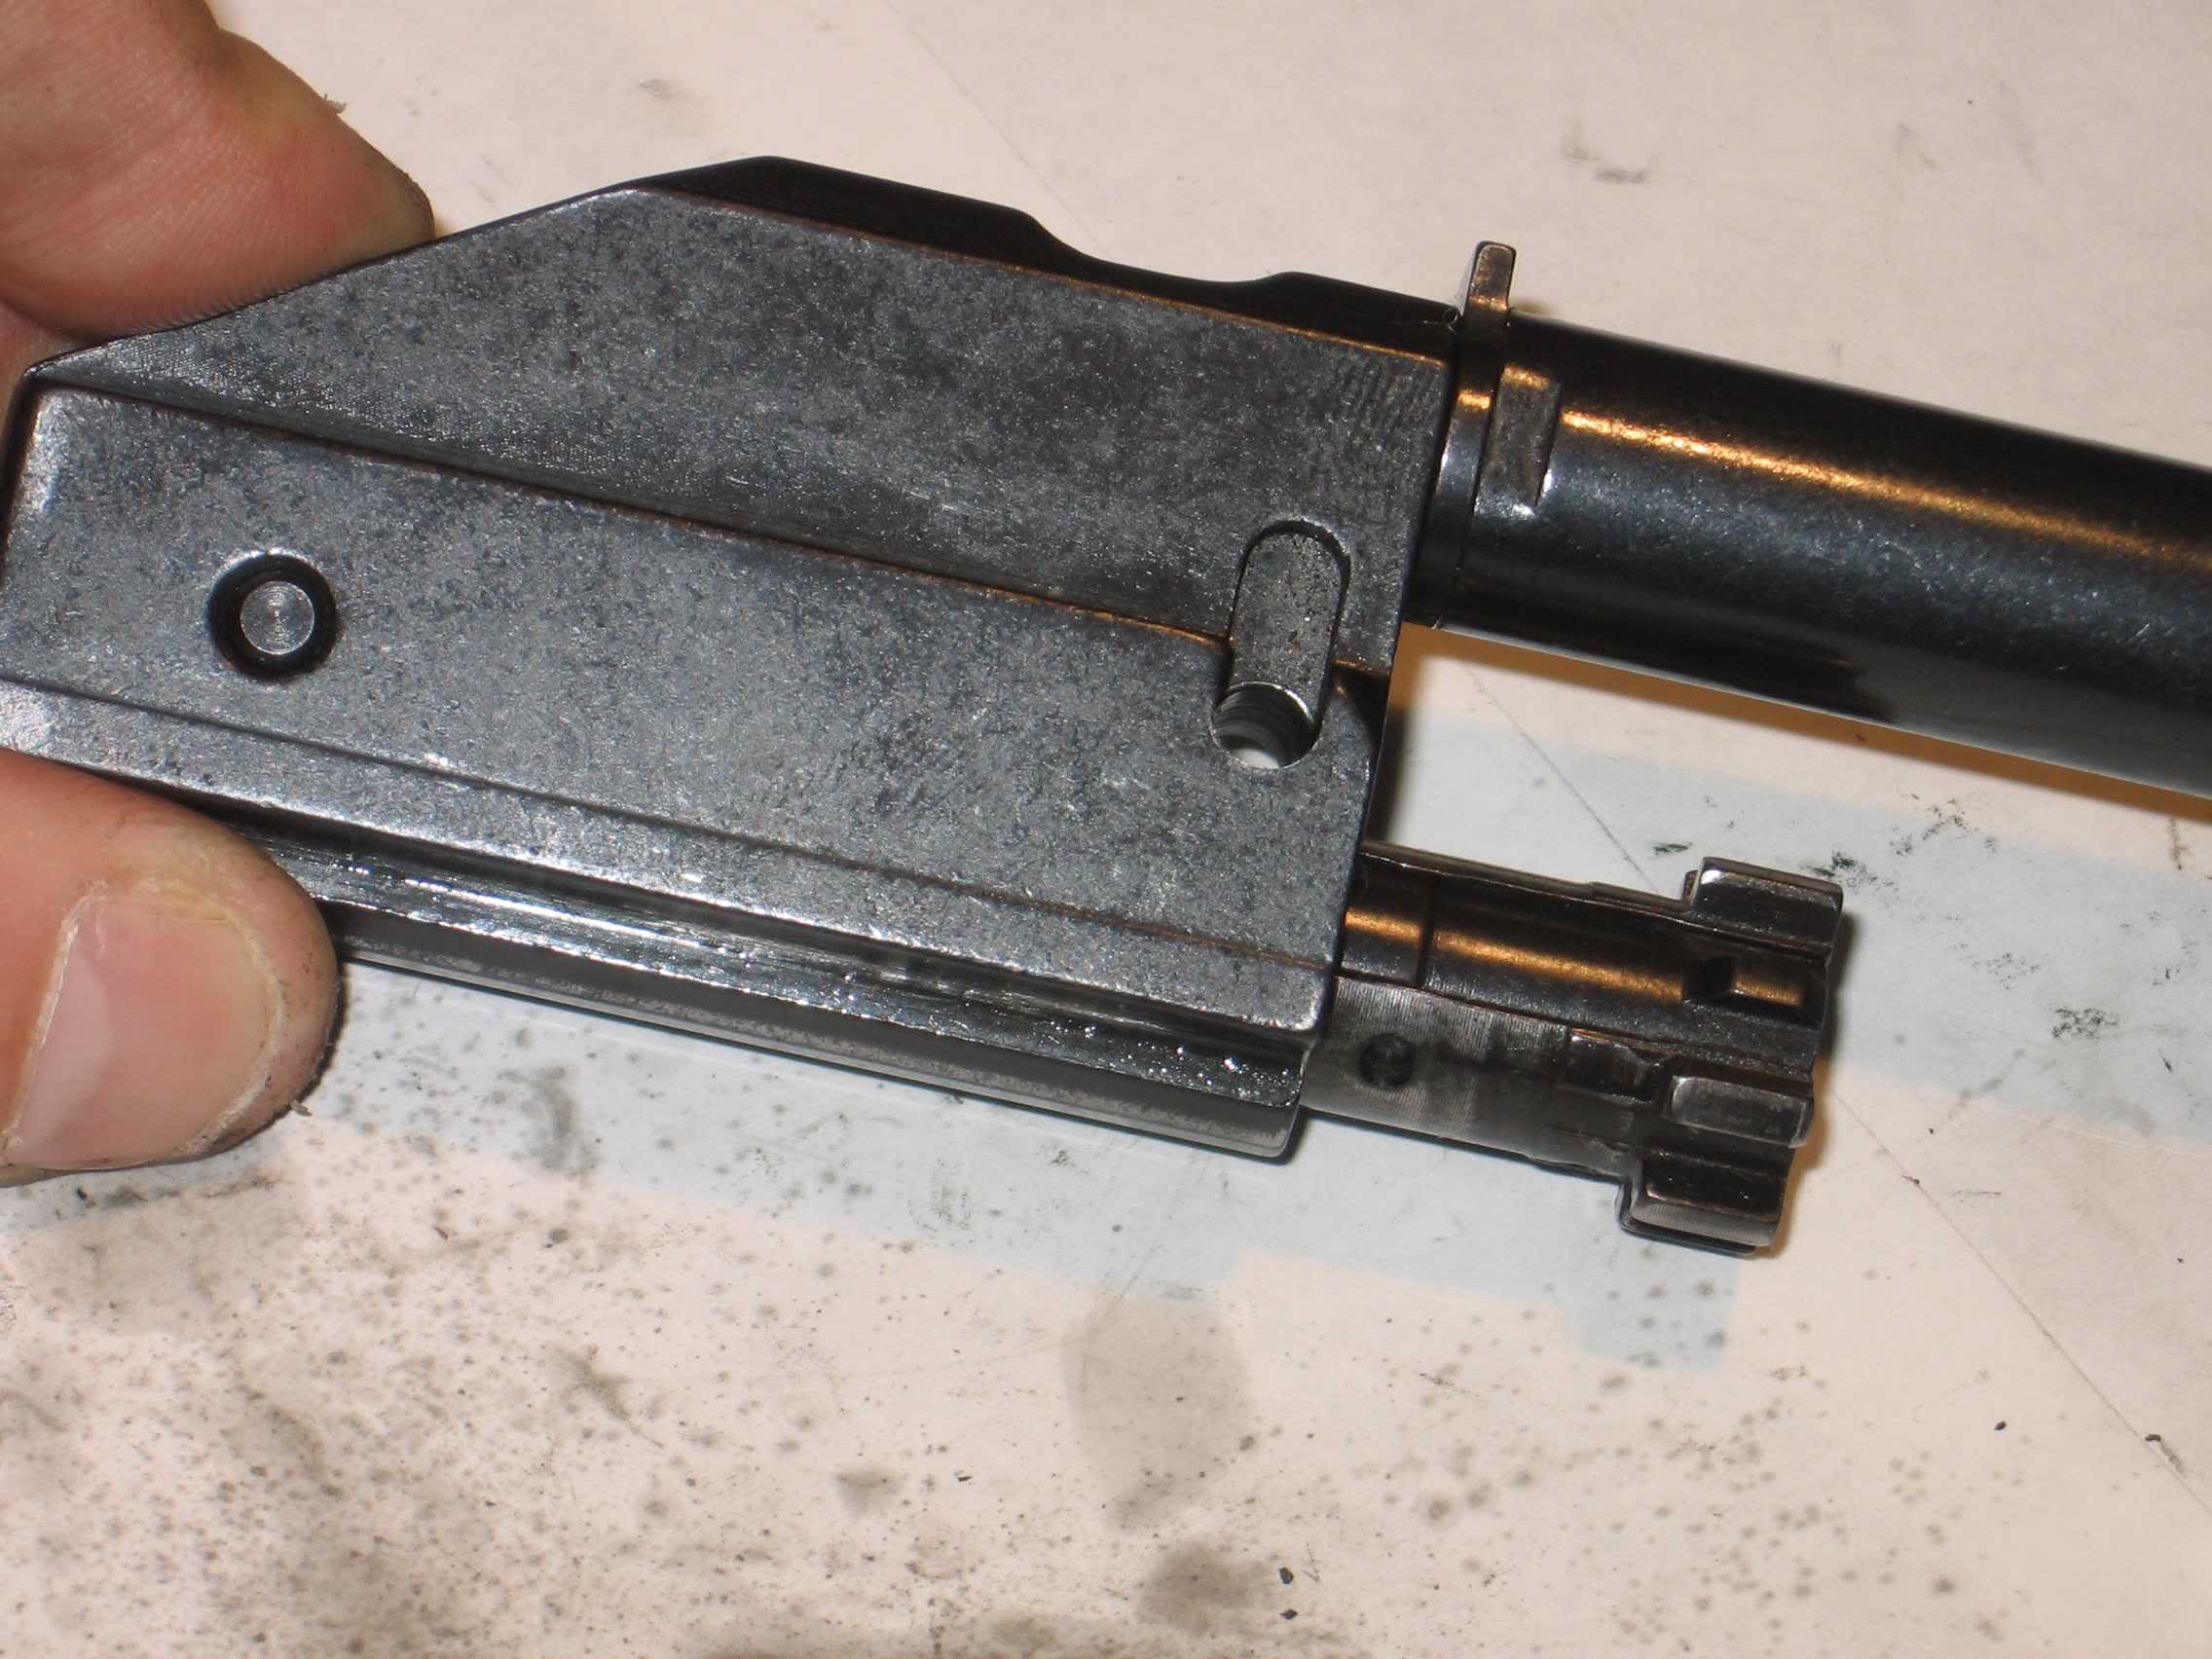
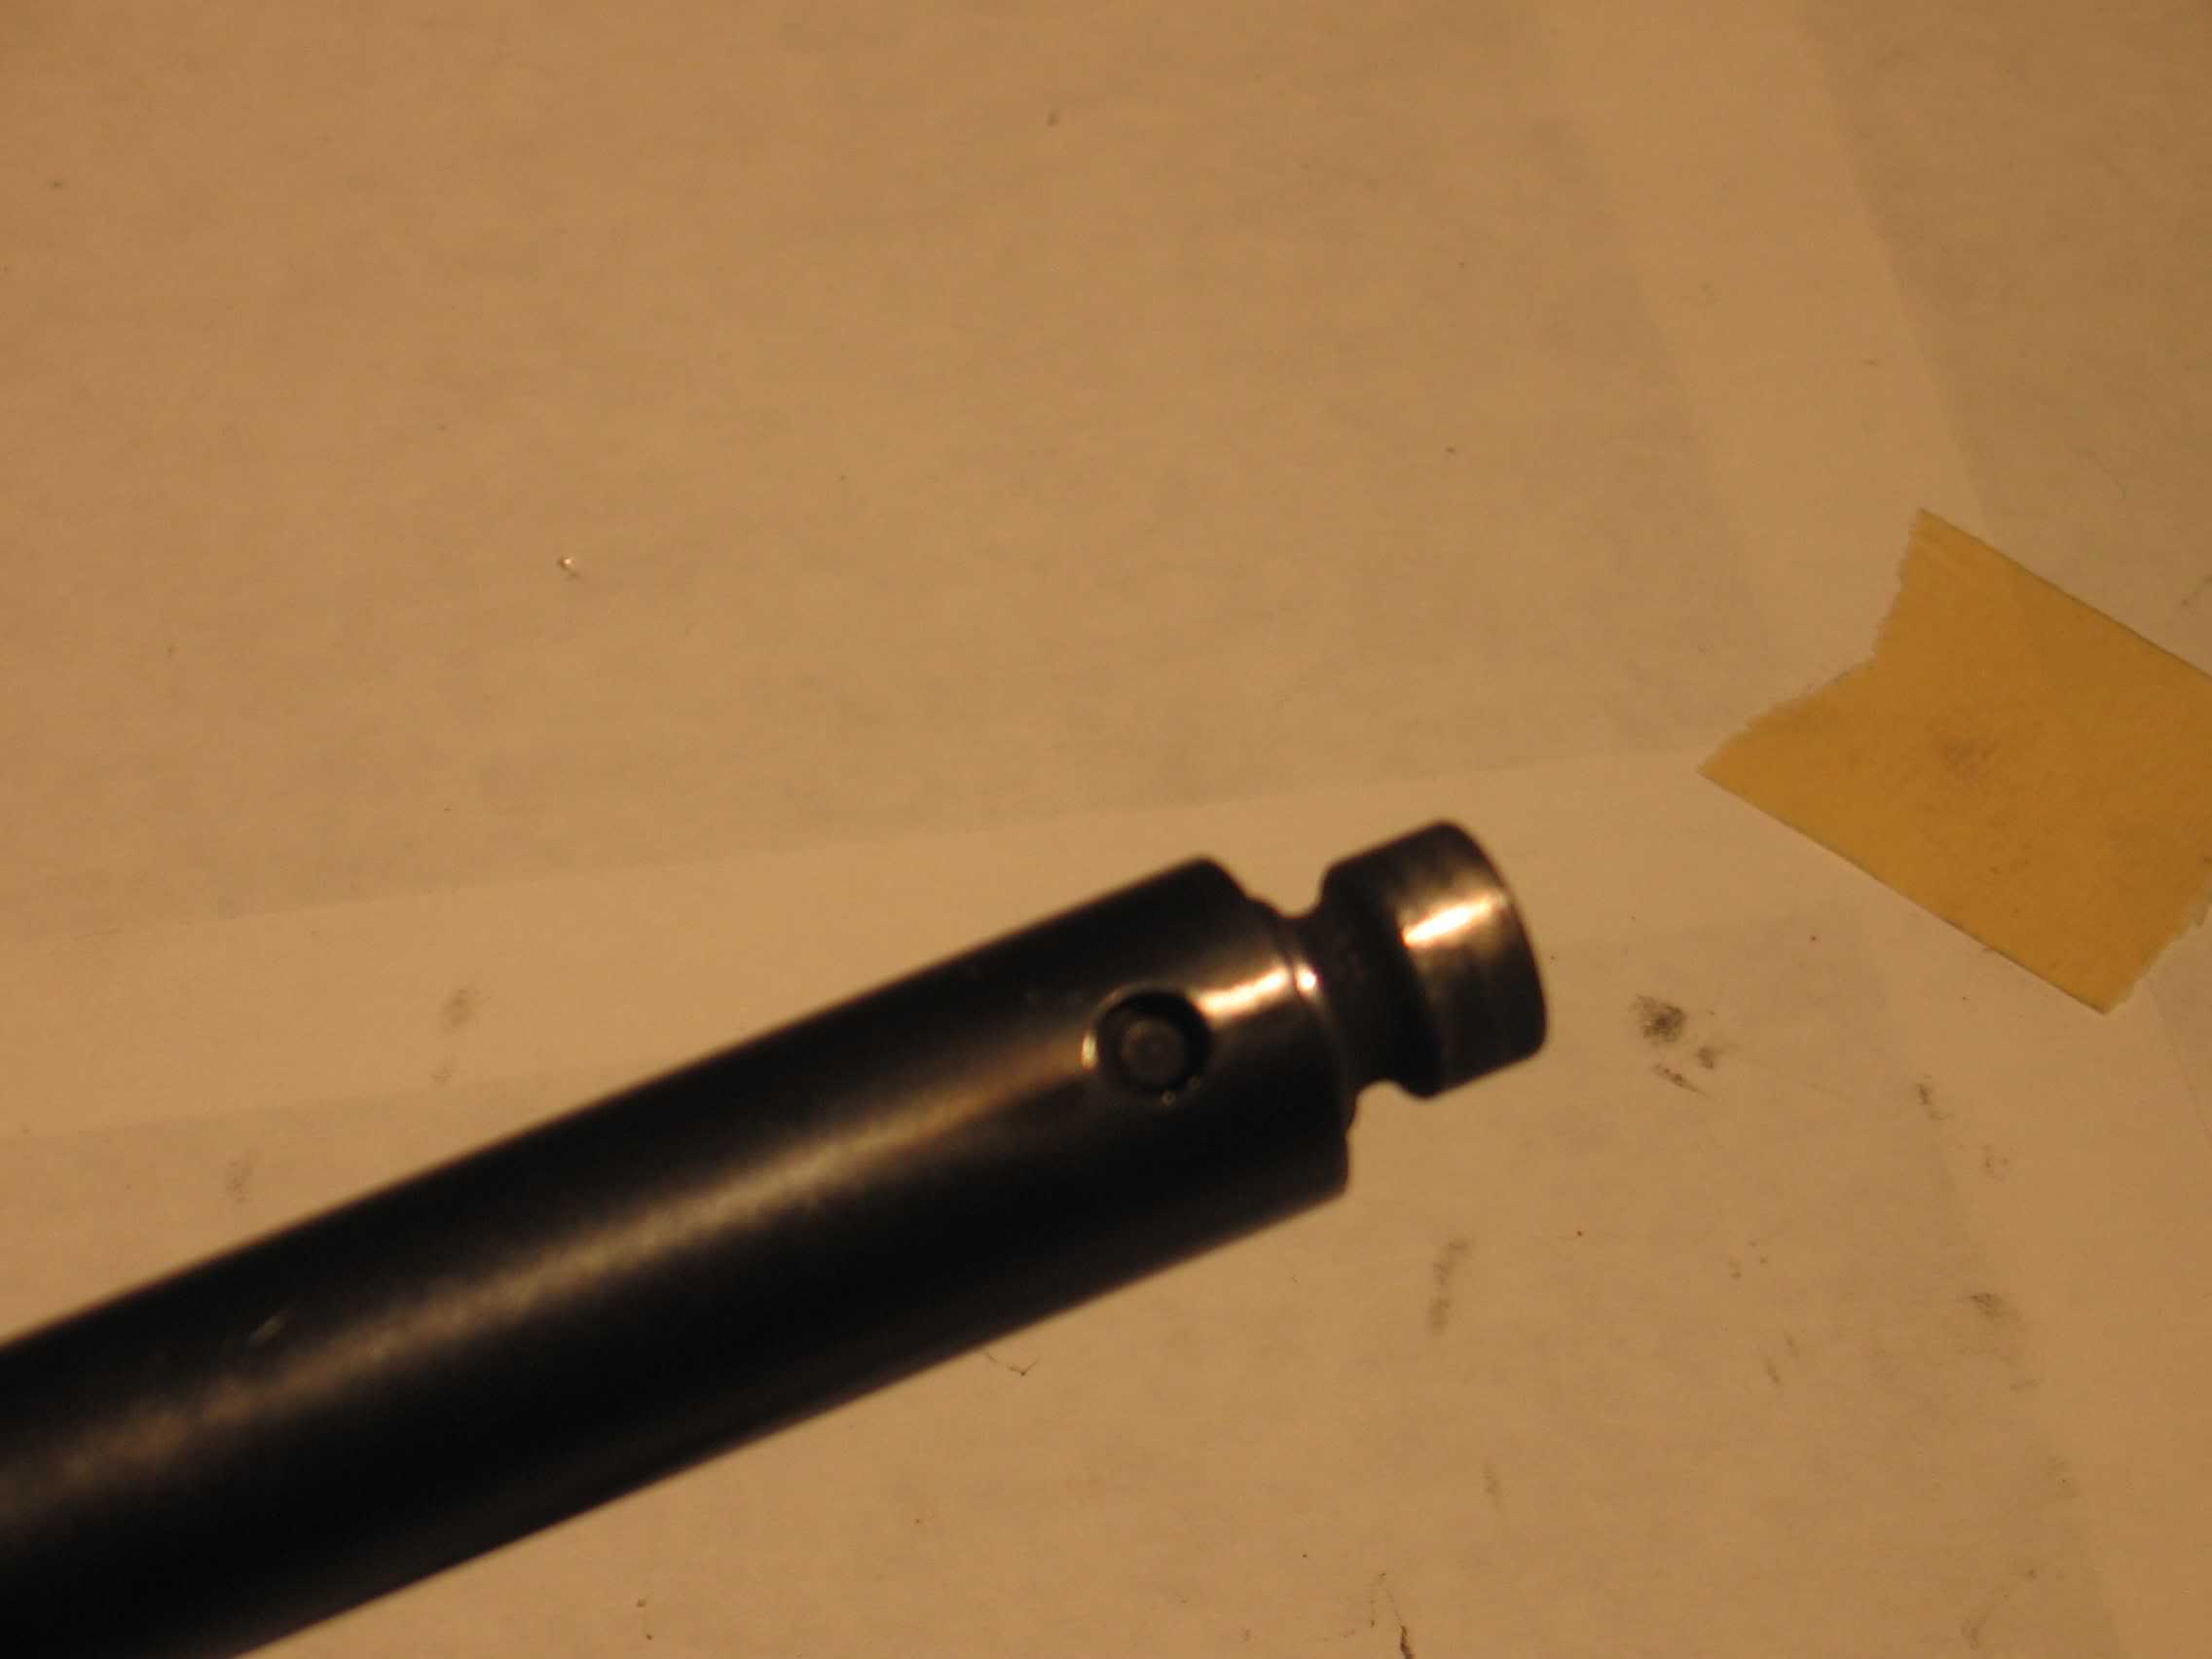
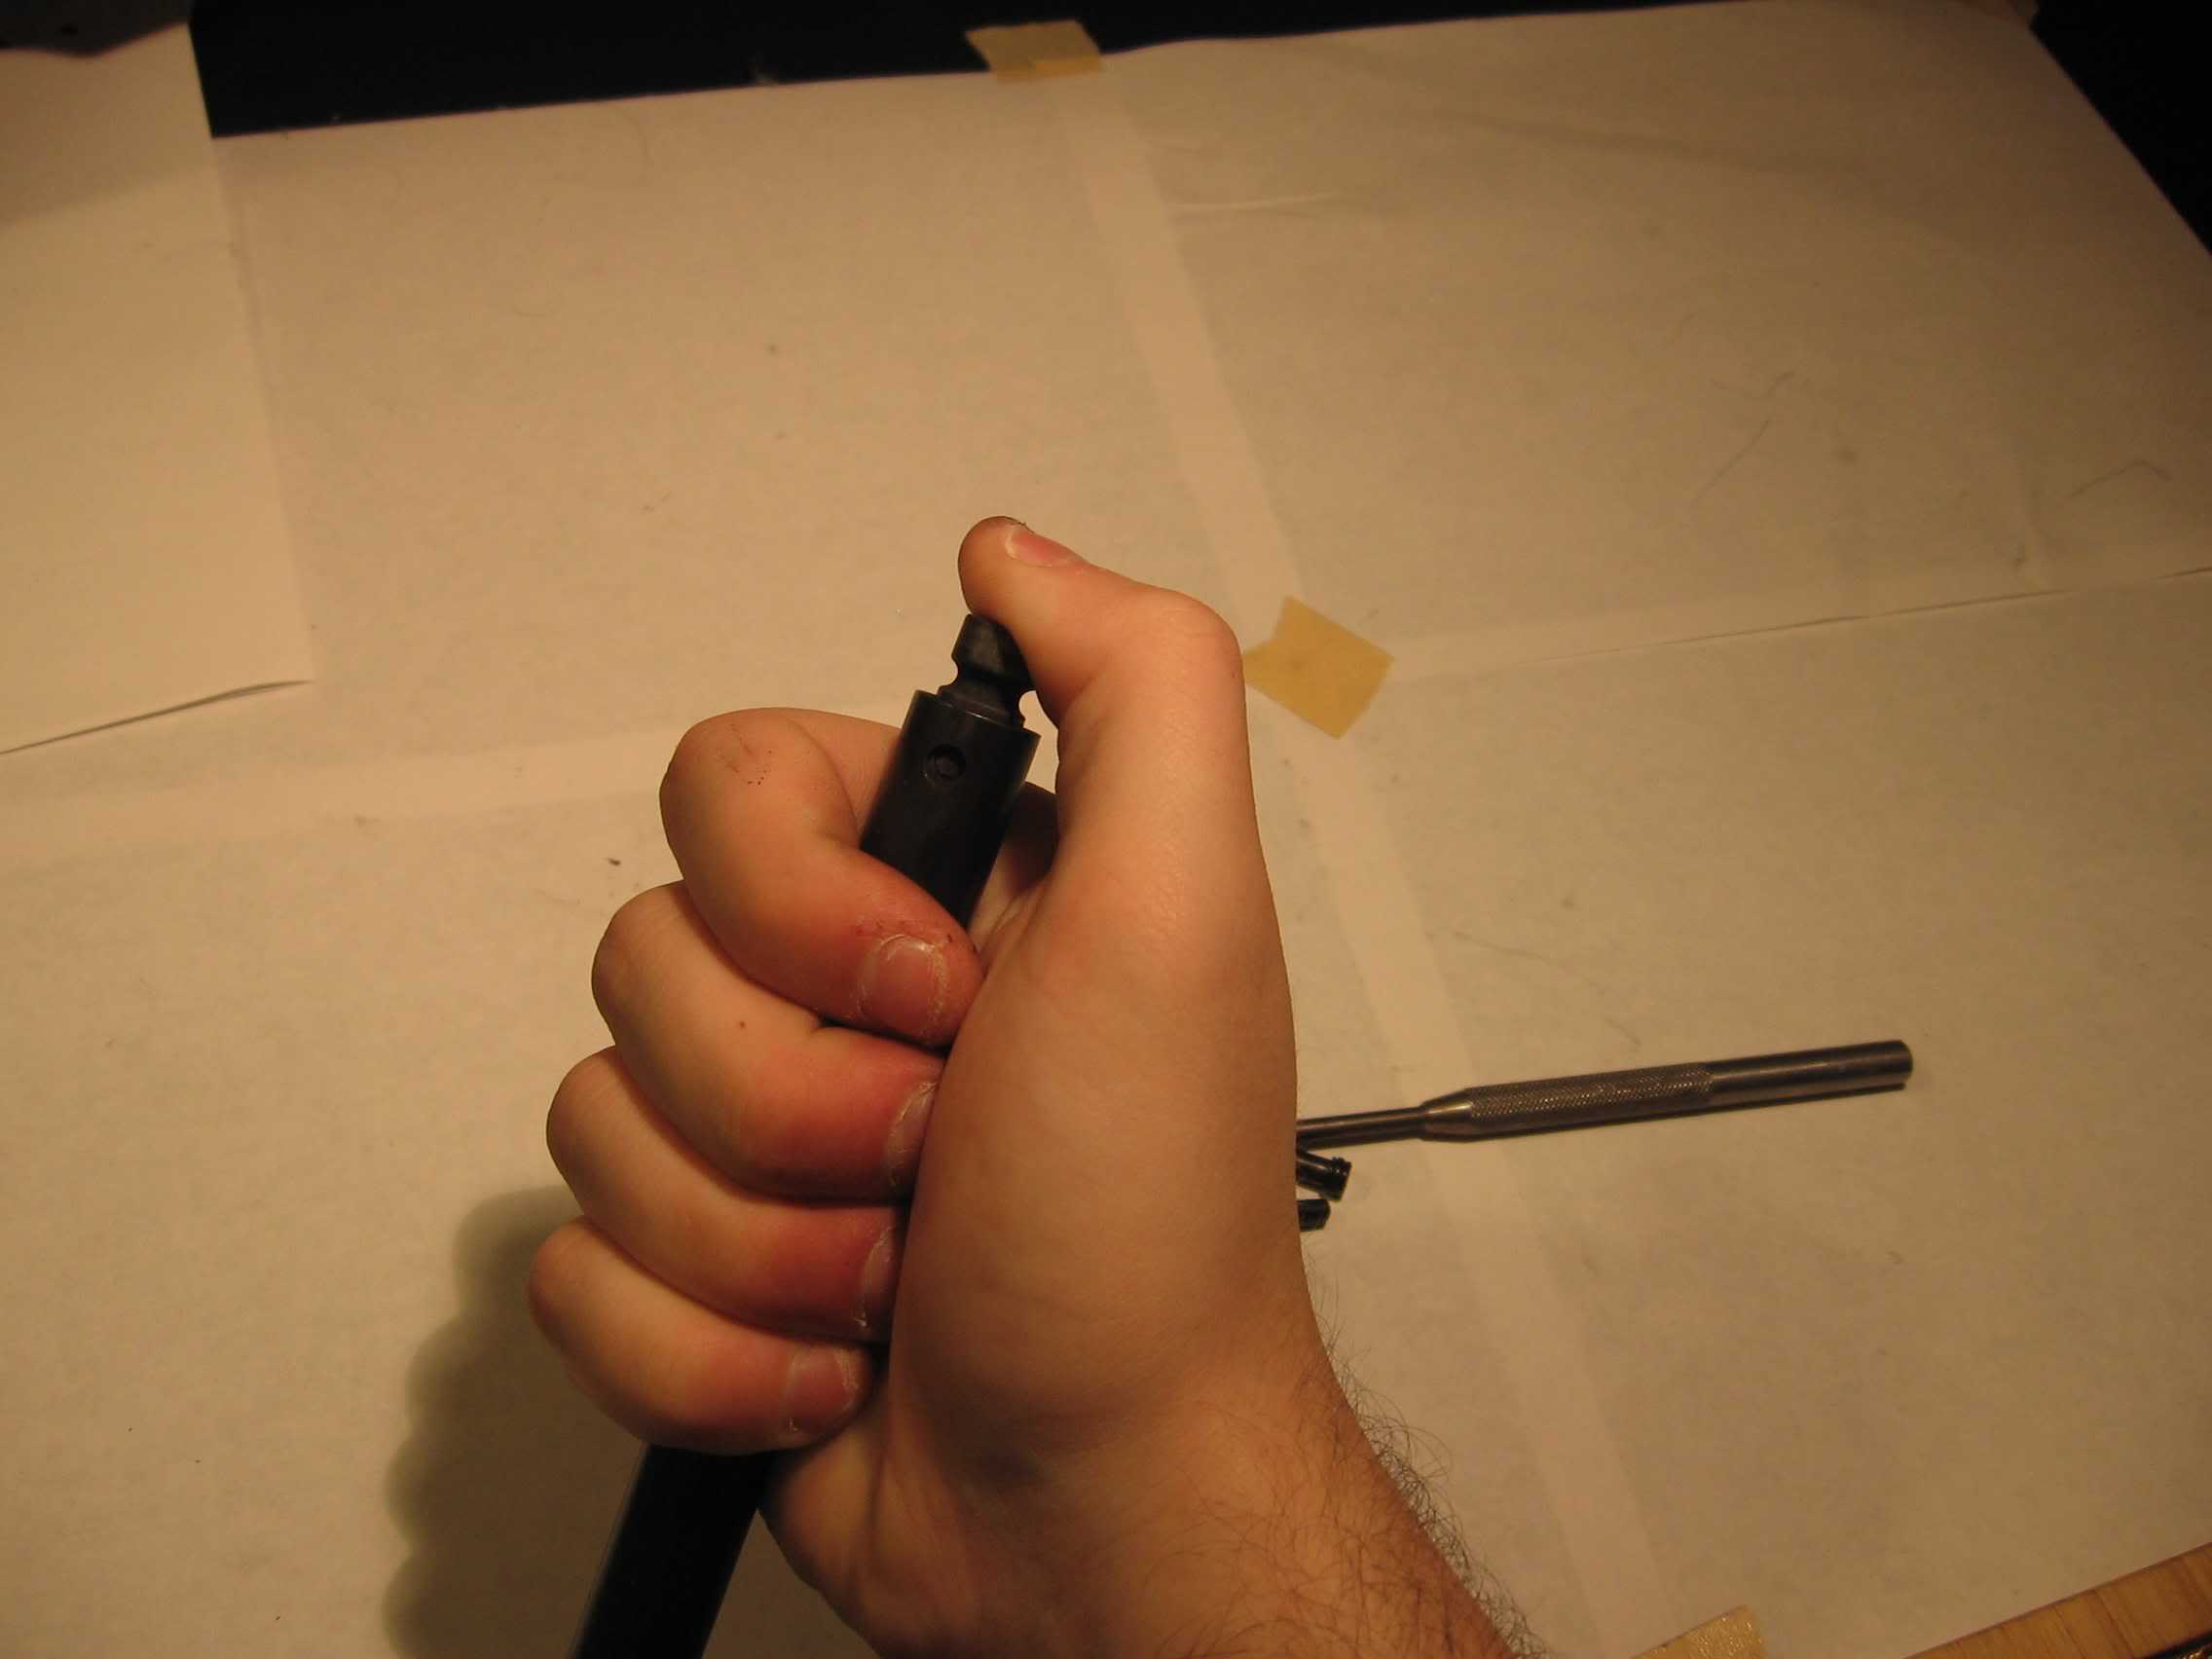
Turn the gas tube until you can see the small pin holding the piston head onto the piston. While grasping the tube firmly, use your thumb to restrain the piston head. Use the firing pin to gently drive out the small pin. While holding the head on, remove the firing pin and gently release the tension in the spring.

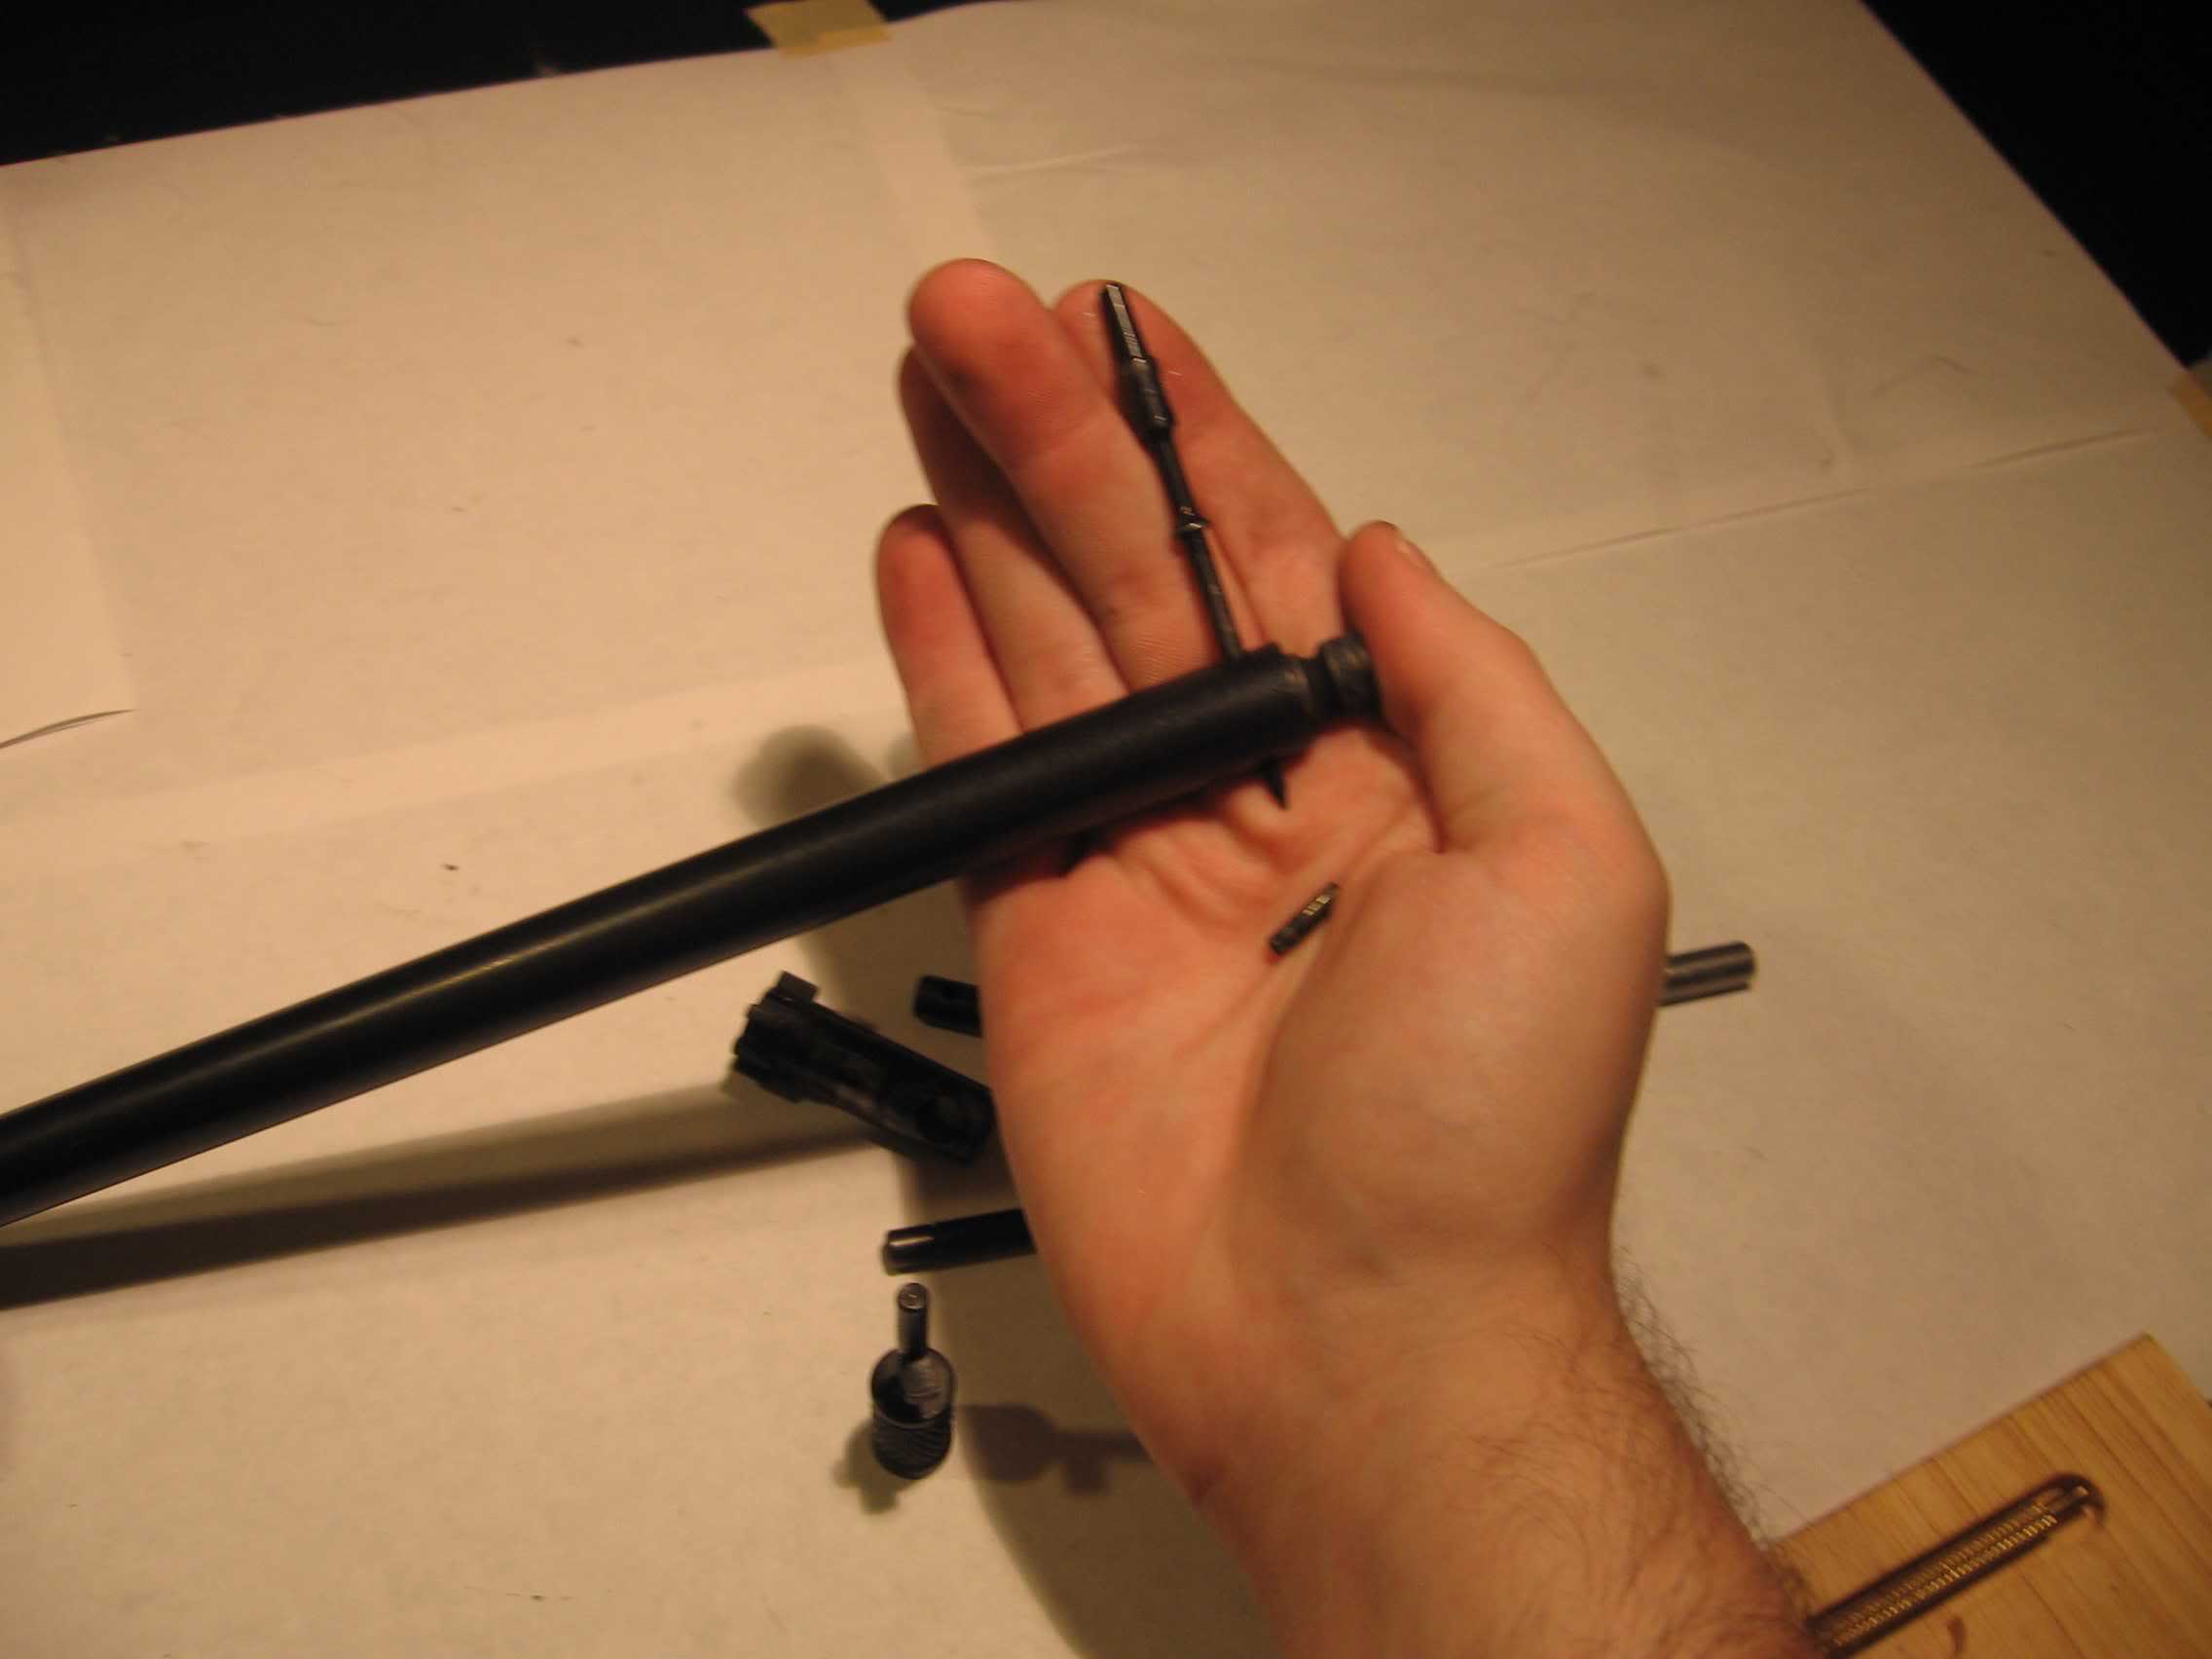
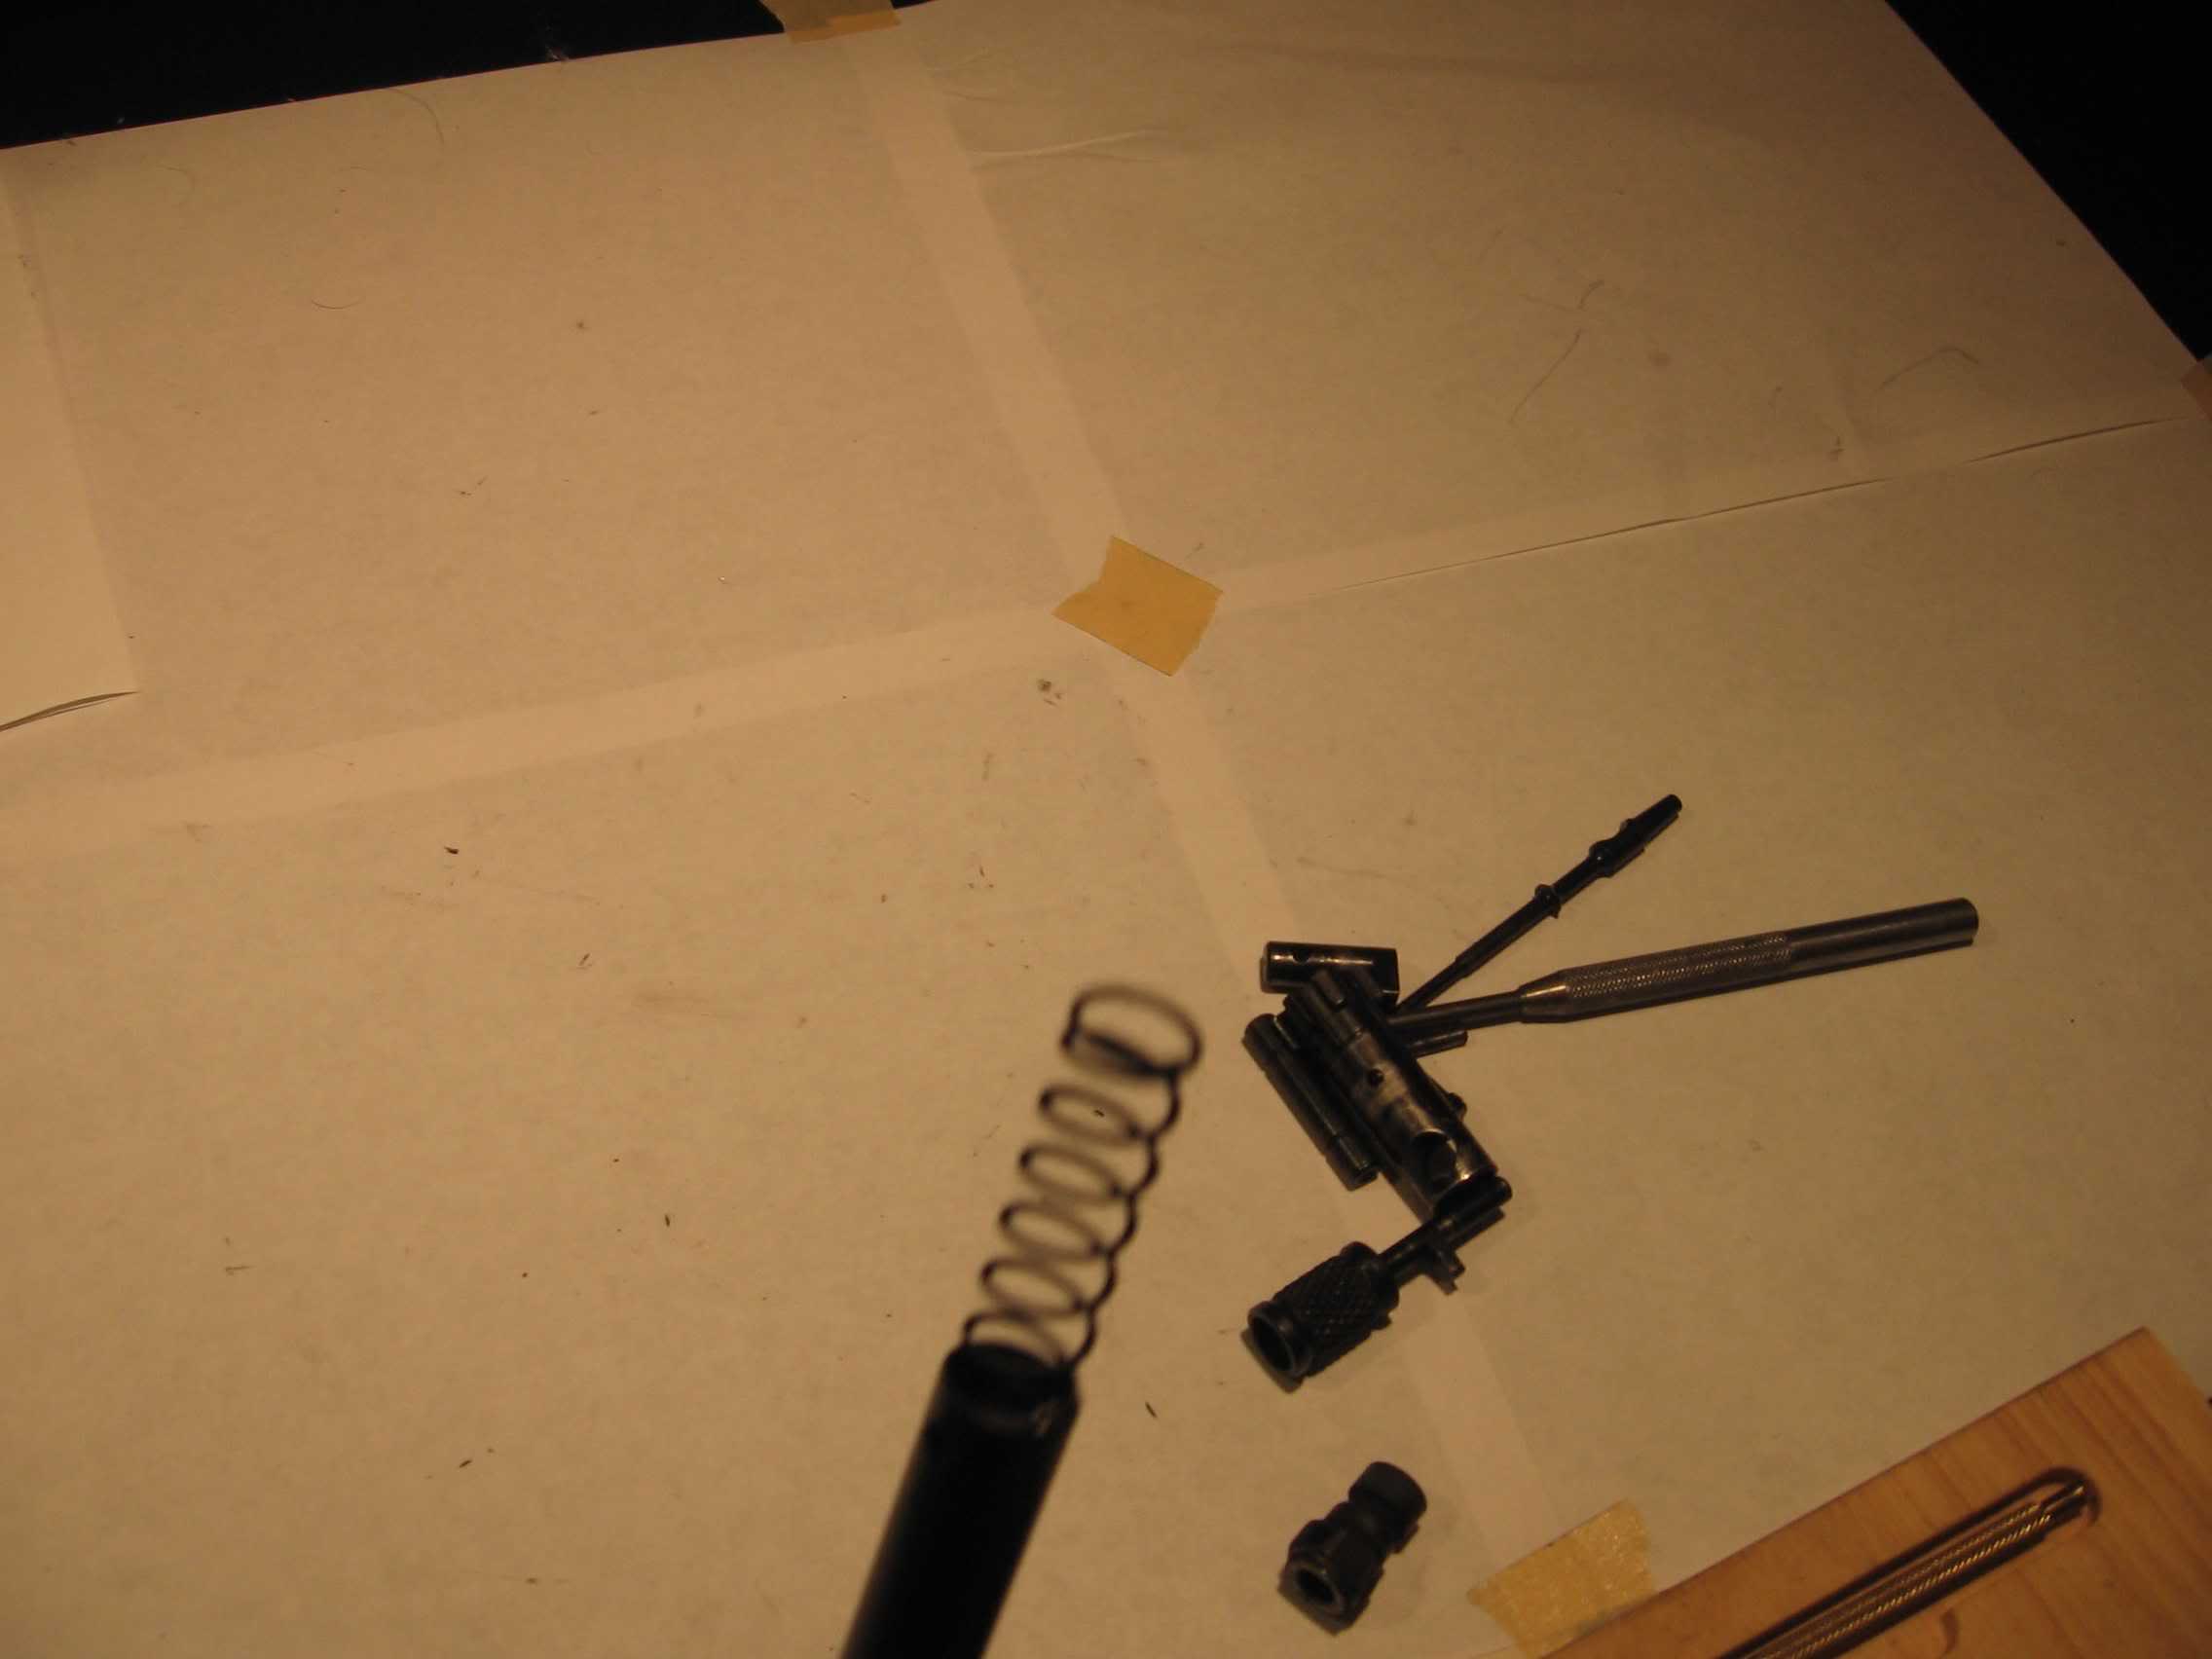
Remove the piston head, spring, and gas tube from the piston (the piston is a part of the bolt carrier).


Step 7: Rifle is now disassembled. Using patches, q-tips, and cleaning solvent, clean all parts. Be sure to focus on cleaning all parts where metal-on-metal movement occurs. Clean inside the bolt carrier, the locking lugs on the bolt, the body of the bolt, the bolt face, the shaft of the gas piston, inside the gas tube, etc. Hard carbon deposits build up on the gas piston head, and usually require scrubbing. I've found that soaking the piston head in Hoppes #9 for 20 minutes or so, then scrubbing with a bronze brush is quite effective at removing the deposits.

After all parts are thoroughly cleaned, wipe them all dry. Apply a light amount of oil to parts where metal-on-metal contact occurs, but do not oil the gas piston, piston head, inside of the gas tube, or spring.

Also, do not lubricate the firing pin or the firing pin channel inside the bolt carrier or inside the bolt. After cleaning these parts, ensure the pin and channel are completely dry -- gunk can build up quickly if oil remains, and can cause cause malfunctions or slamfiring.

Be sure to lightly lubricate the track that the cam pin slides in, the outside of the bolt itself, locking lugs, and the sides and bottom of the bolt carrier.

With use, you will note that some parts of the gun develop a bit of shiny spots where metal wears on metal. Give these areas a small bit of oil.

If you have cotton swabs or q-tips, soak the heads with solvent and clean the chamber and locking lugs around the chamber. It will be very difficult indeed to get this area perfectly clean. I generally don't consider perfect cleanliness in this area to be critical; I shoot dirty Wolf ammo, clean the chamber area and locking lugs as best I can, and have never experienced problems. AR-15 chamber cleaning brushes can be handy, if one has a flexible cleaning rod, but it's difficult to apply torque using a flexible rod. If anyone knows a more effective way of cleaning the chamber and locking lugs, let me know.

Be sure to lightly oil the external metal parts of the rifle, including the barrel and gas block (where the front handguard hinge attaches to).

Though usually not a problem, the gas block can sometimes become dirty and constrict the flow of gas to the piston, causing operating problems. If you wish, you can use a suitable pipecleaner (AR-15 gas tube pipecleaners are great, but are too long. Cut them with scissors to a more manageable length, and they work fine.) and a solvent to clean out the interior of the gas block. Be sure to remove all oil from the inside of the gas block, as oil will cause crud to build up...and that's exactly what you don't want happening.

Note on Lubrication
Only a light coating of oil is necessary. Excessive lubrication will attract residue during firing, and can cause failures. With CLP and other quality oils, one can apply the oil with a wet patch, and then gently wipe the metal with a dry patch to absorb excess oil. Really, only a thin film of lubrication is needed. If the oil is enough to move around with your fingers, it's probably too much.

Using Cleaning Rod to Clean Barrel
Using the cleaning rod, patches, bore brush, and solvent, clean the inside of the barrel. I've found using a solvent-soaked patch (run through 2-3 times), a bore brush (run down-and-back once for every 10 rounds fired), and then alternating dry and solvent-soaked patches until they come out clean works well. After bore is clean, run an oil-soaked patch through the barrel, then run a dry one through to remove excess oil. Only a very thin coat should remain.

Unfortunately, the design of the rifle requires that one clean the barrel from the muzzle end. This is generally not preferred, as it can push residue and solvent into the chamber. Using a boresnake can greatly simplify the process.

Using Boresnake to Clean Barrel
As an alternative to using a cleaning rod, one can use a boresnake. Soak the pre-brush cloth with a goodly amount of CLP, then drop the brass weight into the chamber and feed the string through the barrel and out the muzzle. Pull the snake through the barrel from the breech to the muzzle. I usually then run the snake through a second time, and the barrel's clean and ready to go. Easy, huh?

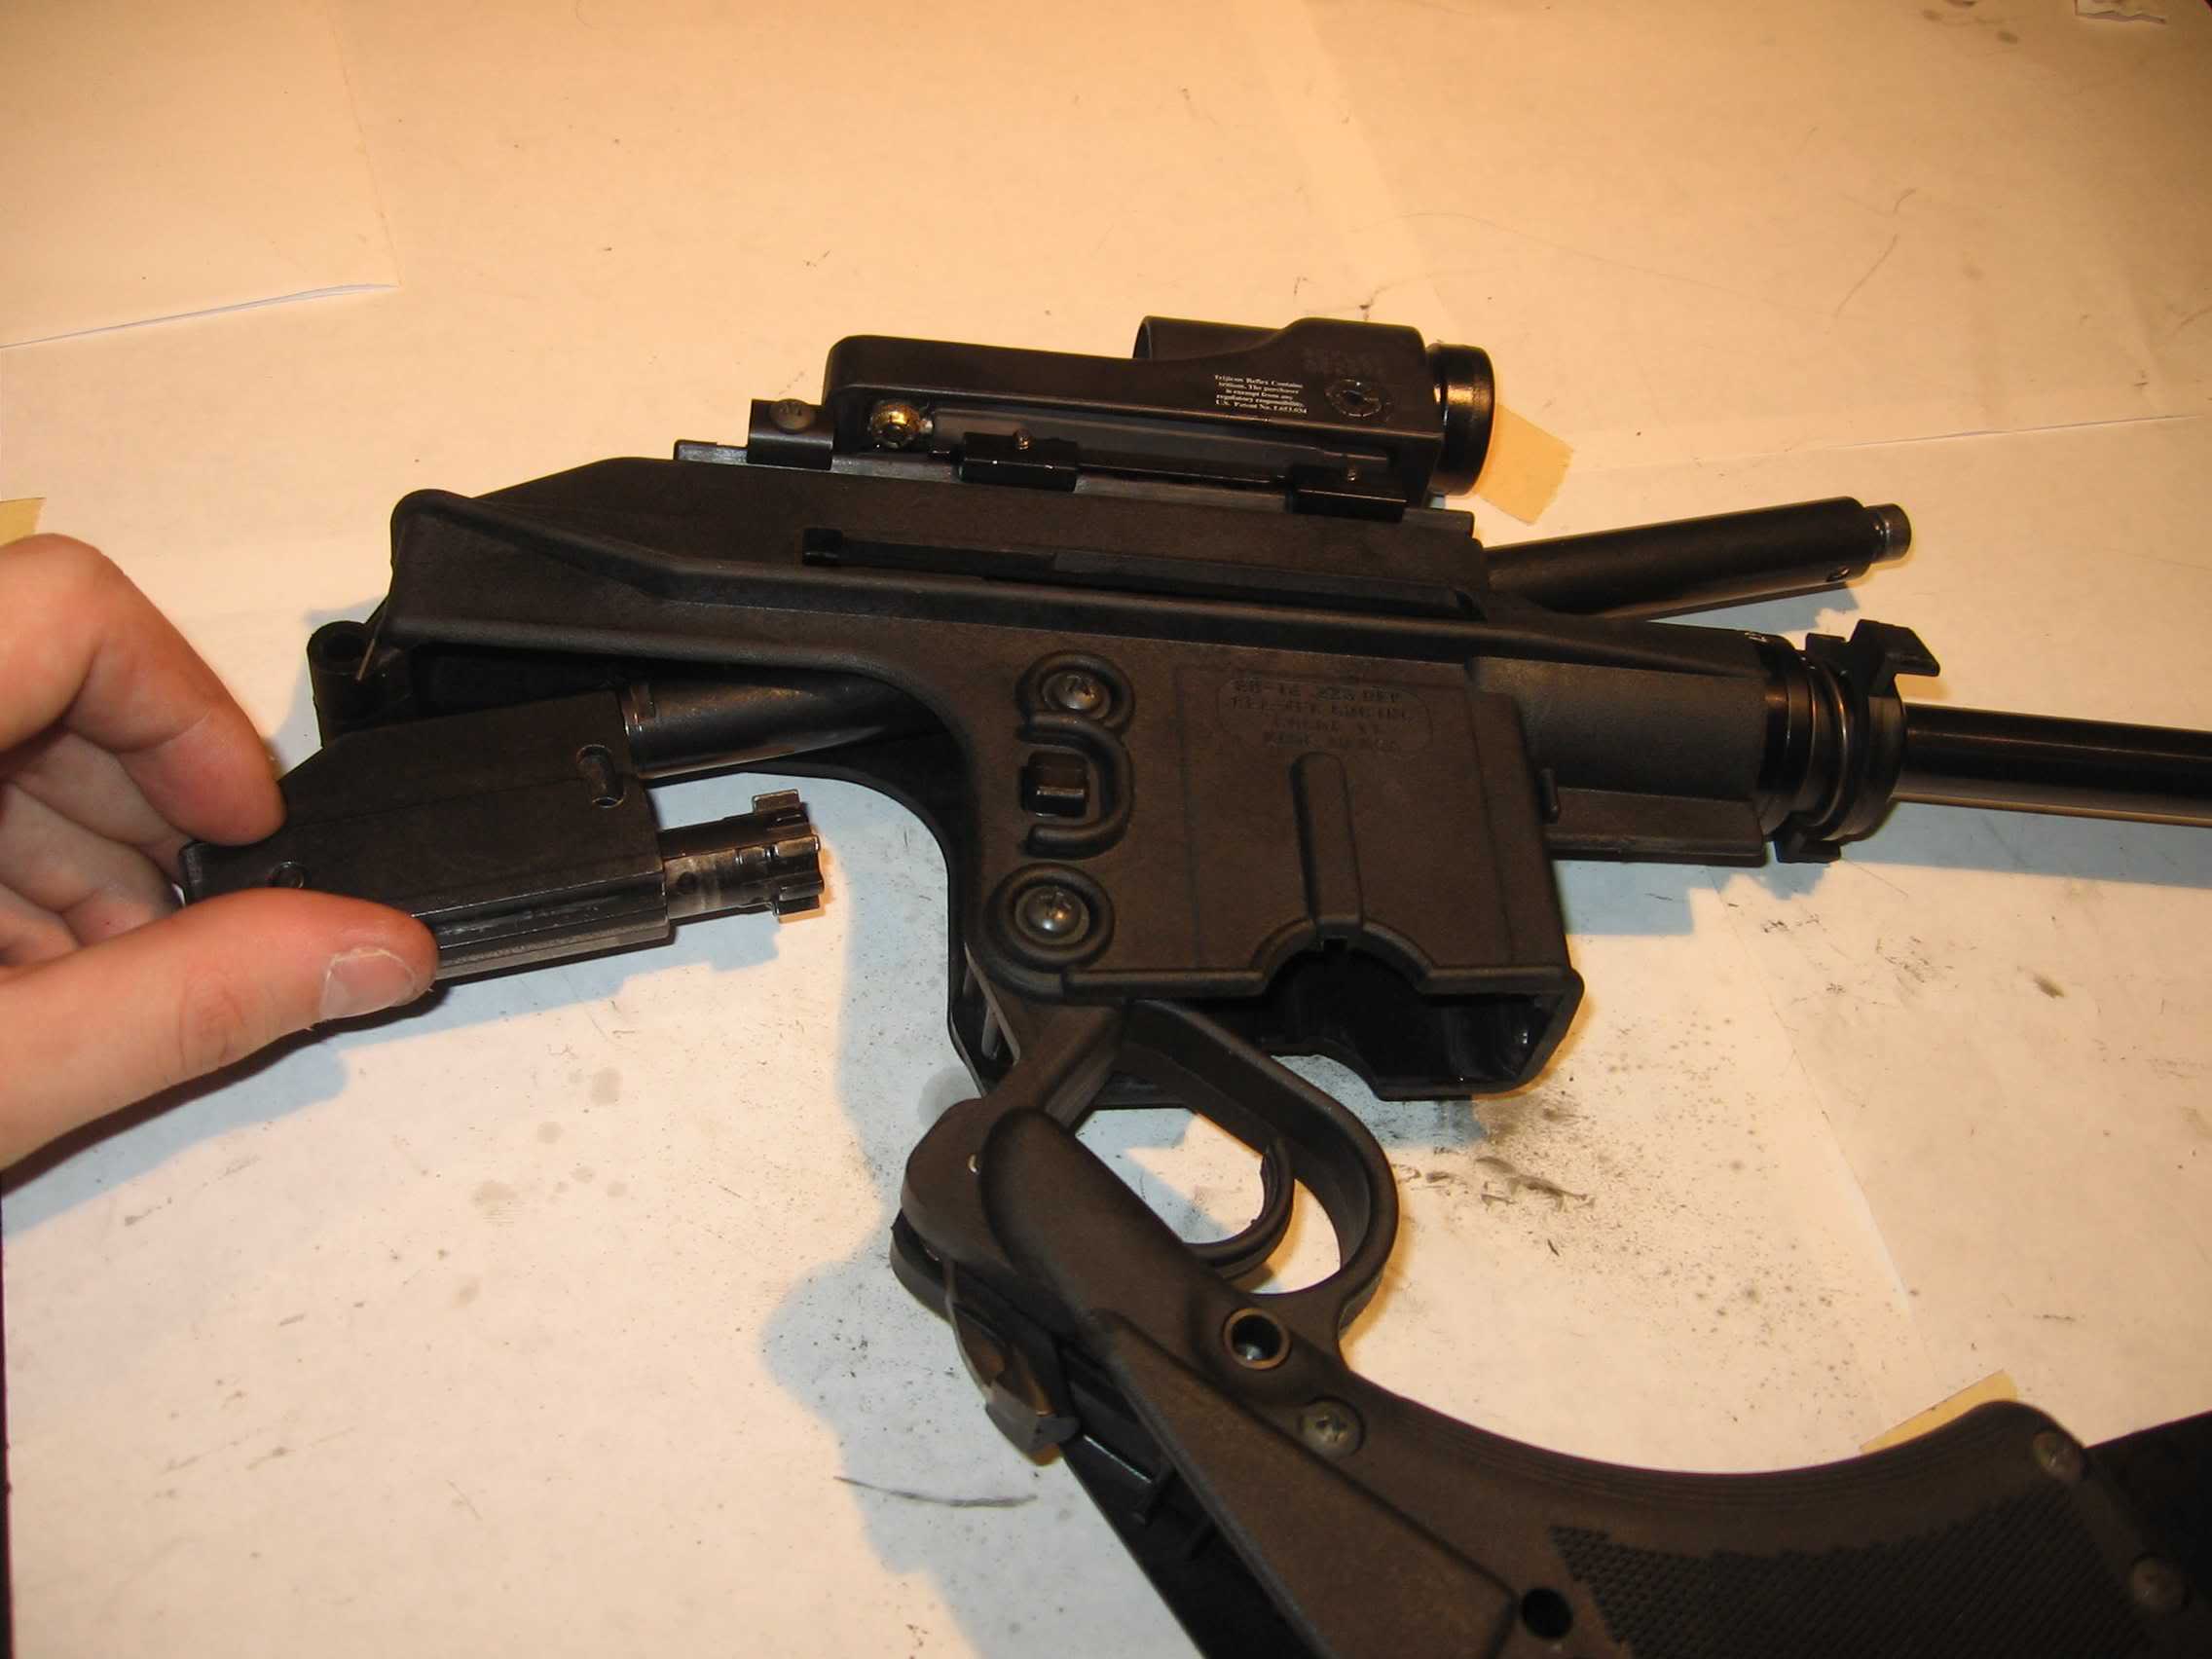
All right, now that the rifle's disassembled and cleaned, let's get on to reassembly!


Reassembly
Step 1: Place the gas tube over the gas piston.

Make sure the end with the protruding tab is closest to the bolt carrier. Insert the spring into the gas tube, being sure to align the holes in the gas tube with the hole in the end of the gas piston.

Place the gas piston head on top of the spring, then use your thumb to compress the spring. Again, ensure the holes are aligned.

When properly aligned, insert the small pin to hold the gas piston head on.


Step 2: Examine the bolt, noting the presence of the extractor (the claw that fits around the cartridge rim, and the part that has the shorter locking lug). Insert the bolt into the bolt carrier with the extractor facing to the right. When inserted properly, you'll notice that the hole in the back of the bolt is visible from the cam pin track (see second picture).

Insert the cam pin into the hole with the lip of the pin facing the left side of the bolt carrier (see third picture).

Note that the firing pin has a U-shaped cutout on it. Insert the firing pin into the rear of the bolt carrier with the U-shaped cutout facing up. Insert the firing pin retaining pin through the left side of the bolt carrier.

With the bolt fully to the rear, press on the firing pin. The tip of the firing pin should protrude slightly from the bolt face. The firing pin should move freely, and with the bolt held to the rear, the firing pin should move forward and backward when the bolt carrier is shaken. If the firing pin does not move freely, this is a potentially dangerous situation. I advise disassembling the bolt carrier again, cleaning it again (if necessary), and reassembling properly.


Step 3: Look at the first two pictures in this section. Note how the bolt can be either extended or retracted. Also note how the tab on the gas tube is in the vertical position. This is important.

With the bolt extended and the tab in the vertical position, insert the bolt carrier and gas tube into the receiver. When fully inserted, insert the charging handle into the proper hole. Move the whole assembly forward so that the gas piston head is aligned with the gas block, but not yet inserted. We'll do that in the next step.


Step 4: With the bolt carrier fully forward, pull the gas tube out from the receiver. Rotate the tube clockwise so that the tab fits into the small notch on the left side of the receiver. This will secure the gas tube.

Be sure that the gas tube is properly centered in the notch on the handguard-release latch attached to the barrel.


Step 5: Unfold the stock, putting it back into the fully-extended position. Reinsert the takedown pin to hold the stock in place.
Step 6: Congratulations! You've successfully disassembled, cleaned, and reassembled a Kel-Tec SU-16B rifle. All Kel-Tec rifles in the SU-16x series are almost identical, so these instructions could be easily used for any o their other rifles.

Before using the rifle, I strongly advise performing a function check. All these checks should be done with the rifle unloaded and pointed in a safe direction. This is what I do:

Function Check #1
1) Place safety on "safe".
2) Pull charging handle to the rear. Gas tube should not move if properly locked in position. One should feel spring resistance.
3) Release the charging handle. Bolt carrier should move fully forwards in a quick motion, the bolt should twist and lock into the locking lugs.
4) Pull the trigger. Hammer should not fall.

Function Check #2
1) Place safety on "fire".
2) Repeat steps 2 and 3 from above.
4) Pull the trigger. Hammer should fall.

If your rifle passes these function checks, then you reassembled it properly. It would behoove you to verify that the barrel is free of obstructions like cleaning patches or excess oil. Otherwise, your rifle is ready to use!


I hope this was useful. I enjoyed writing it.

Feel free to post links to this page if you are so inclined. If you have any questions, please don't hesitate to email me.

Version History
11/3/05 - First public version.
5/6/06 - Added Google Ad at the bottom of the page (sorry folks, I have to pay for the bandwidth somehow. Hopefully this isn't intrusive.). Widened the tables to allow for more comfortable reading and viewing. Clarified a few points that were causing confusion for some readers.
4/4/07 - Fixed a broken link. Added some information.
3/9/10 - Removed Google Ad and Digg link. Will spruce up the page in the near future.
10/29/14 - This page is now licensed under a CC-BY 4.0 International license. I also added a note that I don't own an SU-16B anymore. This page hasn't been modified in years but is being kept up for archival purposes.

Creative Commons License
Disassembling, cleaning, and reassembling a Kel-Tec SU-16B rifle by Pete Stephenson is licensed under a Creative Commons Attribution 4.0 International License.

Pete Stephenson - p...@heypete.com